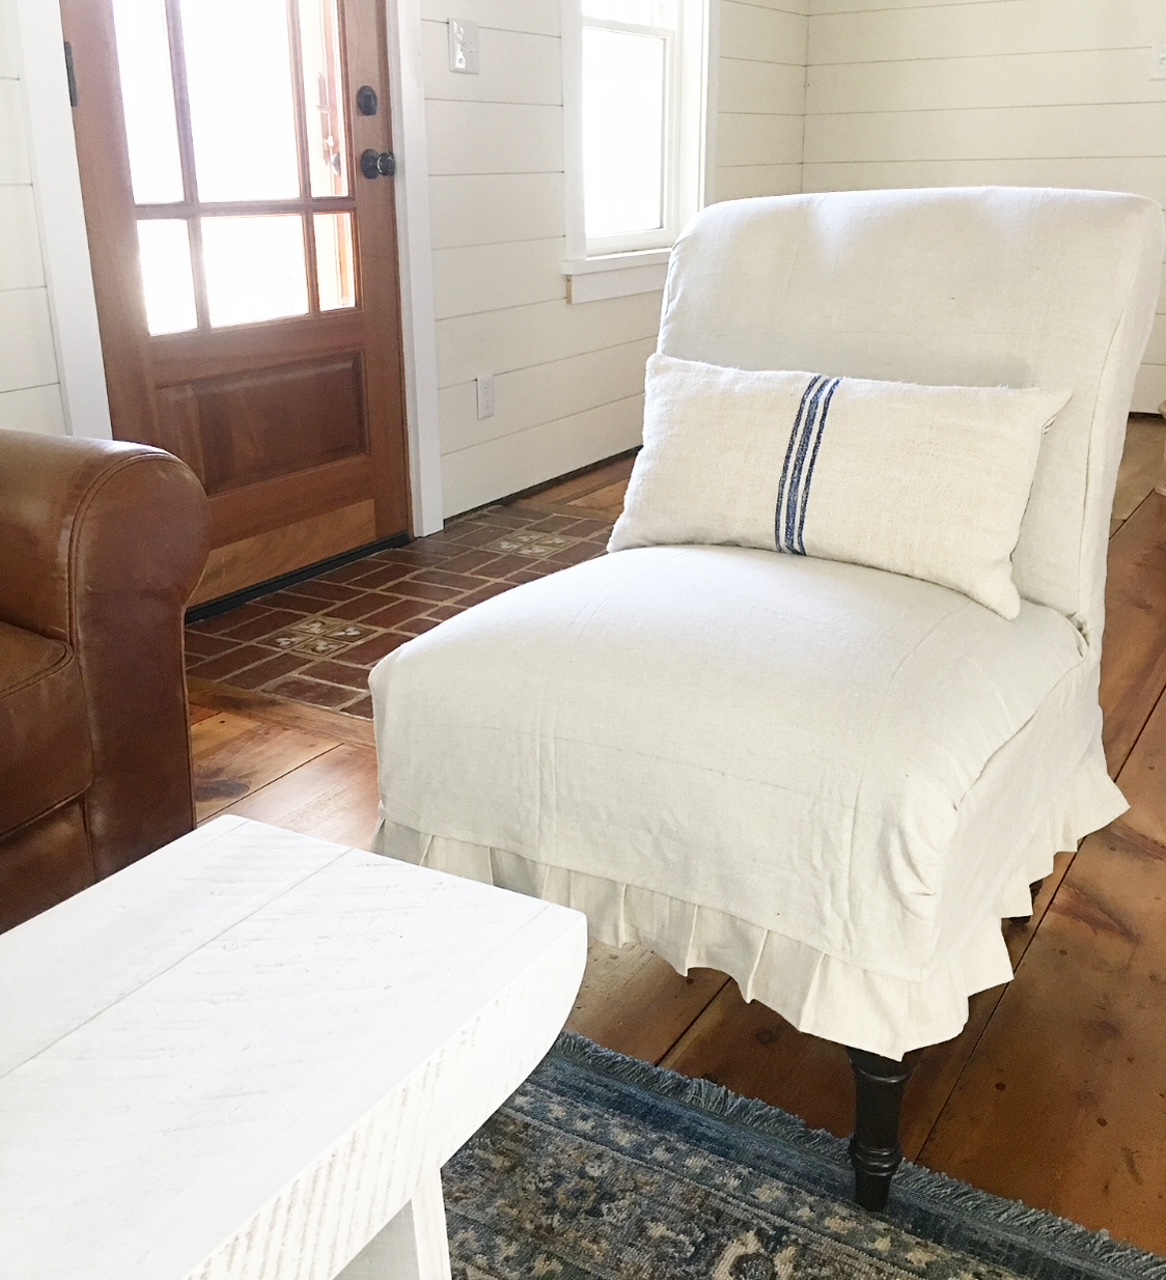
Making your house a home can be an adventure! It’s fun and exciting to find just the right pieces that say just what you want them to say when guests come calling, but sometimes our search can come up empty handed. This is where I found myself recently when it was time to finally start moving furniture back into our 2 year front room DiY remodel. You can see some of the early progress here and here. Full tour coming soon!
During the long process, there were times that I thought we might not see the end to this project and even as I type this post, we still need to finish painting the trim and the staircase. (smile) We are so close though, and I am so happy with the way it turned out. This remodel came in phases and spanned a few years because life can throw some wrenches on the road, can’t it?
I have made four other slipcovers over the years with one of them being a love seat that the old owners left in our 1840’s log cabin. The log cabin is original to the hollow and you can take the tour here. You can also see my slipcovered love seat and the tutorial that I used to make it, here. If you are looking to make your own slipcovered accent chair, read on and see how I did it in two days.
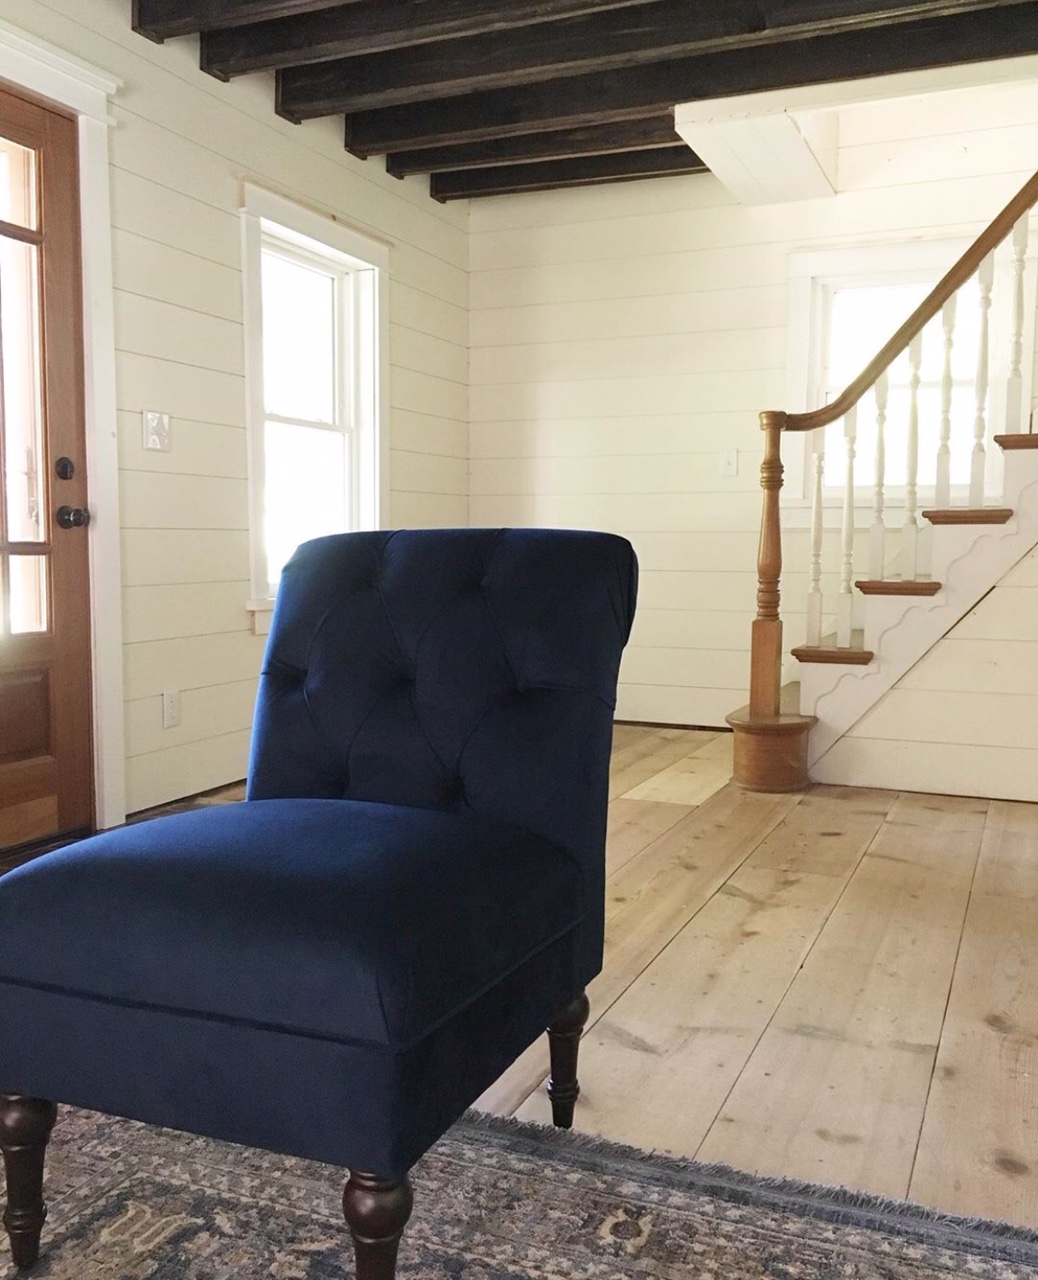
I found a pair of these velvet-like accent chairs at the local Bargain Hunt store. It is a Target brand and although I liked the pop of color on the neutral shiplap walls, it was a little too much color, but they are comfortable as far as occasional chairs go, so I decided to make them work. And for $60 a piece, it was a budget-friendly DiY project.
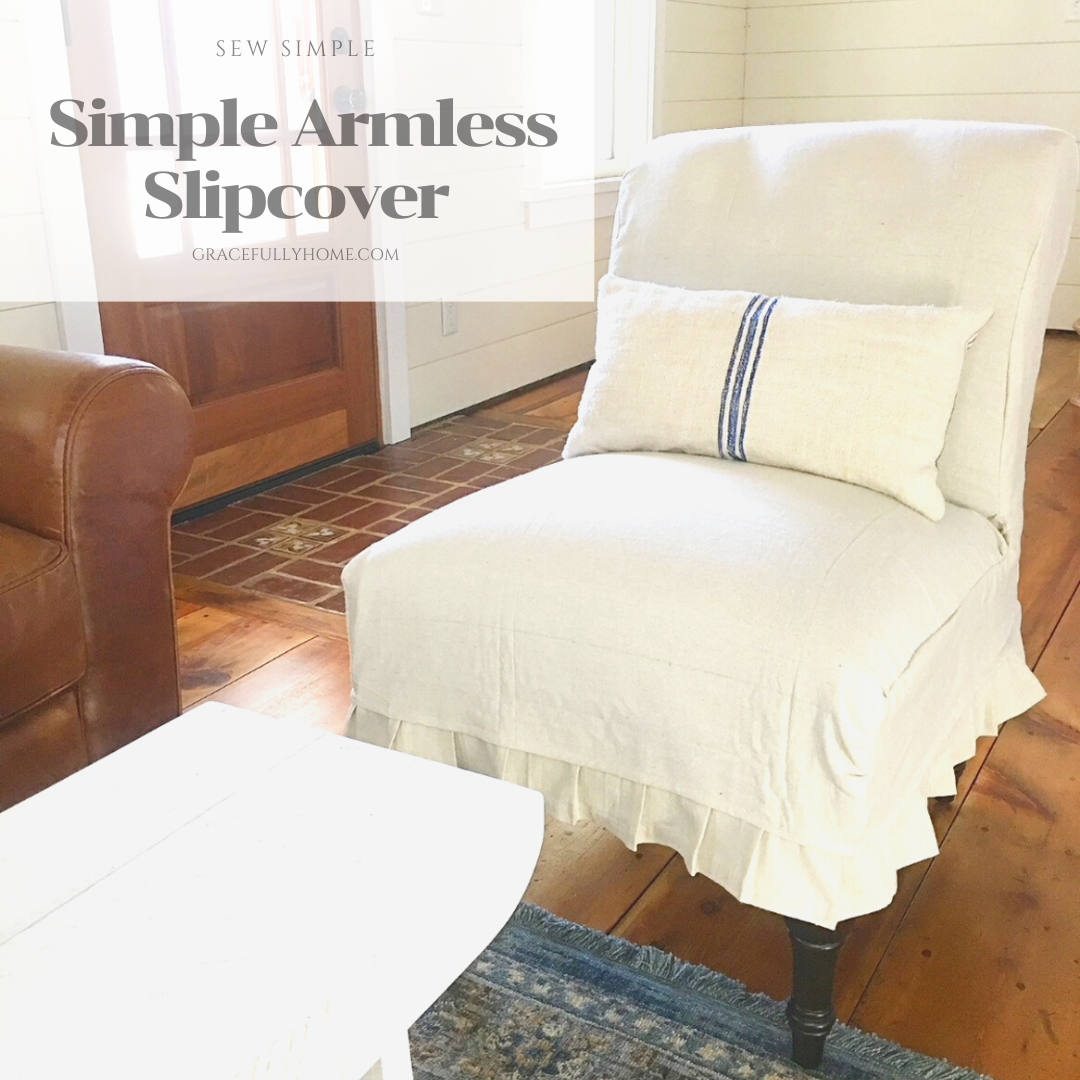
HERE IS HOW I MADE THESE SLIPCOVERS IN TWO DAYS…
**This post may contain affiliate links. Please see full affiliate disclosure here.
SUPPLIES YOU WILL NEED
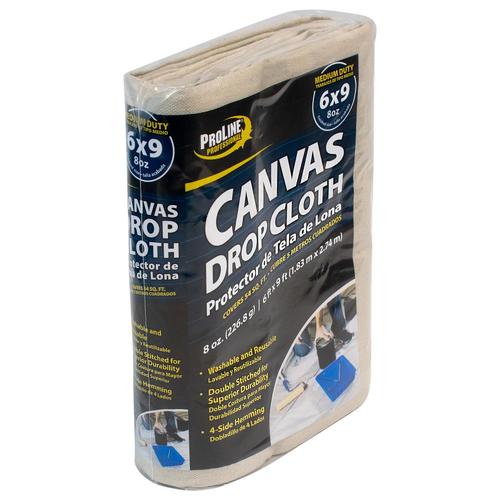
Painters drop cloth (I used two of these from Lowe’s, but you can use whatever brand you like or if your budget allows, a thicker duck canvas or denim type fabric would work too.)
Straight pins
Sharp scissors
Measuring tape
Sewing machine (we own a Bernina 380 sewing machine)
Heavy gauged needle (the kind you use for denim or thicker material)
Serger (optional, we own a Janome serger)
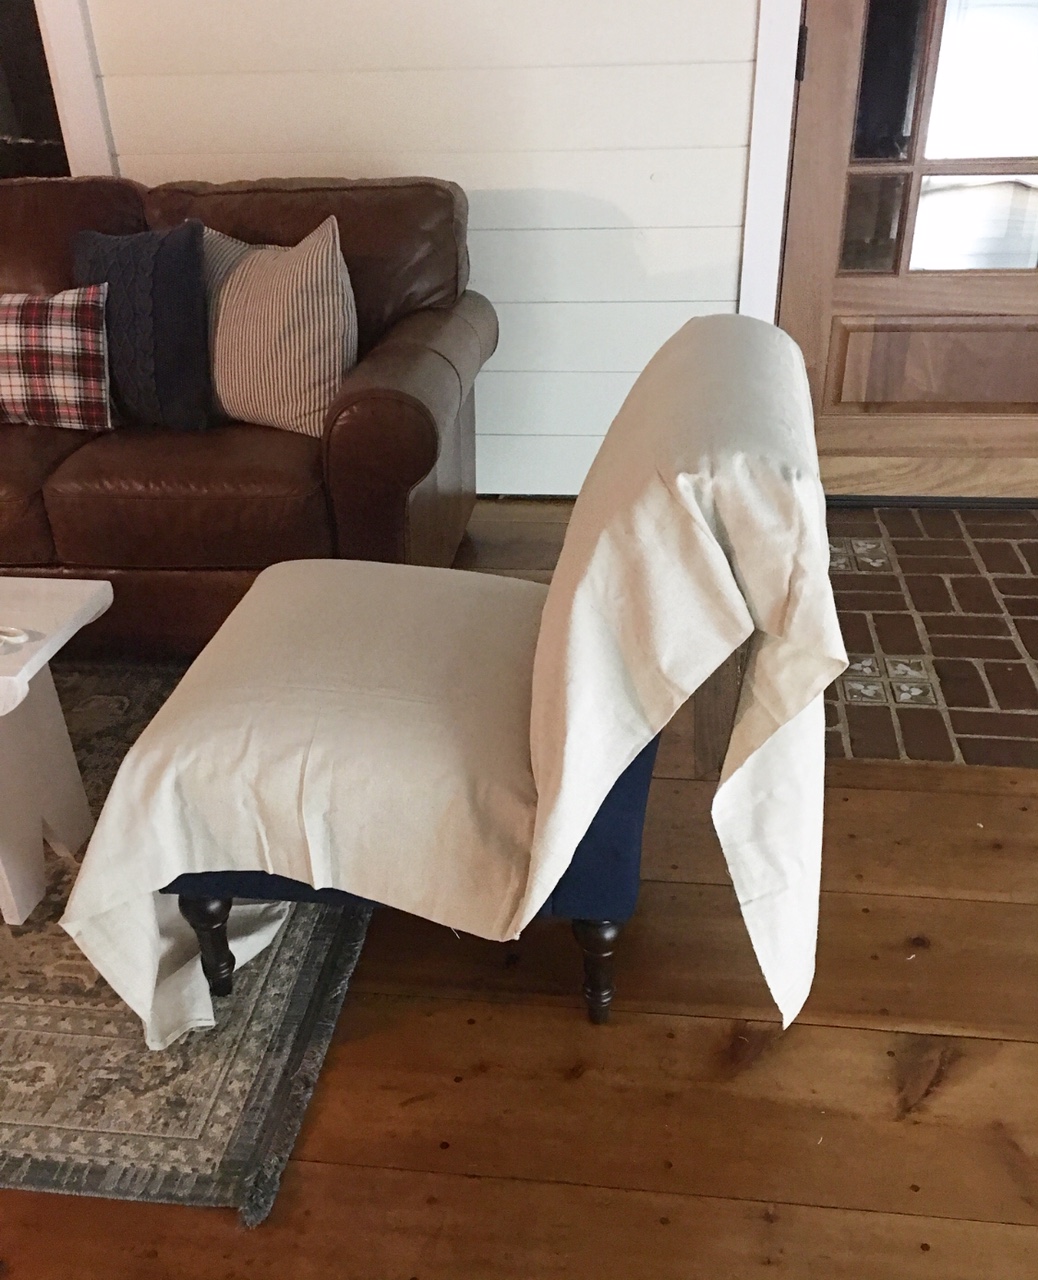
After I gathered up my supplies, I started by draping the fabric over the front and all the way to the back of the piece. Then I cut the excess fabric off leaving about a 2 inch seam allowance. At this point, I tucked in some fabric where the back and bottom of the seat meet. It is similar to a store bought slipcover that you would have pipes or dowels to hold the fabric in place when being used.
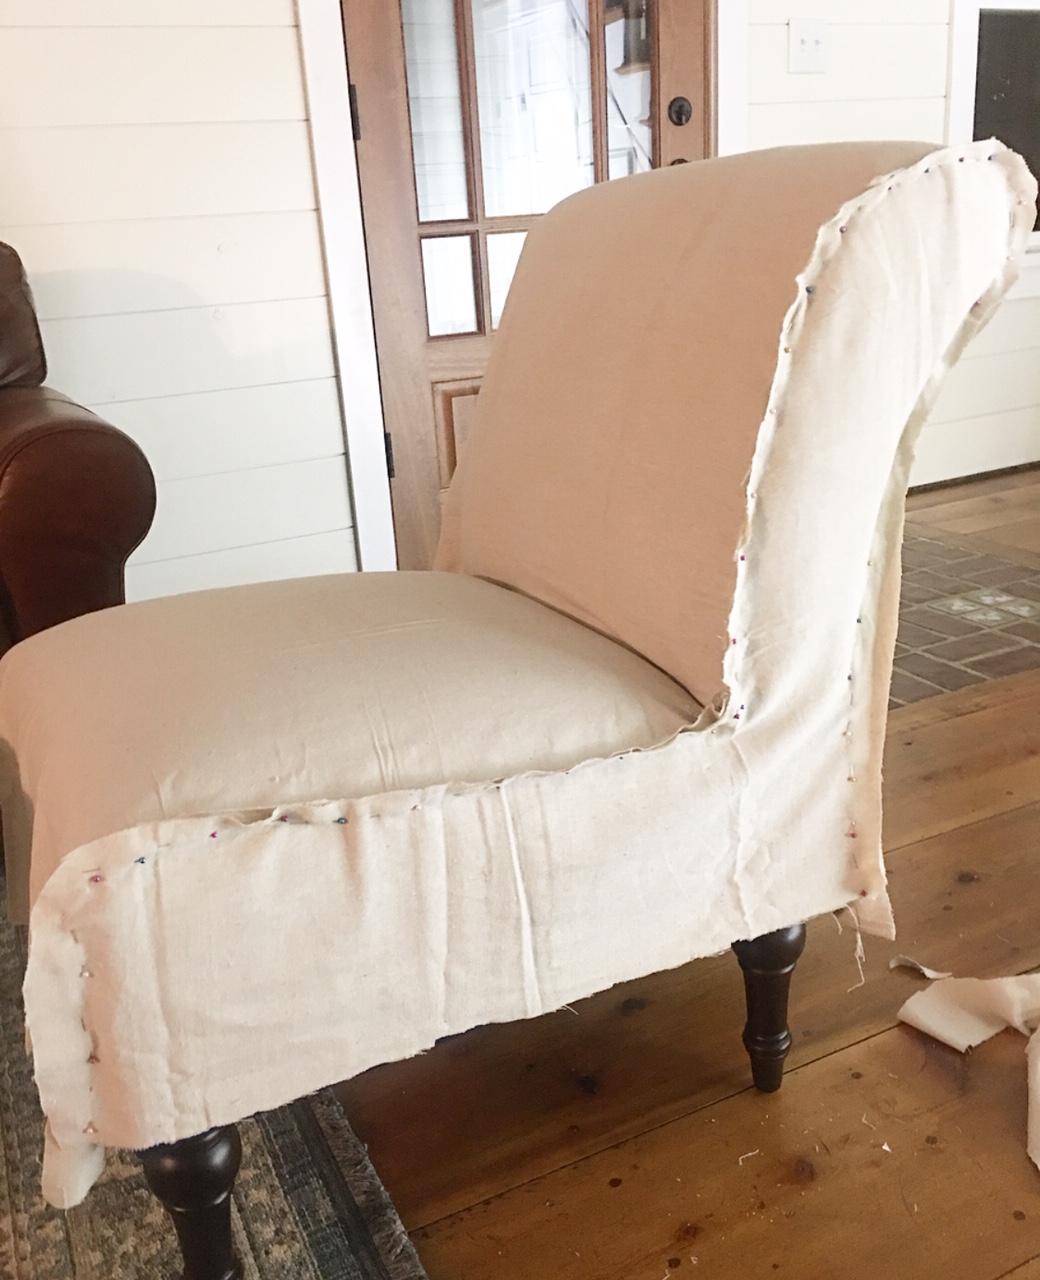
Next, I draped a smaller panel over the side and started to pin along the 2 inch seam. I wanted my slipcover to be snug, but not so snug that it would stress the seams. After pinning, I cut any excess fabric off and the piece started to really take shape.

This time around, I decided to make two slipcovers at one time. I was surprised at how simple it was and how smoothly it all went. Two slipcovers in two days is definitely a record for me! (smile)

The next step was to carefully bring my pinned pieces to the sewing machine and sew the seams together. Then I took the working piece back to the chair and turned it right side out. I tucked the bottom raw edges under and pinned it in place. Next, I measured around chair for the skirt. I typically will try to at least double the length so that I could add pleats or ruffles. I cut the drop cloth in long strips that were about 5 inches in width, hemmed the bottoms, and ironed pleats. I just eyeballed the pleats, but if you like a more uniform look, you could measure each pleat individually.

Next, I pinned the ruffle skirt all the way around the piece and made sure that the two ends met in the back. Since this particular accent chair would be floating with its back visible to those entering the room, I tucked the ends to make a seamless, connection.

Then I removed the slipcover and took it back to the sewing machine and sewed the seams together on the right side of the fabric. I wanted to get this project done fast, so I didn’t bother making any piping detail. I did sew about a 1/4 inch line all the way around to create the look of piping. After sewing the skirt on, I took the time to serge the raw edges to prevent fraying. If you do not have a serger, you can get the same effect by using a zig zag stitch on your raw edges.

I thought about ironing the finished piece, but I figured it was going to get used, so I would let it give off that shabby chic vibe. You can see that the joining of the seams in the back are not noticeable. It worked out really well and I am so pleased with the way it turned out.
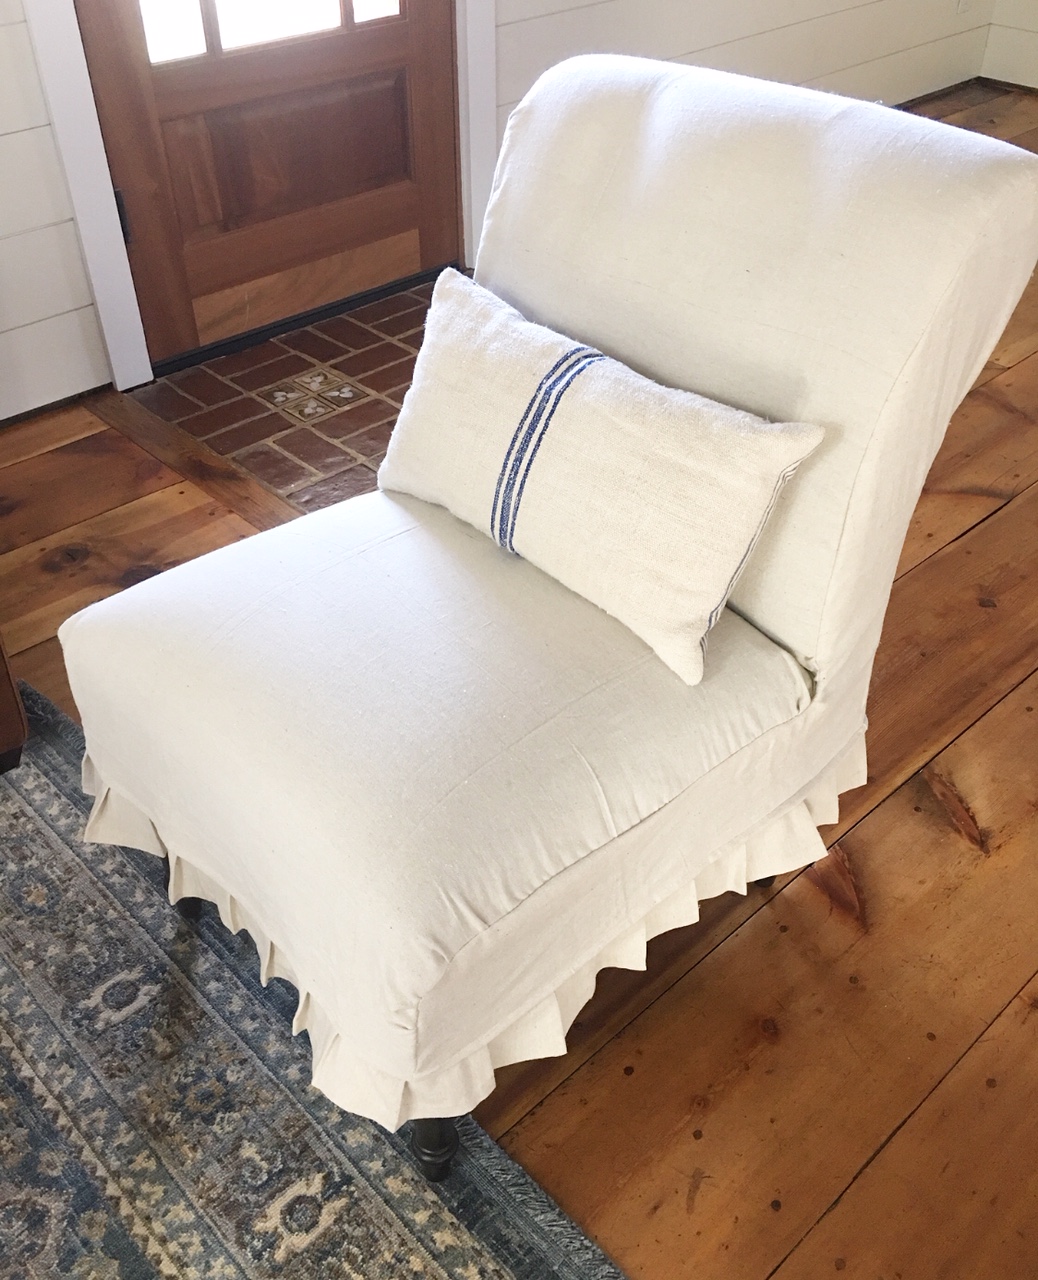
Here is the finished product. Doesn’t she look pretty? To think, under this neutral slipcover, lies a dark blue velvet accent chair. Sometimes, you need to just think a little outside the box and go for it! (smile)

Note: Purchasing through any of my blog links and/or side bar buttons, helps to keep this blog running. All reviews and opinions of any items shared on GracefullyHome.com are of my own opinion and are not swayed by sponsorship or collaborations. Please keep in mind that I only share products or services that my own family have found helpful and healthful with those who visit my blog. Thank you for your support and for continuing to follow along!

Love this! Thank you for sharing!
So glad that you enjoyed this post, Mary Ann! It was such a rewarding and fun project. I appreciate you stopping by and taking the time to leave a kind comment.
This looks great! I will keep this in mind when I find chairs at goodwill! 👍🏻
Thanks so much for taking the time to leave a comment. I love finding good deals at thrift shops and Goodwill! There is something about saving money while creating inviting spaces for family and friends to enjoy, that is so rewarding. I appreciate you stopping by!
I have been searching for a slipper chair slipcover project like this. I have thesame Threshold chair, different fabric. I have the same issues with regard to color &use. Thank you so much for your inspiration!
So glad you found this post helpful, Cindy! I love how a simple slipcover can change the whole look and feel of a space. I appreciate you stopping by! Take care and stay safe.
I love this slip cover. Followed your steps and got a fairly good result. I struggled with how to sew the intersection of the side and the folded area of the seat. Ended up with a bunchy weird “dart” where the side turns up the back. Would you please explain how you sewed this part and got a smooth seam? Thank you!
Hi Nancy, so glad that you gave the slip cover a try and had good results. That intersection area where two or three sides meet can be tricky. I am not a master seamstress, but I have found that treating the sides separately helps to get a cleaner line. So, I would take two sections and sew a straight line. Then go back and take the other section or sections and move the previous section aside and sew another straight line, making sure to close the opening up on one of the passes. It’s probably not what a professional seamstress would do, nor is it perfect, but it makes that awkward corner tuck easier and doesn’t take away from the overall look or feel of the slipcover. Hope that helps.
Absolutely beautiful!! And where can I find that gorgeous lumbar pillow with the three navy stripe, unless you stitched it? Beautiful!
You did such a great job! It’s absolutely beautiful! You explained the process very well.
I have a gooseneck rocker that I’m thinking of making a slipcover for. I’ll have to remove the arms and do the chair like you did. Then add some fabric on the arms.
Hope to get started soon,
thanks again for a great post!