Use these basic sewing tips to create your own simple, but festive plaid tartan flannel pillow cover for your home this holiday season. In this DiY tutorial, you’ll see how simple it really is to make these easy envelope pillow covers without any complicated math or advanced sewing skills.

I have been making these types of envelope slipcovers since I was eighteen. Over the years, I have added to my sewing resume and can make more complicated patterns now, like these full size slipcovers here and here, but I always find myself coming back to this simple and basic pattern.
These slipcovers don’t take long to make and you really don’t need to measure, unless you really want to. I typically only use the measurements loosely as a guide and use my pillow form as a template. For this project, I used my favorite IKEA farmhouse inspired ruffled 16″ x 26″ slipcover (no longer available) as my inspiration for this holiday pillow cover.
**This post may contain affiliate links. Please see full affiliate disclosure here.
SUPPLIES AND TOOLS YOU WILL NEED
- Sewing machine ( I have the Bernina 380, but a basic sewing machine will do for this project)
- Scissors
- Measuring tape (optional)
- 1.5 yards of plaid tartan flannel fabric (I can’t remember if I found my plaid pattern at Joann’s or Hobby Lobby, but there are so many to choose from. Here is a link to some affordable options from Fabric.com)
- 1 yard of coordinating fabric or solid color fabric for the back (I used this linen blend from Amazon)
- Straight pins
- Large safety pin
- Coordinating thread
- Pillow insert
- Iron and ironing board
HOW TO MAKE A DIY PLAID TARTAN PILLOW COVER
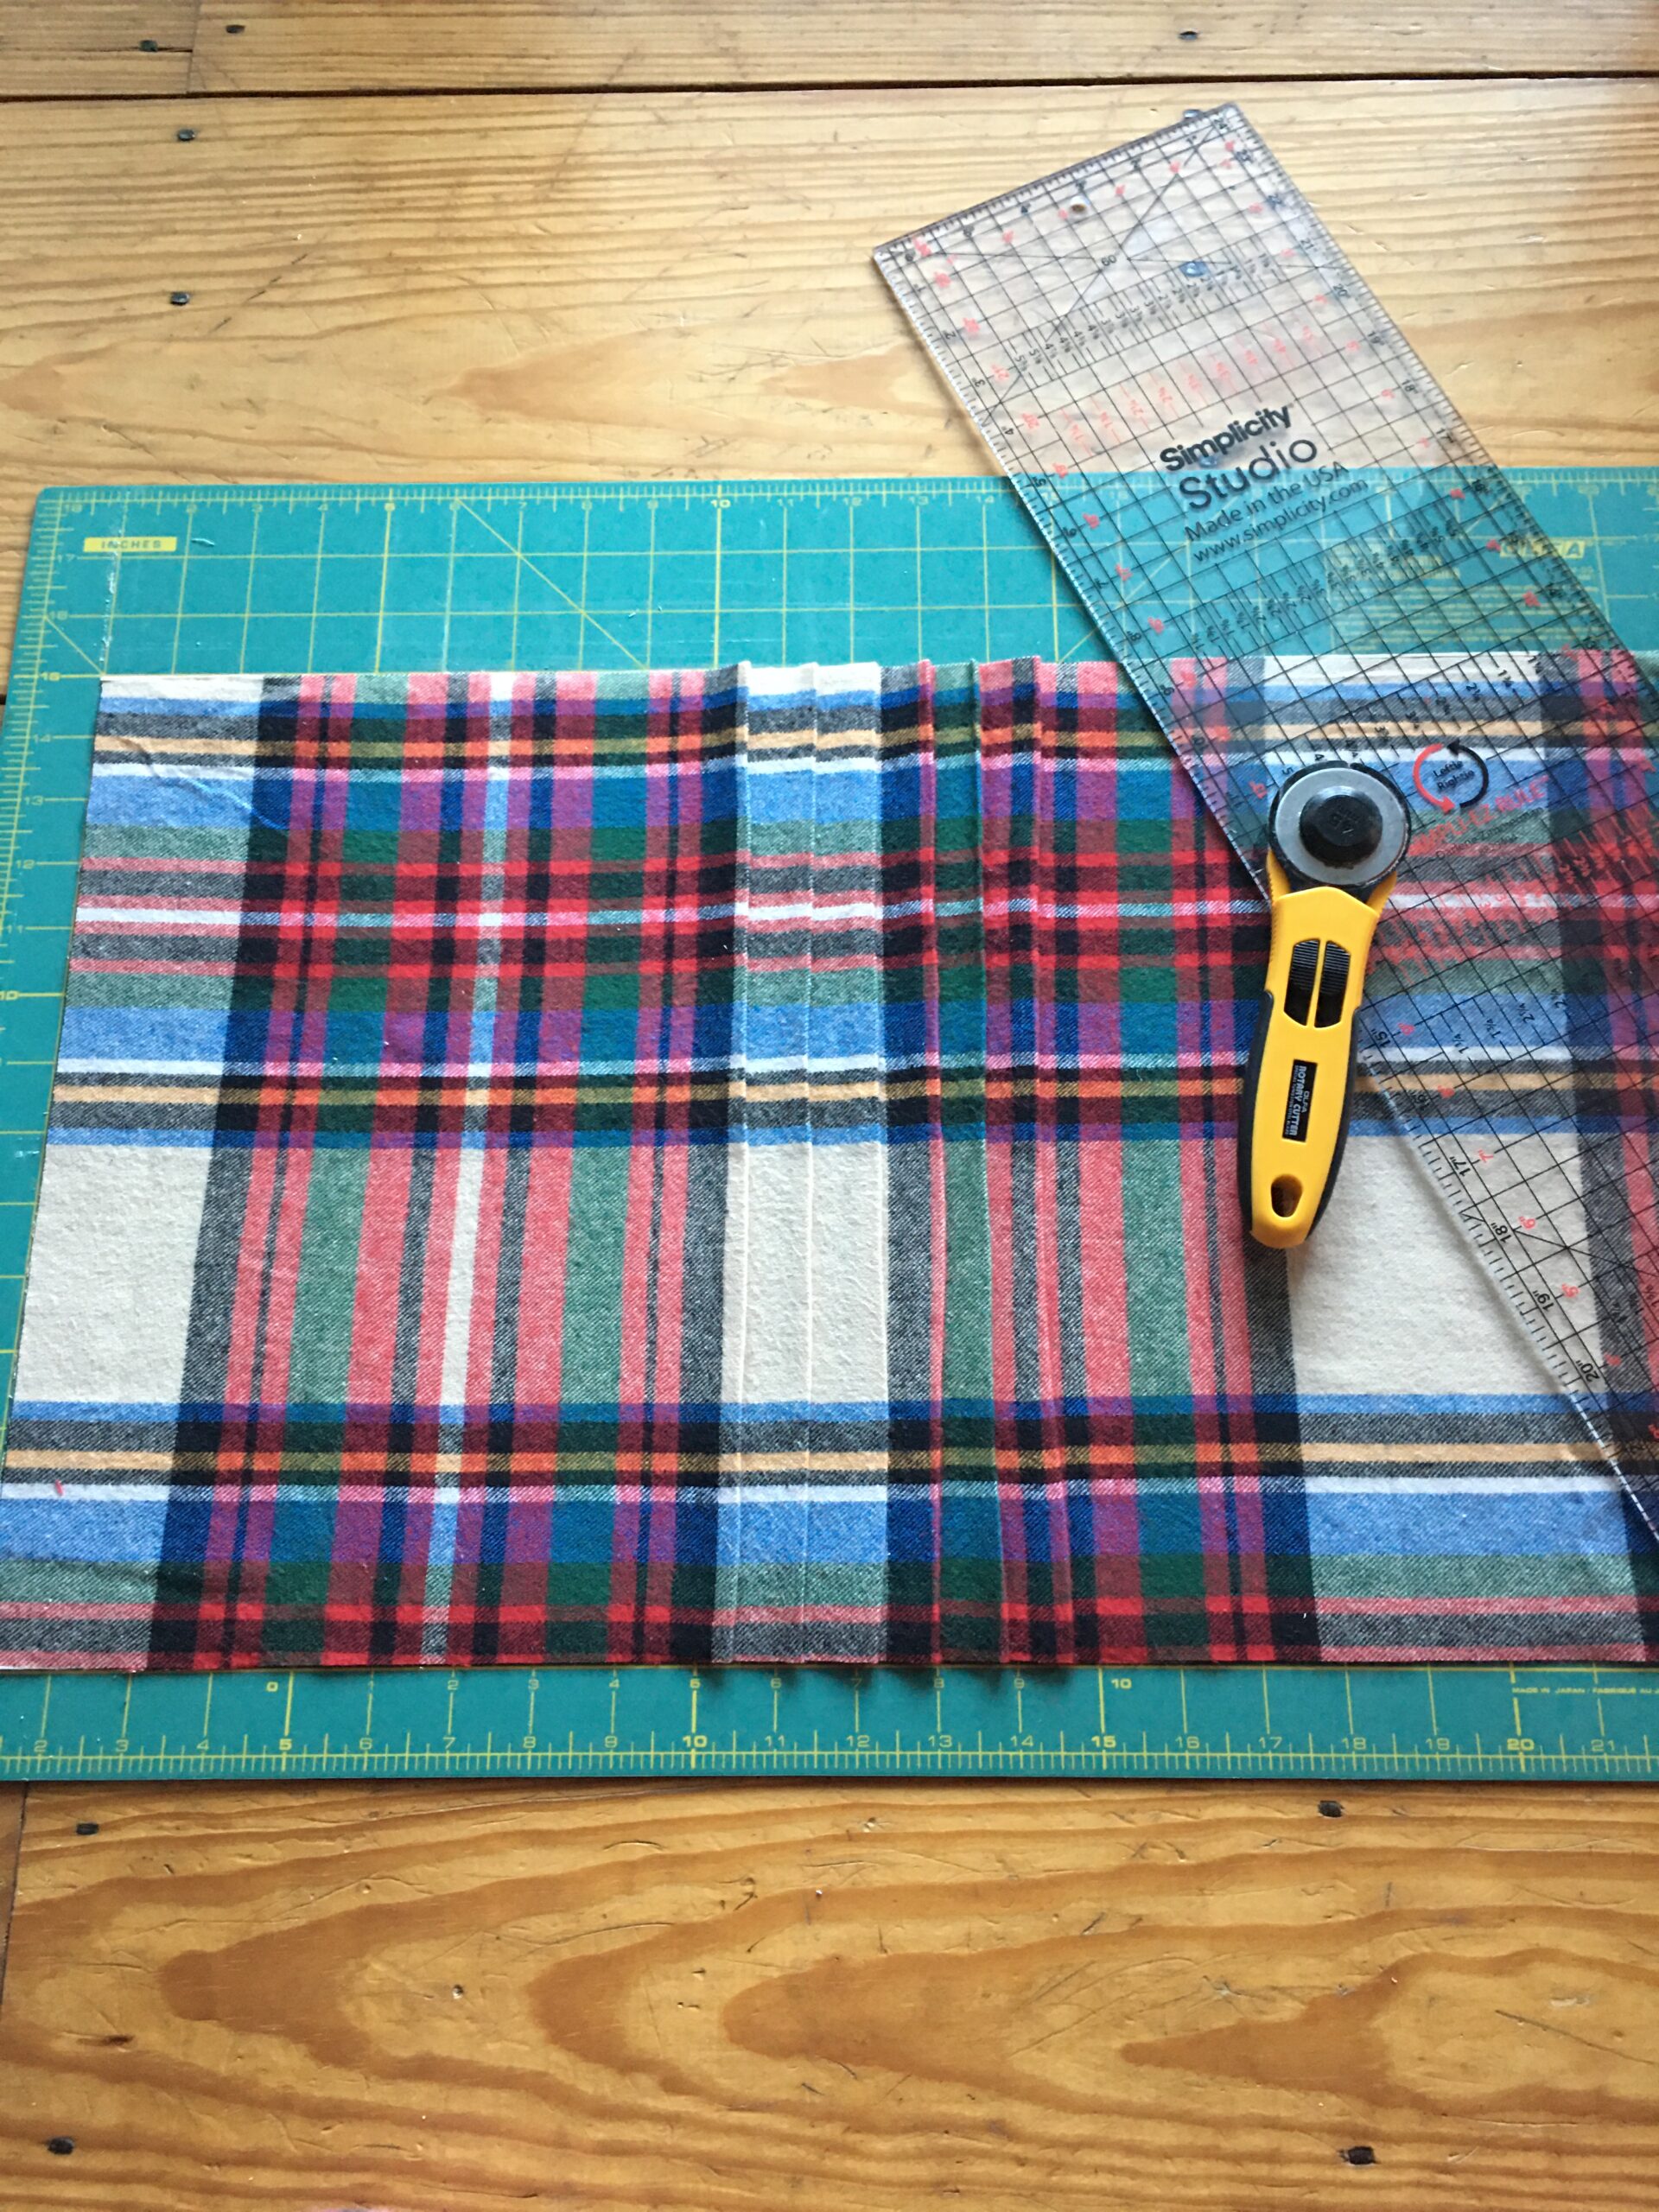
STEP ONE: MEASURE AND CUT
Using your pillow insert as your template and guide, place the insert on your fabric and cut around the pillow (rectangular in shape for this pillow) about 2-3 inches wider than the pillow to leave room for at least a 1/2 inch seam allowance.
BONUS TIP:
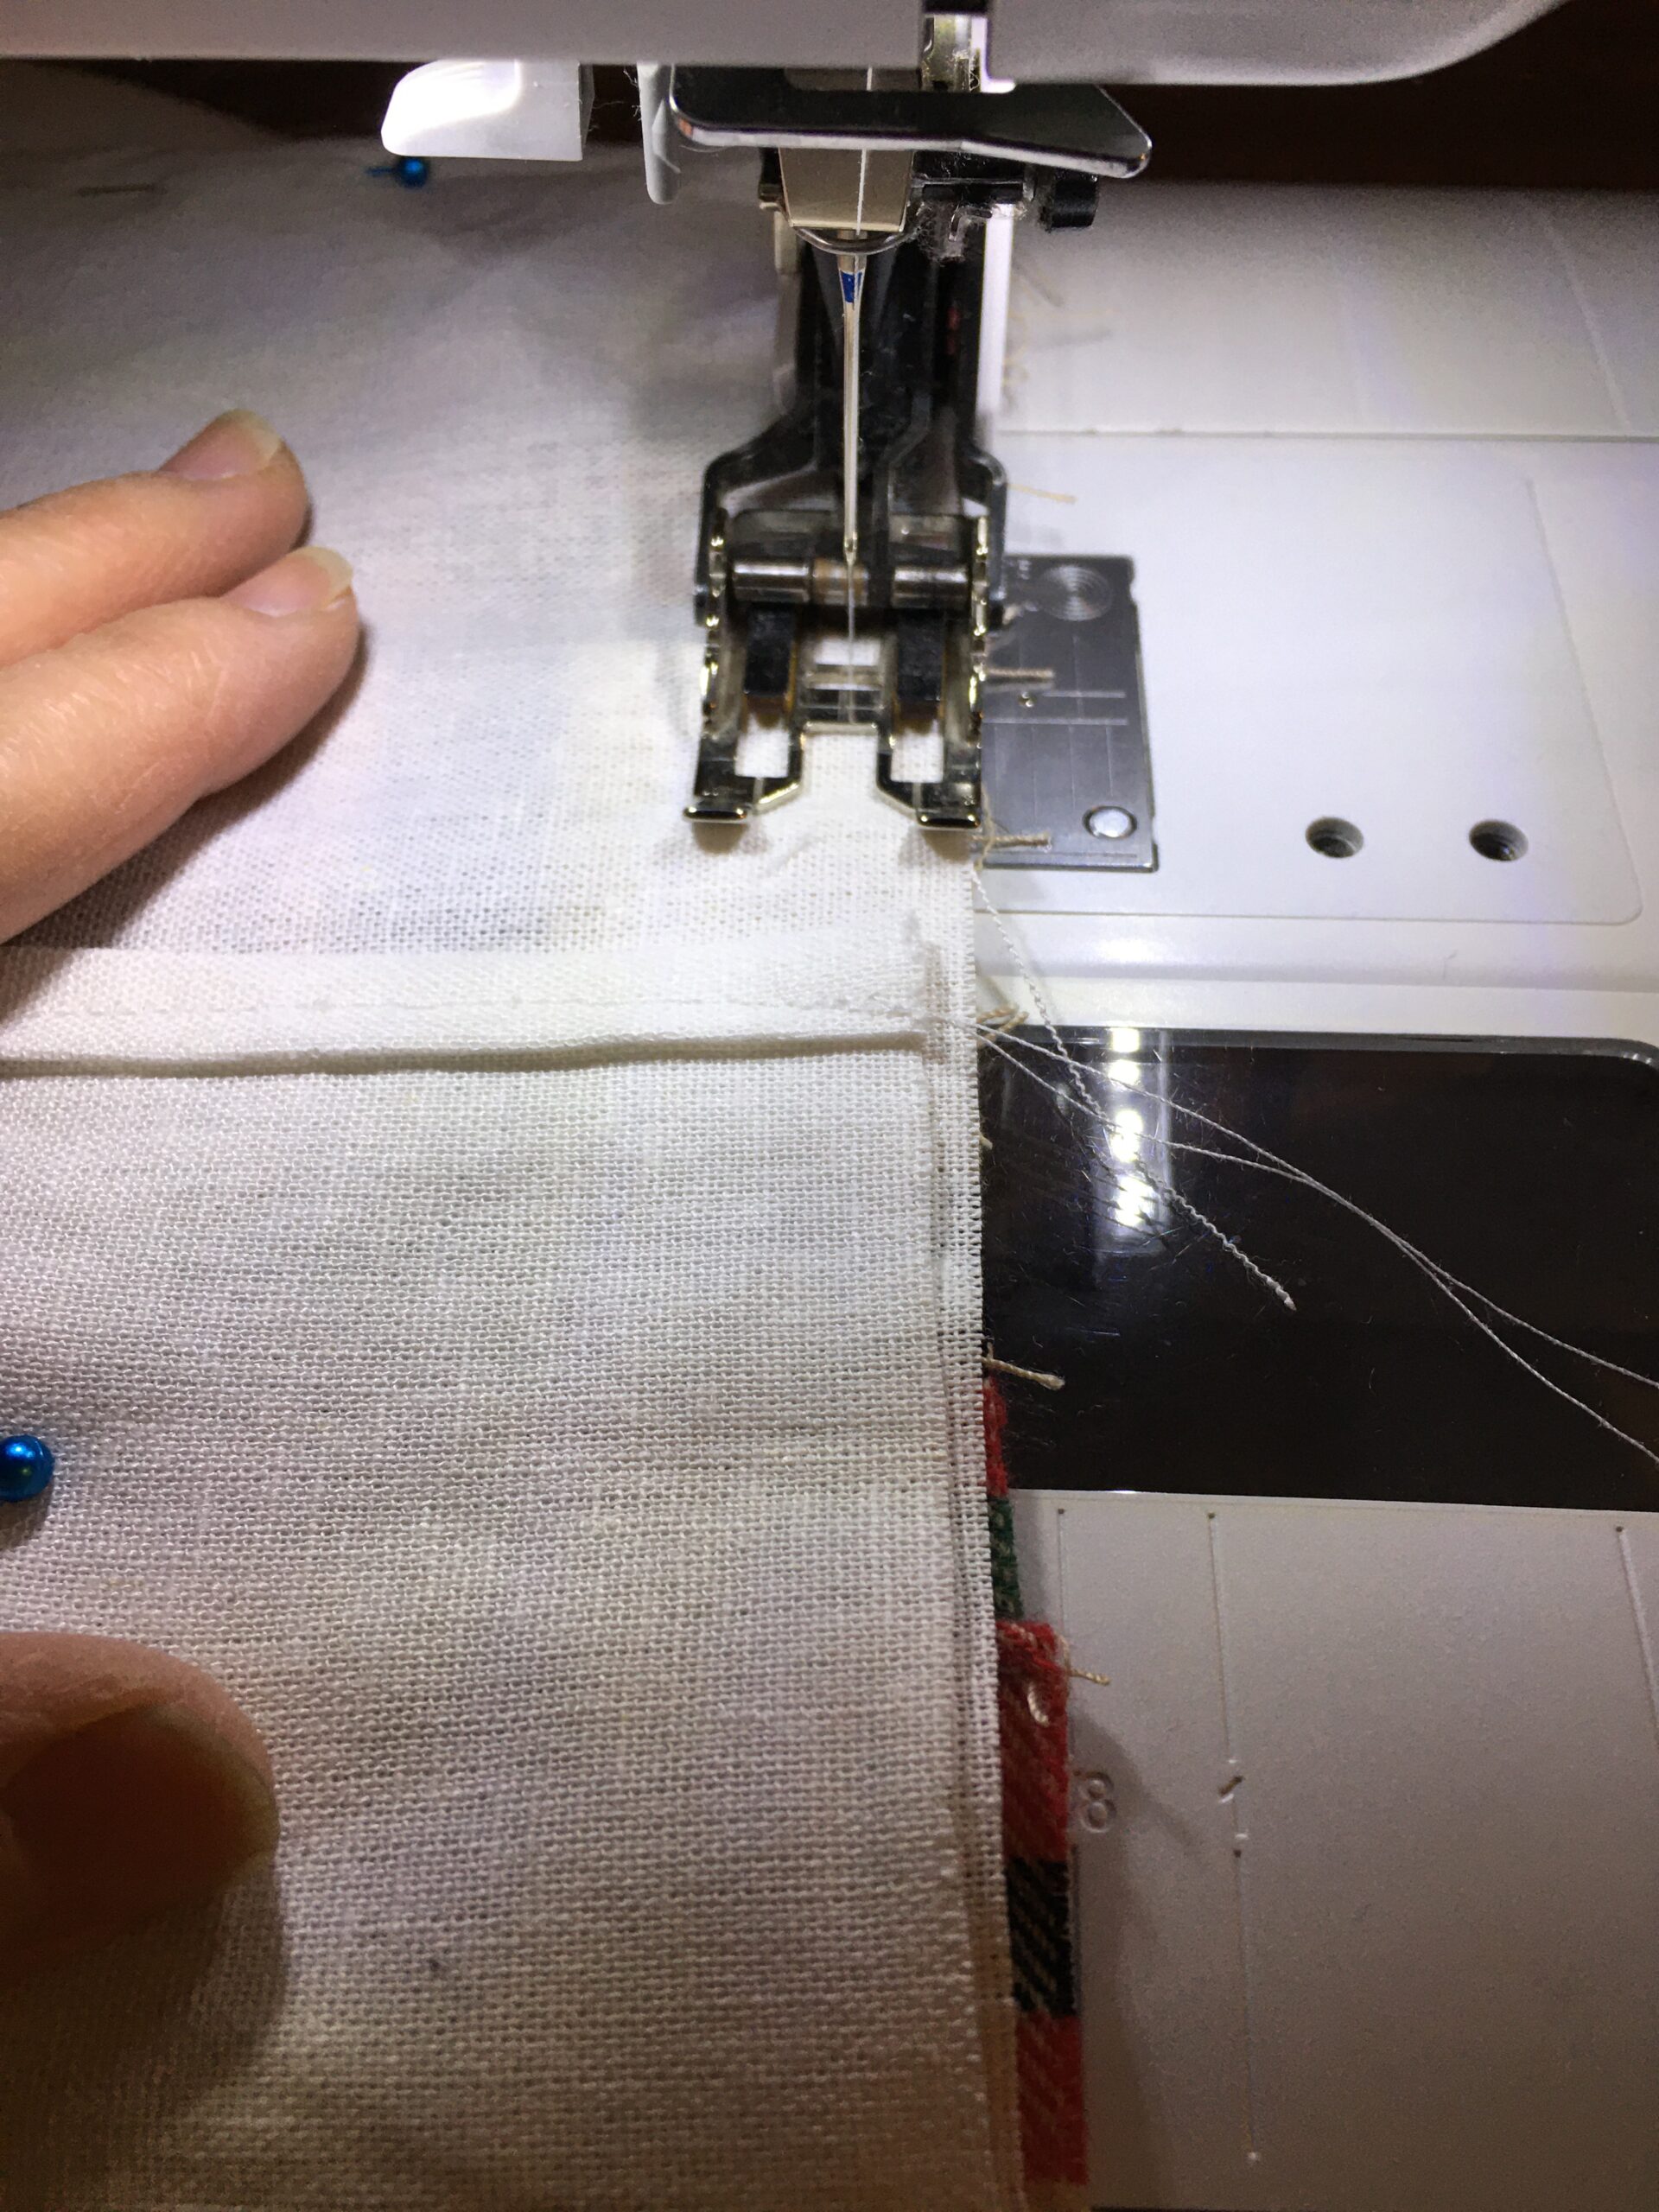
You will need three pieces and two strips total. One piece will be for the front and two pieces for the back. You will need two strips that will form your ruffles. Make sure to factor in that the two back pieces will have a hem that will give your envelope that finished look.
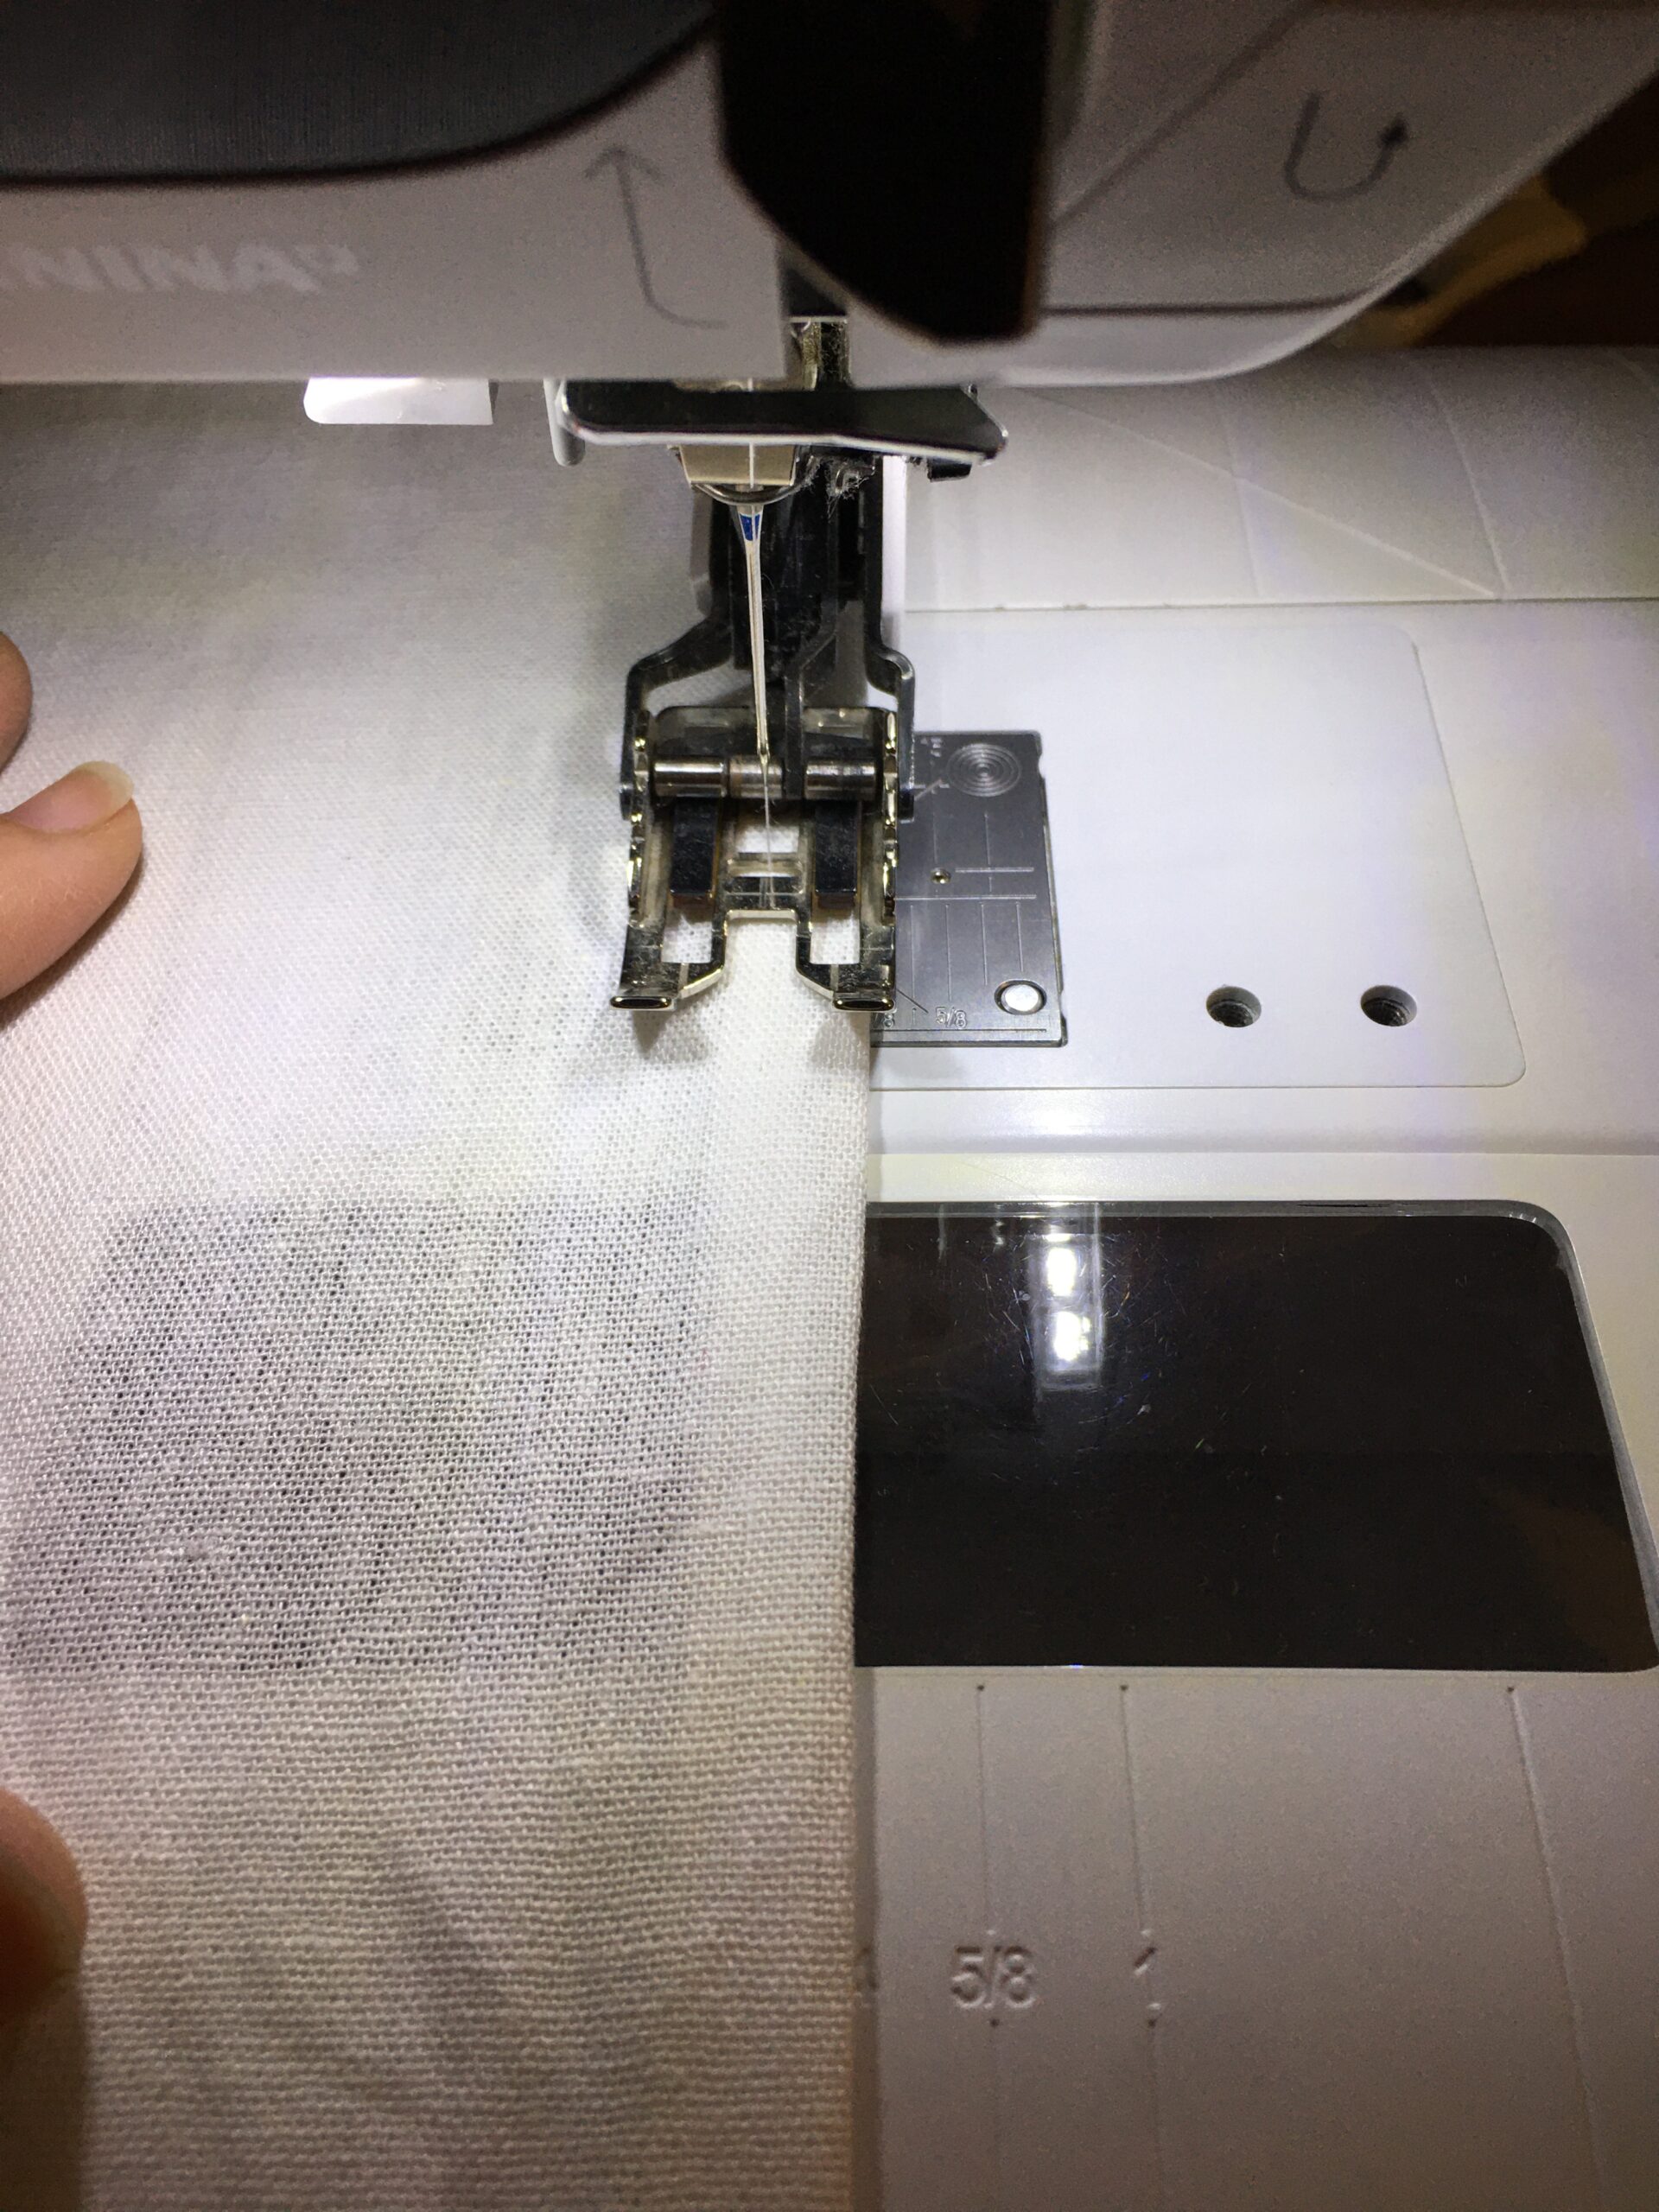
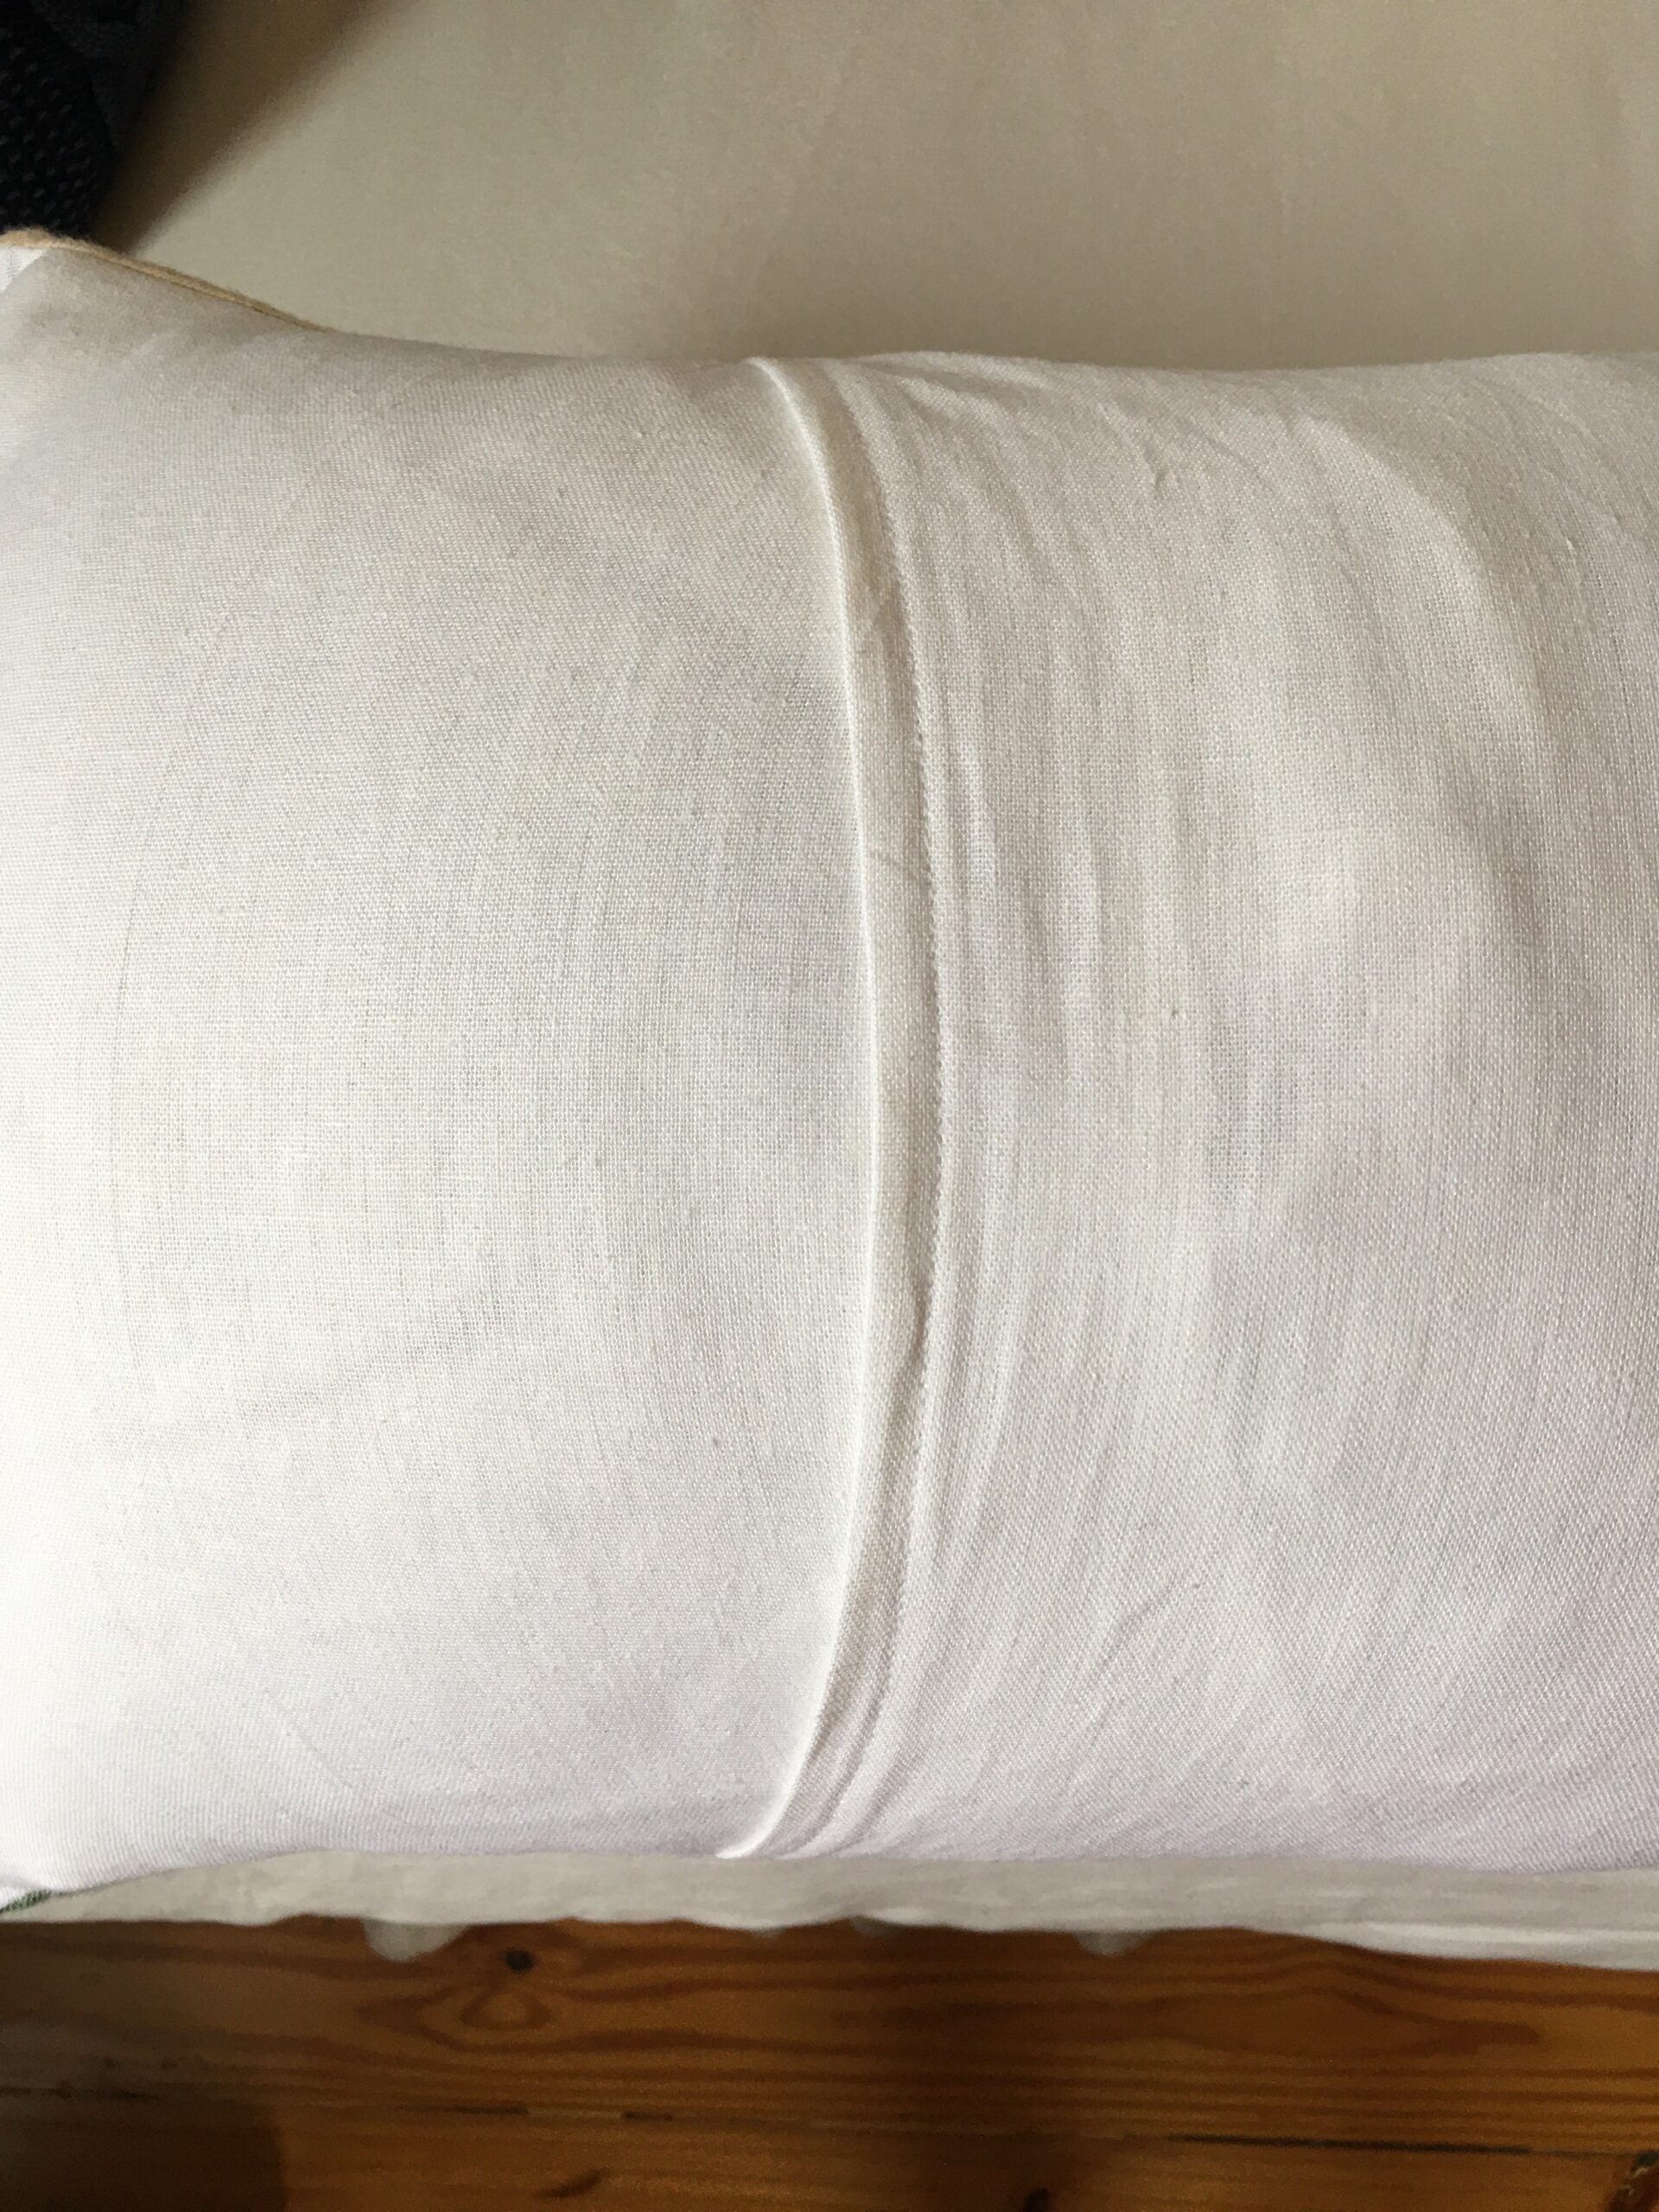
Basically, the hem consists of folding the short edges of the fabric to form the overlapping envelope. You do this by folding the short side of the fabric 1/2 an inch and then another 1/2 inch. Iron in place and sew straight down to prevent fraying. This will be towards the middle of the back of the pillow and the opening should have a minimum of 4 inches overlap to help keep the pillow insert from poking out.
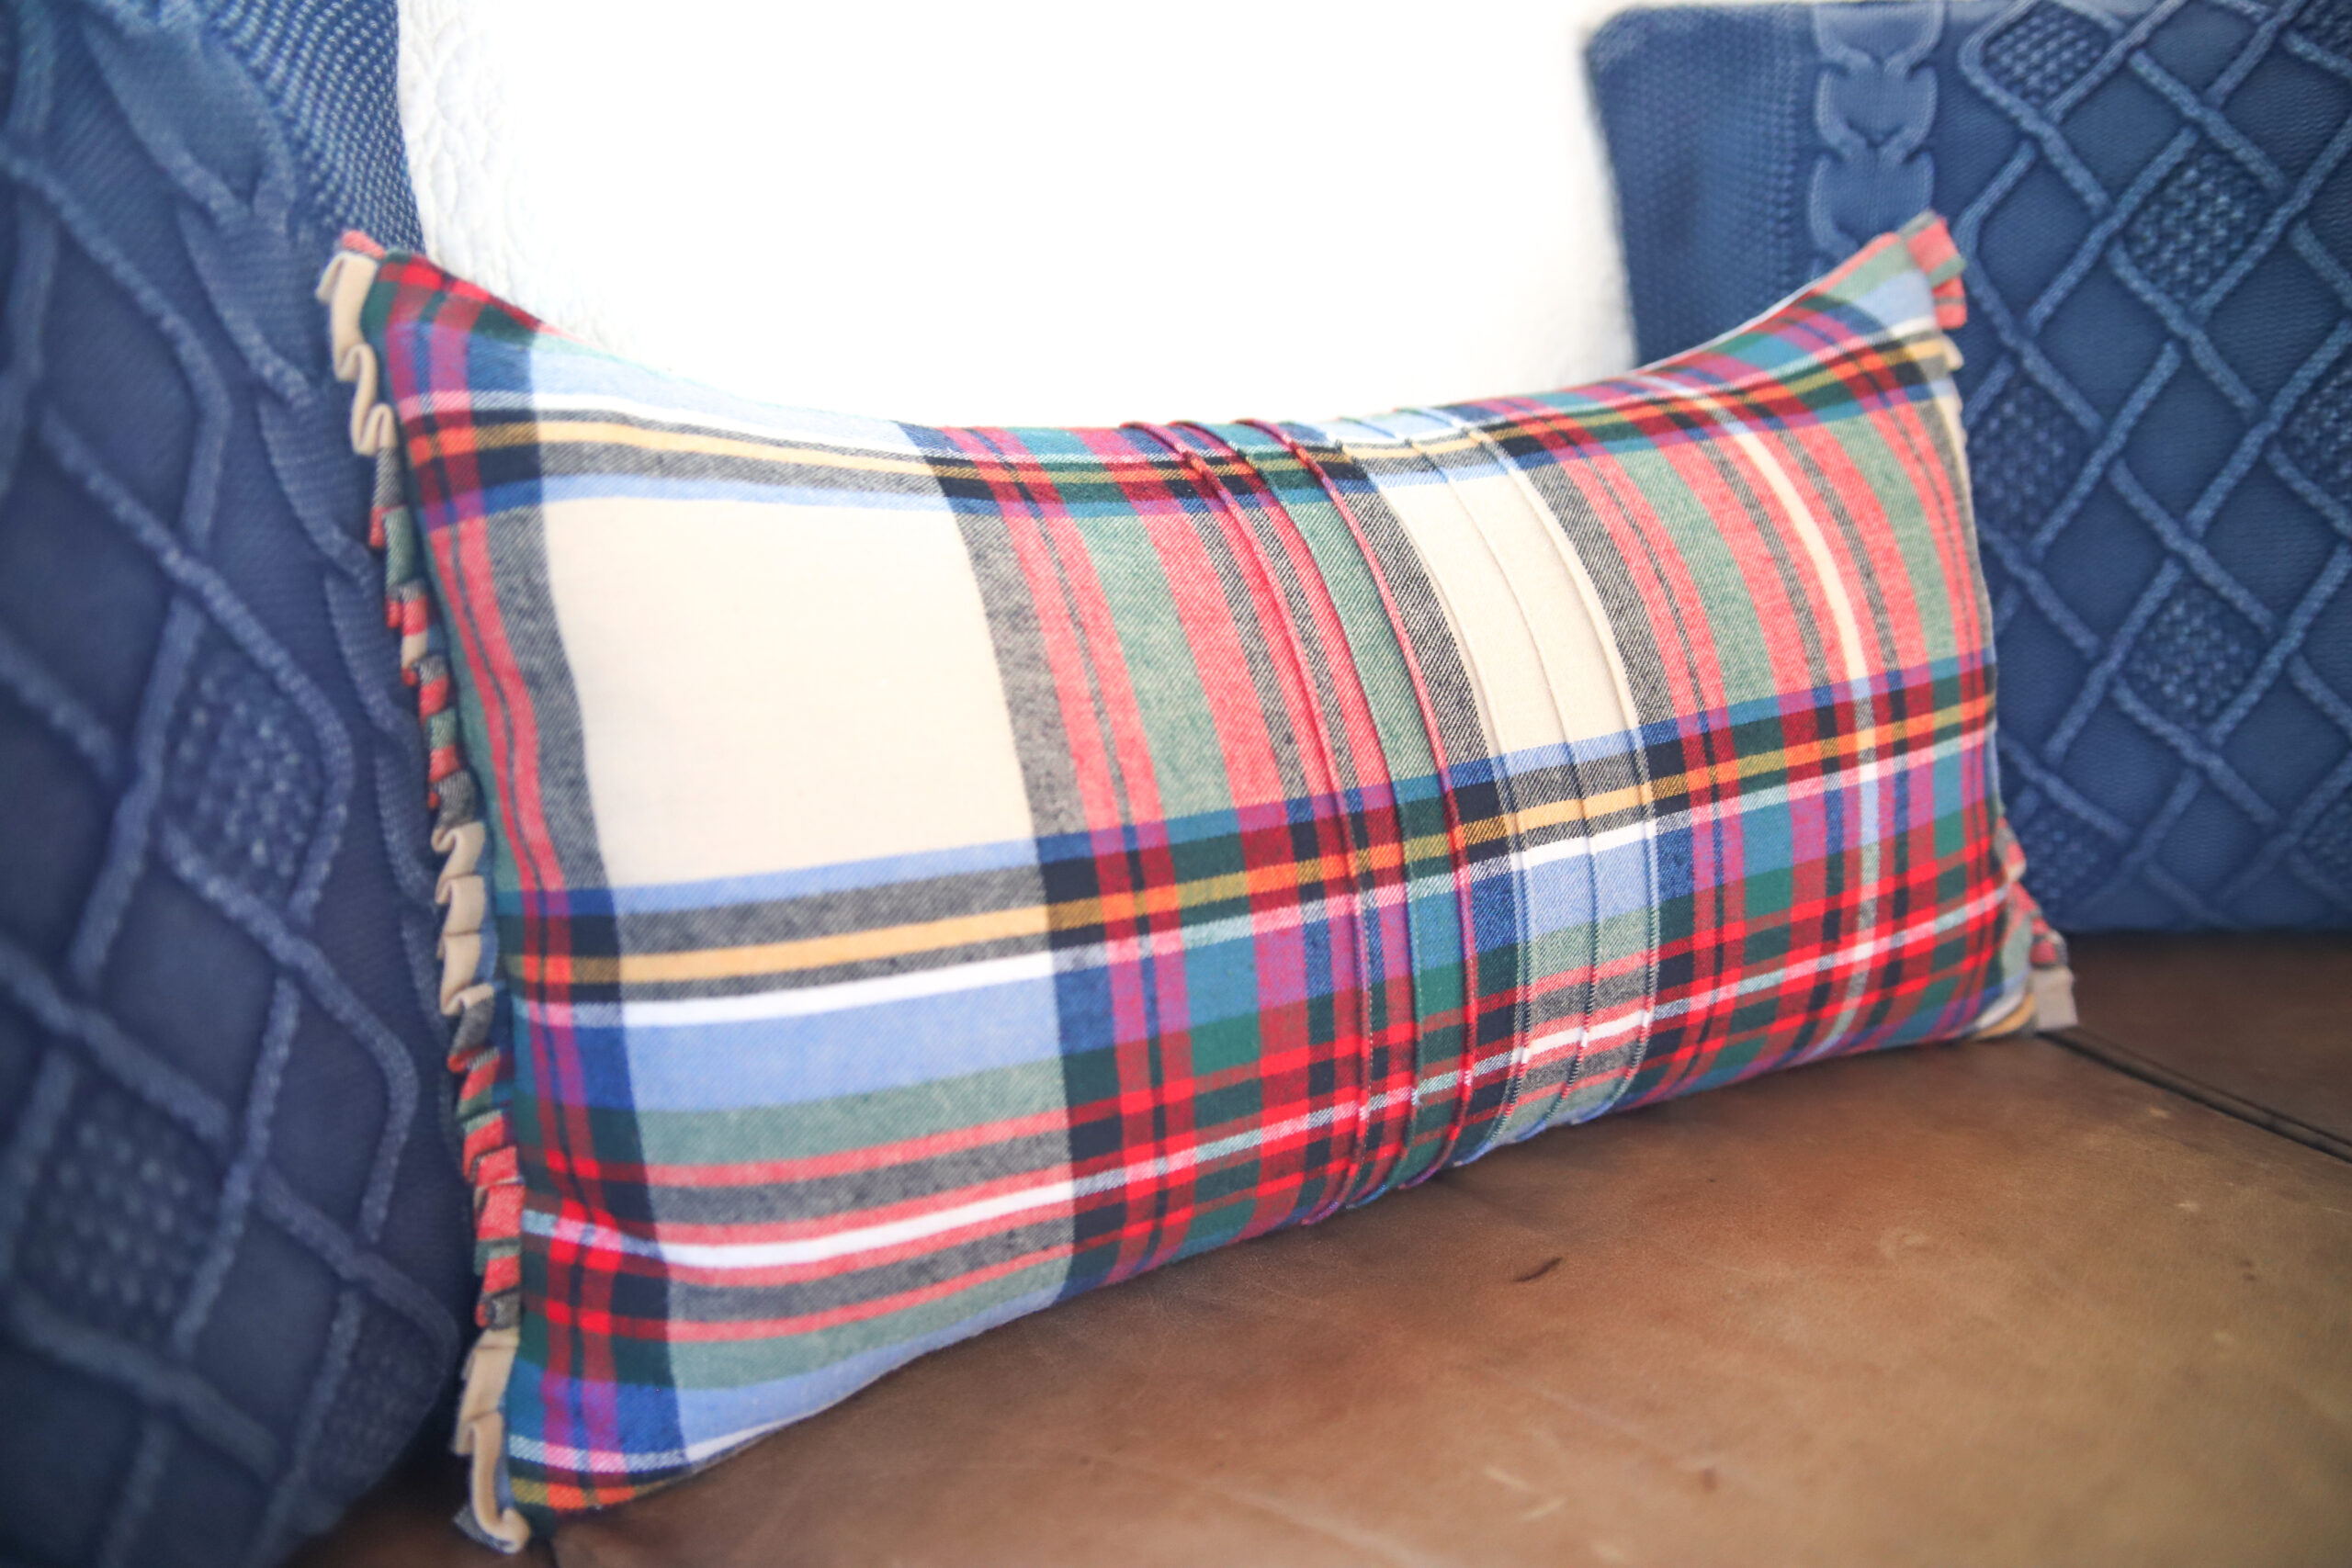
STEP TWO: MAKE THE SIDE RUFFLES
Make the side ruffles by cutting 3 inch wide strips of your plaid pattern. You will need two strips at least double the length of your side seams of the pillow. If you have fabric to spare, I would suggest tripling the length to insure that you will have more wiggle room and not come up short. Take your strips and fold with right sides together and iron strip in half. Then sew a straight line down the long open side of the fabric, leaving both short ends open. Then take a large safety pin and attach the pin to one side of the opening and feed the fabric through to the other side until you are able to turn the fabric strip right side out. Press fabric flat with iron. Repeat for other strip.
You can either bunch the fabric and sew the pieces in place for a more rustic look, or you can fold the strips one section at a time and pin the ruffle in place before sewing for a more pleated look. I opted for the second option because I wanted it to be more uniform. If you already know how to make a ruffle with a lose straight stitch, you can also do that before attaching.
NOTE:
Because the ends of the ruffles will not be attached to the seam, you will need to finish off the end of your ruffles before attaching it to your main body pieces. Simply fold 1/2 an inch at the ends of each ruffle and press with iron. Then sew a straight stitch to secure them.
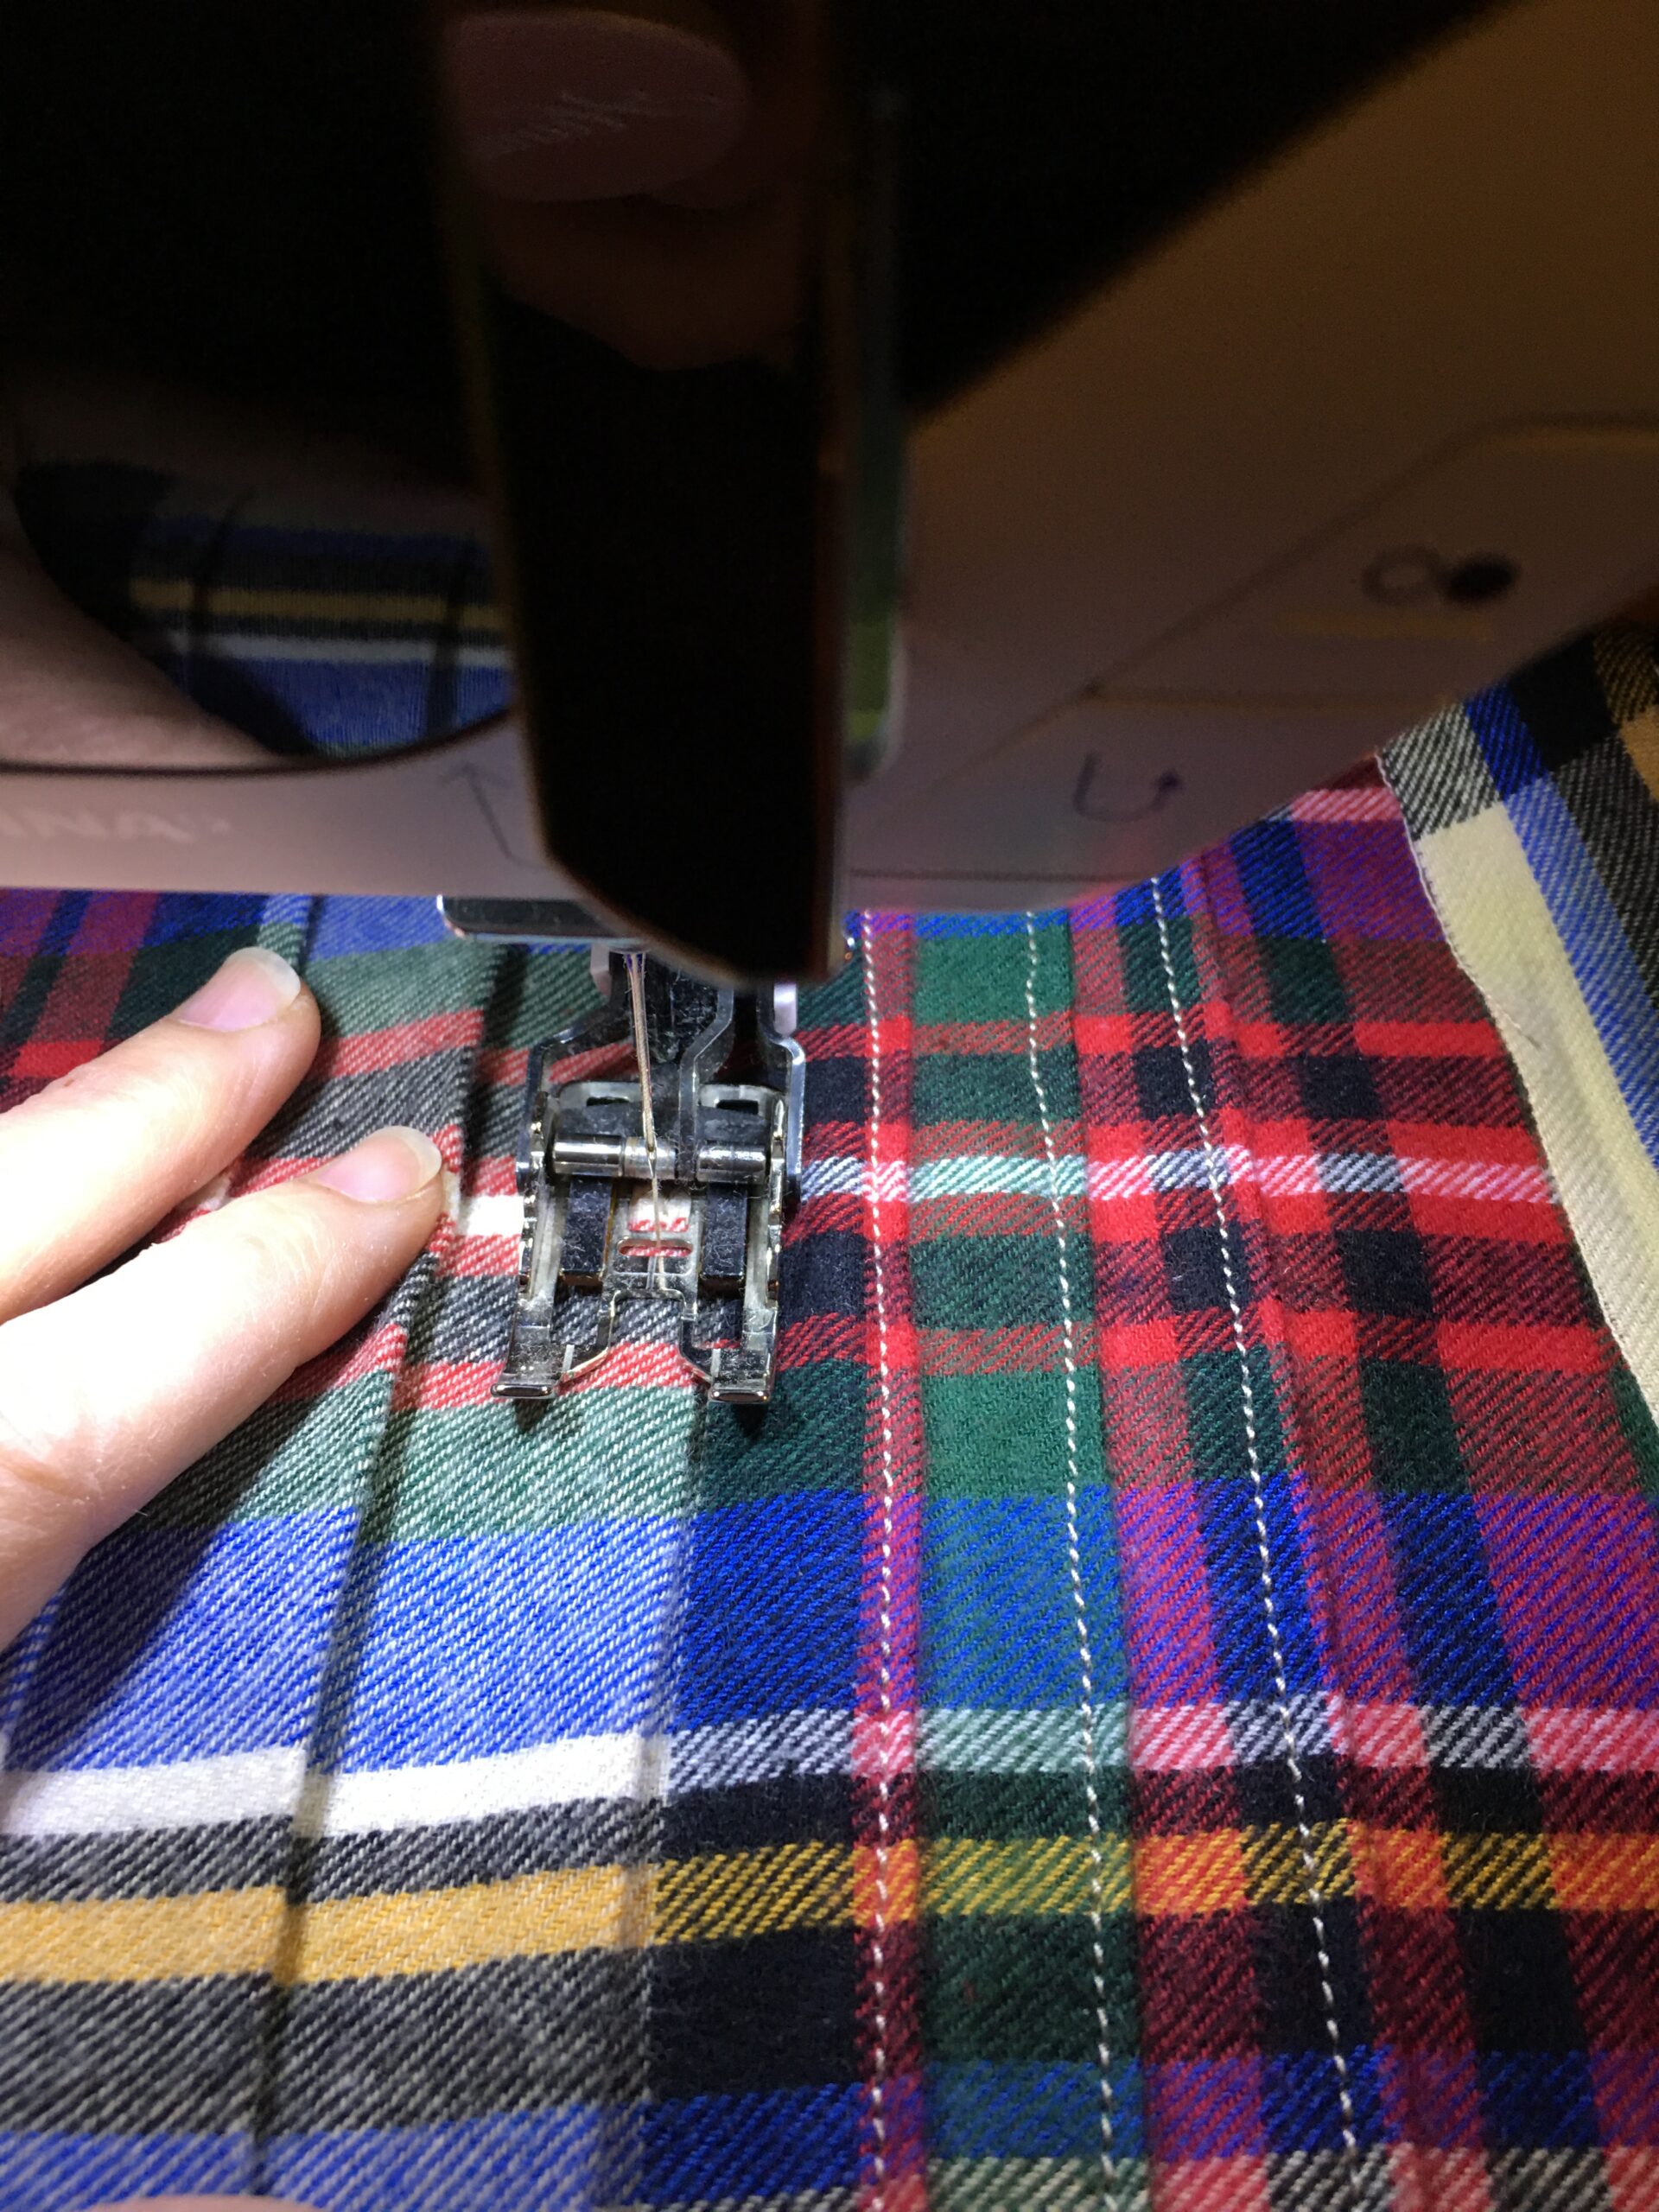
STEP THREE: MAKE THE FRONT PLEAT
Make the pleats for the front of the pillow cover by folding the fabric lengthwise in half and ironing flat to make a lip. Then work your way from both sides the center line and carefully iron two to three pleats on both sides of the center line on your front piece. Then sew in place, leaving a small lip.
STEP FOUR: SEW PIECES TOGETHER
Place the pillow together by placing the front piece facing up and the two back pieces facing down with the finished hemmed sides facing each other and overlapping at least 4 inches. Line up your ends and then sandwich the ruffles in between the three main pieces. Make sure to place the ruffles facing inward (raw edges lined up) so that when you flip your pillow cover right side out, it will be facing the correct outward direction. Pin in place and sew around the edges. Be sure to remove pins as you sew along the perimeter of the pillow cover.
BONUS TIP:
Back stitch on the opening of the envelope seams where the two back fabric pieces overlap to prevent tearing as you insert your pillow form.
STEP FIVE: ADD INSERT AND DISPLAY
Turn right side out and stuff your pillow insert in your new simple pillow cover. Then display that pretty handmade pillow cover proudly in its new home.
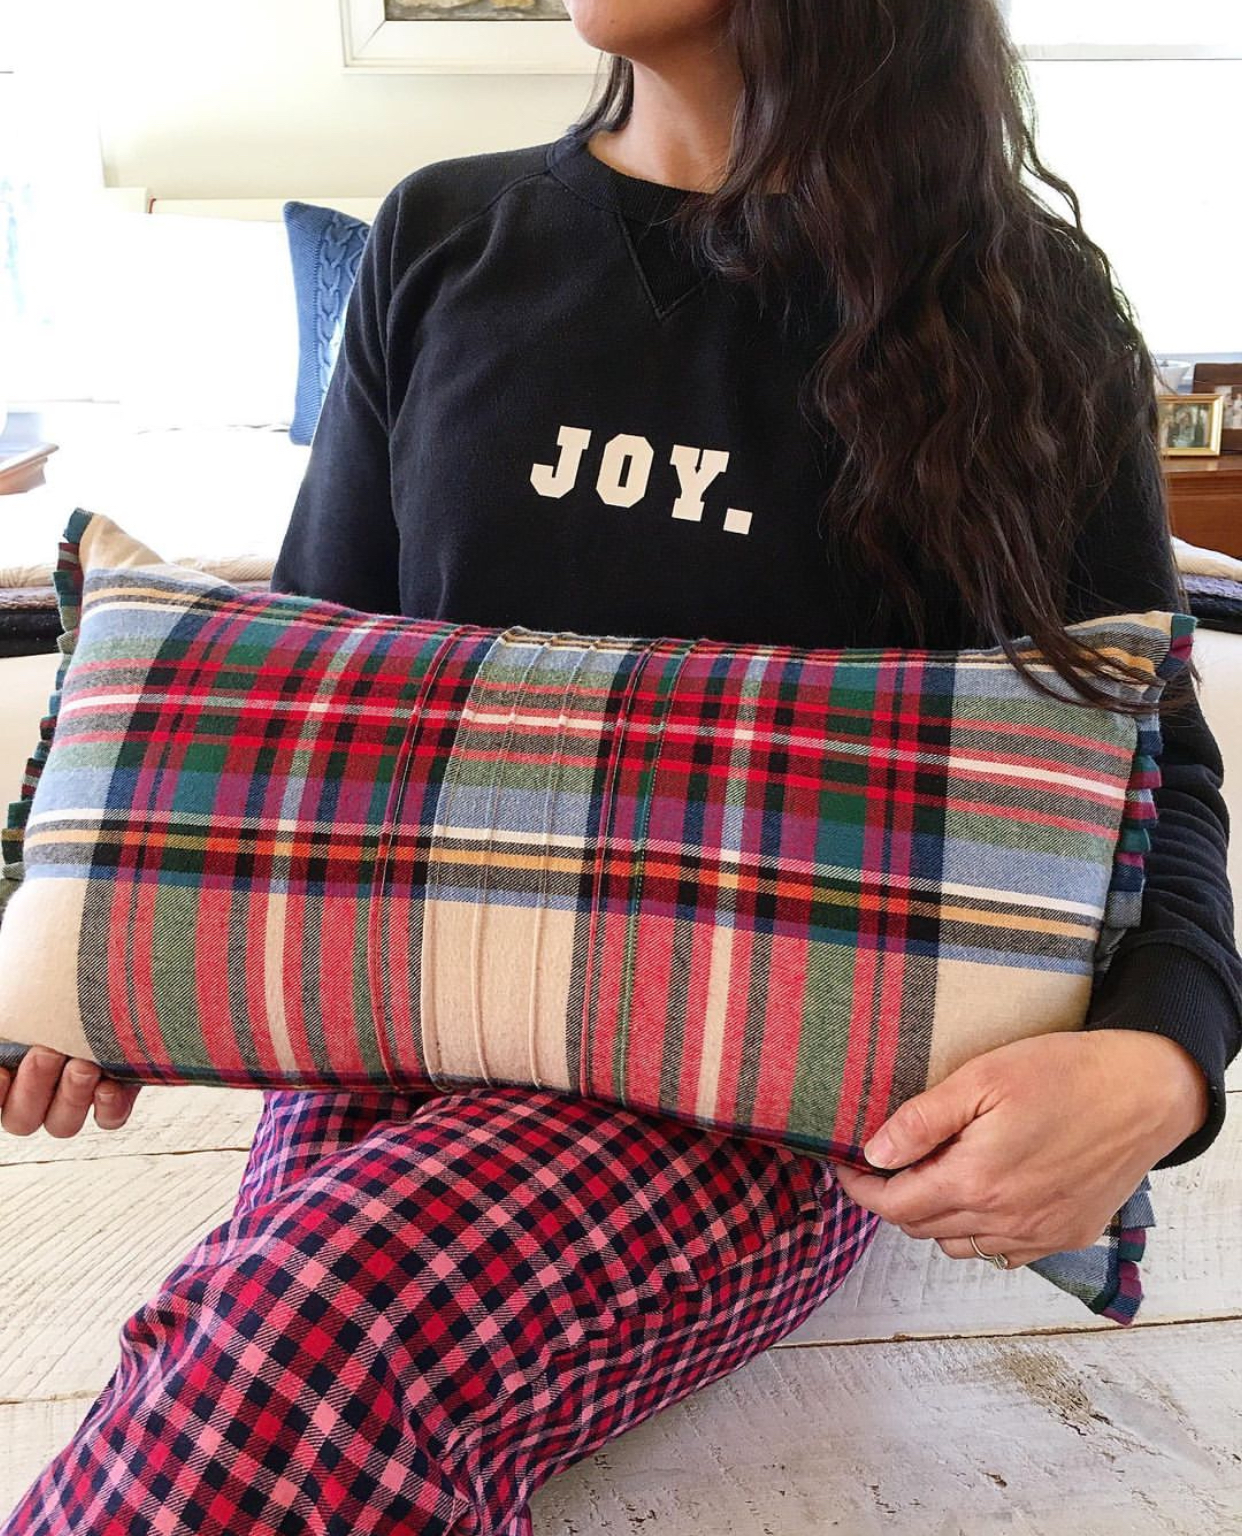
Thanks for stopping by the hollow! I hope you’ll give this simple envelope pillow cover a try. Trust me, it is easier than it looks and once you make one, you will want to fill your home with pillow slipcovers for every season.


Leave a Reply