
Sourdough baking can be intimidating at first, but with practice, patience, and a whole lot of experimenting, you can start making a healthier, fermented and delicious bread option right at home.
As more and more folks are delving into learning more about natural living, it is only natural to want to explore and experiment these back to basics skills with new projects and new recipes.
For years, I would dabble in sourdough baking, but I never really felt like I had a consistently good loaf. They certainly did not have that stunning rustic Artisan look that we all love.

Scoring Practice
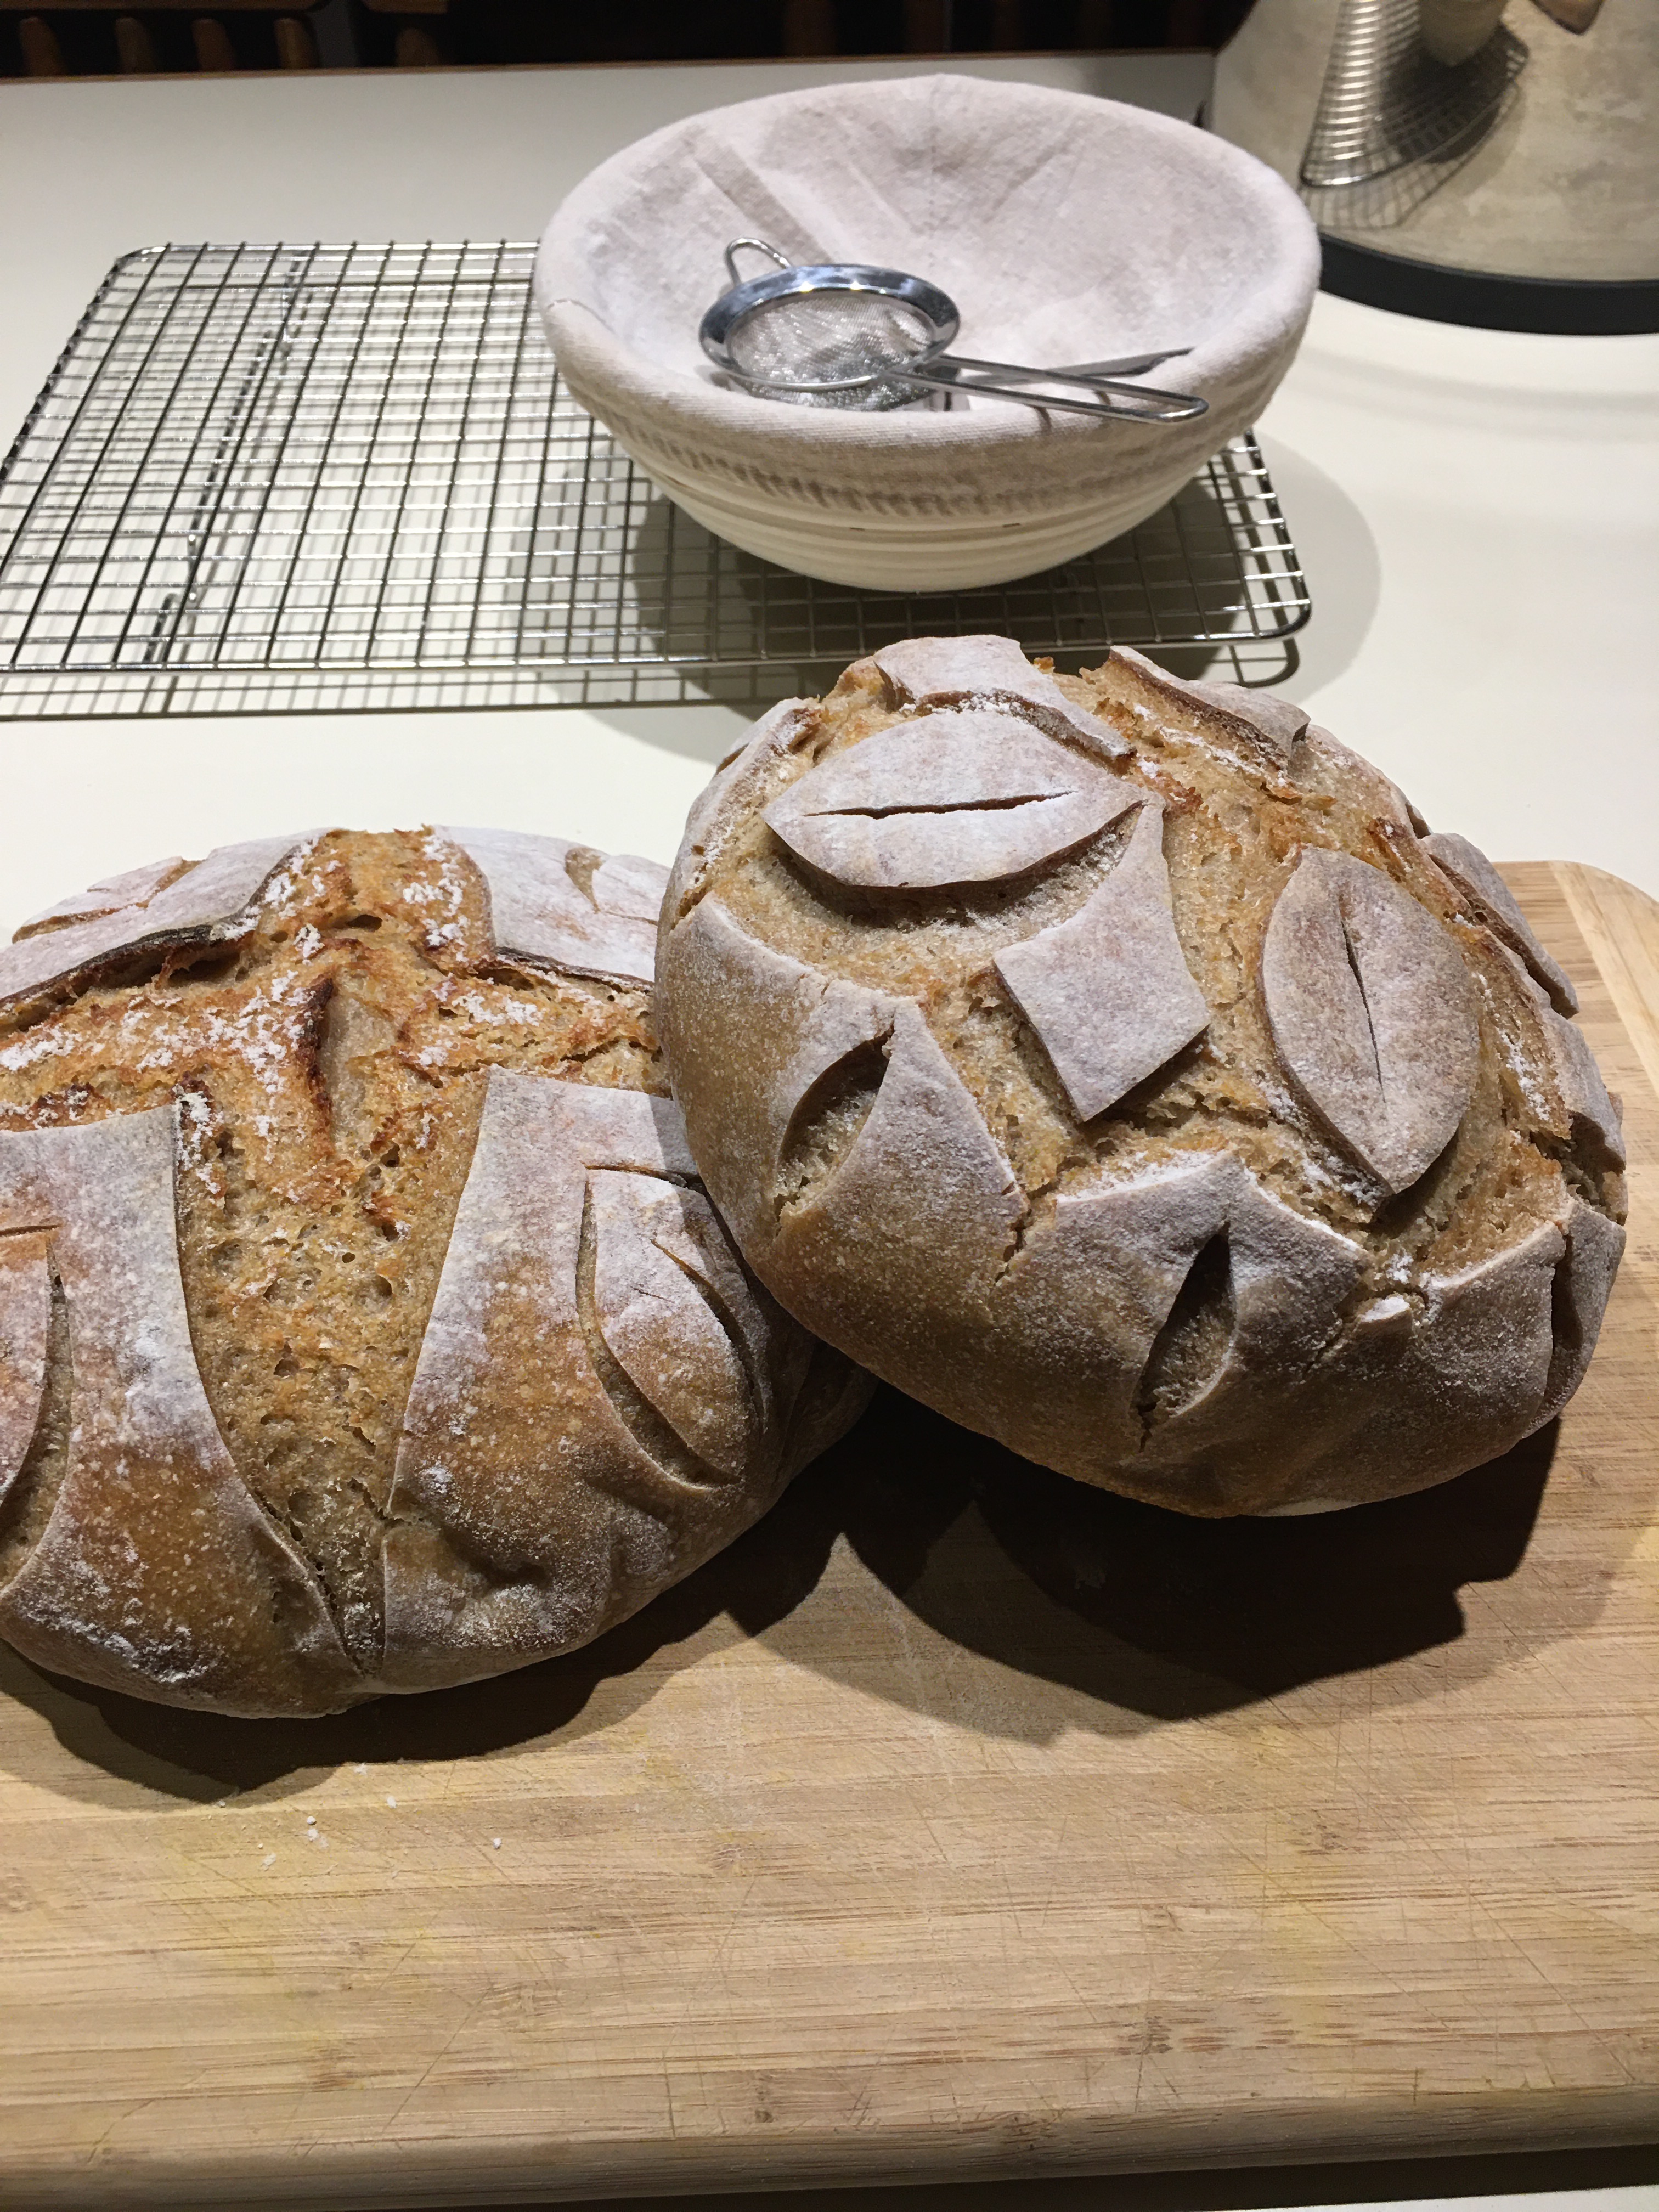
These evening loaves turned out well, but still needed some tweaking.
Until recent years, I stuck with many of the discard recipes like our favorite English muffins , pancakes, biscuits, and sourdough pizza. The more experimenting in the kitchen has birthed more recipes that will soon be added to our online Recipe Box.

Starting with a mature and well fed sourdough starter is key.
Whether you are interested in taking your baking to the next level, or you are wanting to add a healthier version of bread back into your diet, or whatever your motivation is to step into the world of sourdough baking, you are in for a unique experience that will change the way you look at grains forever.

Just look at all those bubbles after an overnight long ferment.
BENEFITS OF SOURDOUGH
Store bought sourdough is not the same as long fermented dough made from wild sourdough starter. They use commercially made yeast and therefore, store bought sourdough is made in bulk and made fast to keep up with demands. It lacks all the benefits you would receive from the long fermentation process.
Homemade sourdough bread is nothing new. Many families have past down their sourdough starters and bread making skills from generation to generation. Fermented foods were a staple in most households around the world for centuries.
But when we traded in those time honored skills for convenience, something important was lost along the way. It’s time to take back what was originally created to be a form of nourishment!
Read more about taking back our daily bread and see why so many people are passionate about preparing their meals from scratch at home and how this simple skill, helps build a stronger foundation for your family for years to come.

I still get giddy every time I see my dough double in size!
BACK TO BASICS
I first learned about baking with sourdough starter when we were stationed in upstate NY. We attended a sweet little church that had a growing women’s ministry. One bible study in particular, really made an impression on this unsuspecting future homesteader and homeschooling mama. The facilitator was an experienced private school educator, turned homeschooling mom of six. She and her husband owned an adorable historic stone home on a beautiful piece of property just outside of town, where they grew their own garden and prepared their large family’s meals from scratch. She had a heart for ministry and for teaching younger women biblically based, Titus 2 principles.
This was like no other bible study I had ever participated in. She hosted it in her beautiful home and on day one, I was smitten! Not only was her home a gorgeous piece of history, filled with heirloom pieces, well-made antiques, an original stone fire place in the dining room, and so much character, she was also super organized. She started her bible study with handing out binders with tabs and page protectors. Hahaha! She was my kind of teacher!
Her bible study consisted of studying the written Word, sharing life experiences, singing hymns, and teaching basic skills; like sewing a zipper, baking bread from scratch, using sourdough starter, and growing a garden. She even provided daycare for the children and for a mama whose husband was deployed overseas often, it was much appreciated and was the highlight of my week. (smile)

After second rise, the dough is ready to score and place in the Dutch oven.
HOW FERMENTED GRAINS ARE DIFFERENT
Traditional sourdough bread is fermented for periods of 8-12 hours and in some recipes, for longer than 24 hours. The long fermentation process allows for the yeast and bacteria to have time to throughly digest the natural sugars and carbohydrates present in the flours. This is why some folks who have gluten issues find that they are able to tolerate sourdough without any flareups or negative issues.

I love using Banneton baskets like this for my sourdough.
CONSIDER MILLING GRAINS AT HOME
In order to receive the benefits from whole grains, all three parts of the grain must be present. By milling our grains at home, we are insuring we get the freshest nutrients for our family.
Grains, seeds, and beans contain phytic acid which is an anti-nutrient that helps protect the seed from spoiling too quickly. Unfortunately, it also bonds to certain vital nutrients and vitamins, blocking their absorption. It also prevents proper digestion and can cause nutrient deficiencies when too much is consumed on a regular basis.
Sprouting, soaking, and fermenting help to breakdown the phytic acid present, making it easier to digest and allows for better assimilation of the beneficial nutrients found in whole grains.
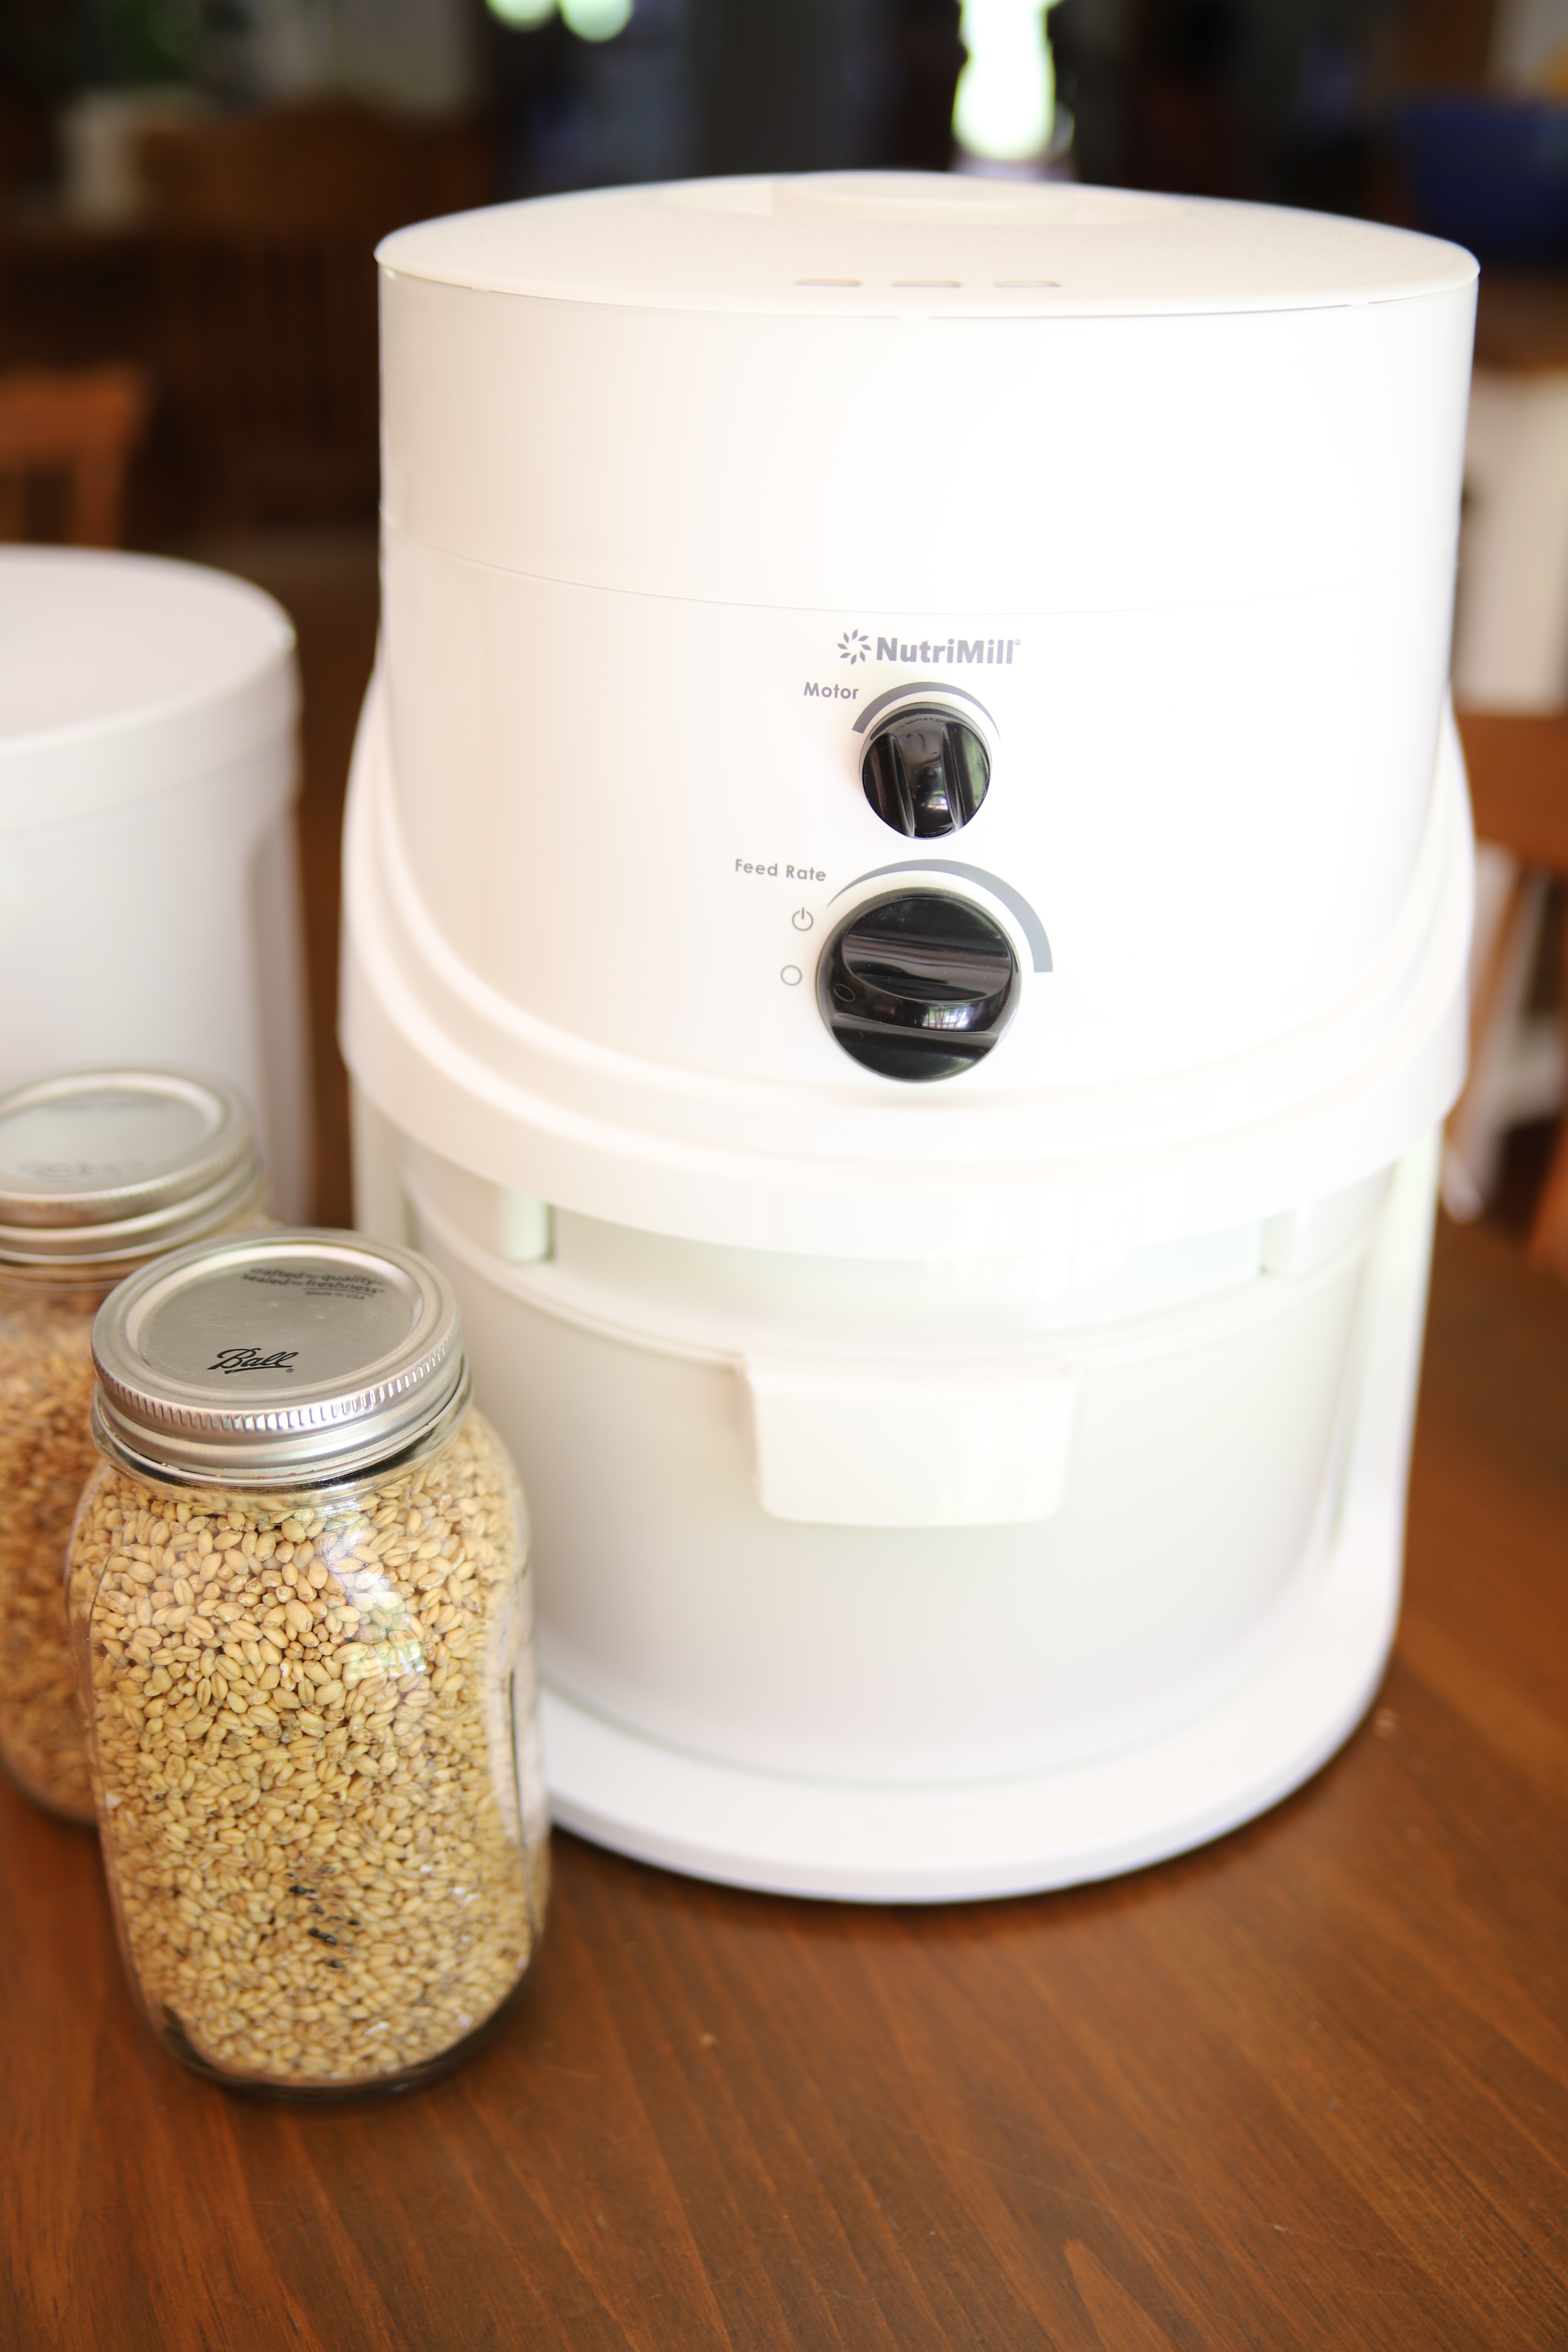
We love our Nutrimill grain mill! It has been such a great addition to our made from scratch lifestyle. When they say that you can taste the difference when you mill your own grain, they weren’t kidding!
Once you get started on this freshly milled and long fermented grain journey, you’ll think twice about buying store bought bread again.
**This post contains affiliate links. Please see full affiliate disclosure here.
NOTE: Any purchases made through any of our links provided, will not incur any additional fees or costs to you. I may receive a small commission that goes back into helping pay for blogging fees. We only share products and services that our family uses and finds helpful in our own home. All opinions are our own. Thank you for your support.
SUPPLIES AND TOOLS YOU WILL NEED
- stand mixer
- banneton baskets
- scoring tool
- mixing bowls
- measuring cups
- measuring spoons
- Dutch oven
- small mesh sifter
- parchment paper
HOW TO MAKE SIMPLE SOURDOUGH BREAD AT HOME

Recipe Box: Simple Sourdough Bread
Sourdough baking can be intimidating at first, but with practice, patience, and a whole lot of experimenting, you can start making a healthier, fermented and delicious bread option right at home.
Ingredients
- 3c organic all-purpose flour (you can use your preferred flour, but note that some tweaking may be necessary to get the right consistency)
- 1c Einkorn flour
- 2 tsp Himalayan sea salt
- 1 1/4c filtered water
- 1c sourdough starter
Instructions
- Place the ingredients in the order above into your stand mixer.
- Note: You can also combine in a mixing bowl, if you don't have a stand mixer.
- Select slow to medium speed and allow contents to mix and knead until gluten is activated. Between 8-10 mins.
- Once dough is ready and gluten is activated, shape dough into a ball and place in a slightly oiled glass bowl.
- Cover with a beeswax wrap or a damp towel and ferment overnight (8-12 hrs or longer (up to 24 hrs) to make more digestible).
- Next morning, punch down the dough and carefully reshape into a loose ball and place in a banneton basket in a warm place for a few hours for second rise.
- Pre-heat oven to 450 degrees and place your cast iron dutch oven in the oven for a minimum of 10 mins.
- When the dough has close to doubled in size, place a piece of parchment paper on top of banneton basket and flip the dough over and lay on a counter or island surface.
- Dust or sprinkle with flour and use a brush or your hand to gently rub the flour into the top of your dough. This will help your scoring pattern be more pronounced after baking.
- Take your scoring razor or lame and add your desired score pattern.
- Note: Try not to take too long during the scoring process to insure that the dough does not settle too much.
- Remove cast iron dutch oven from oven. Carefully pick up the corners of the parchment paper and place the dough into your cast iron dutch oven with lid on. Place back in the oven and bake for 25 mins.
- After the 25 mins, remove the lid, reduce oven heat to 425 degrees, and place the dutch oven back into the oven for an additional 20 mins.
- When the baking time is complete, carefully remove from the oven and allow to rest for 5 mins. Then place the freshly baked bread onto a cooling rack.
Notes
You can test your dough after 8 mins by stretching the dough into a thin sheet, aka the window pane method. You should see light coming through without the dough separating completely. If the dough starts to tear, place back into the mixer and continue to mix until the right elasticity and stretch are achieved.
Taste best when consumed within a couple of days. Freezes well for future meals.
Serve with grass-fed butter or cream cheese.
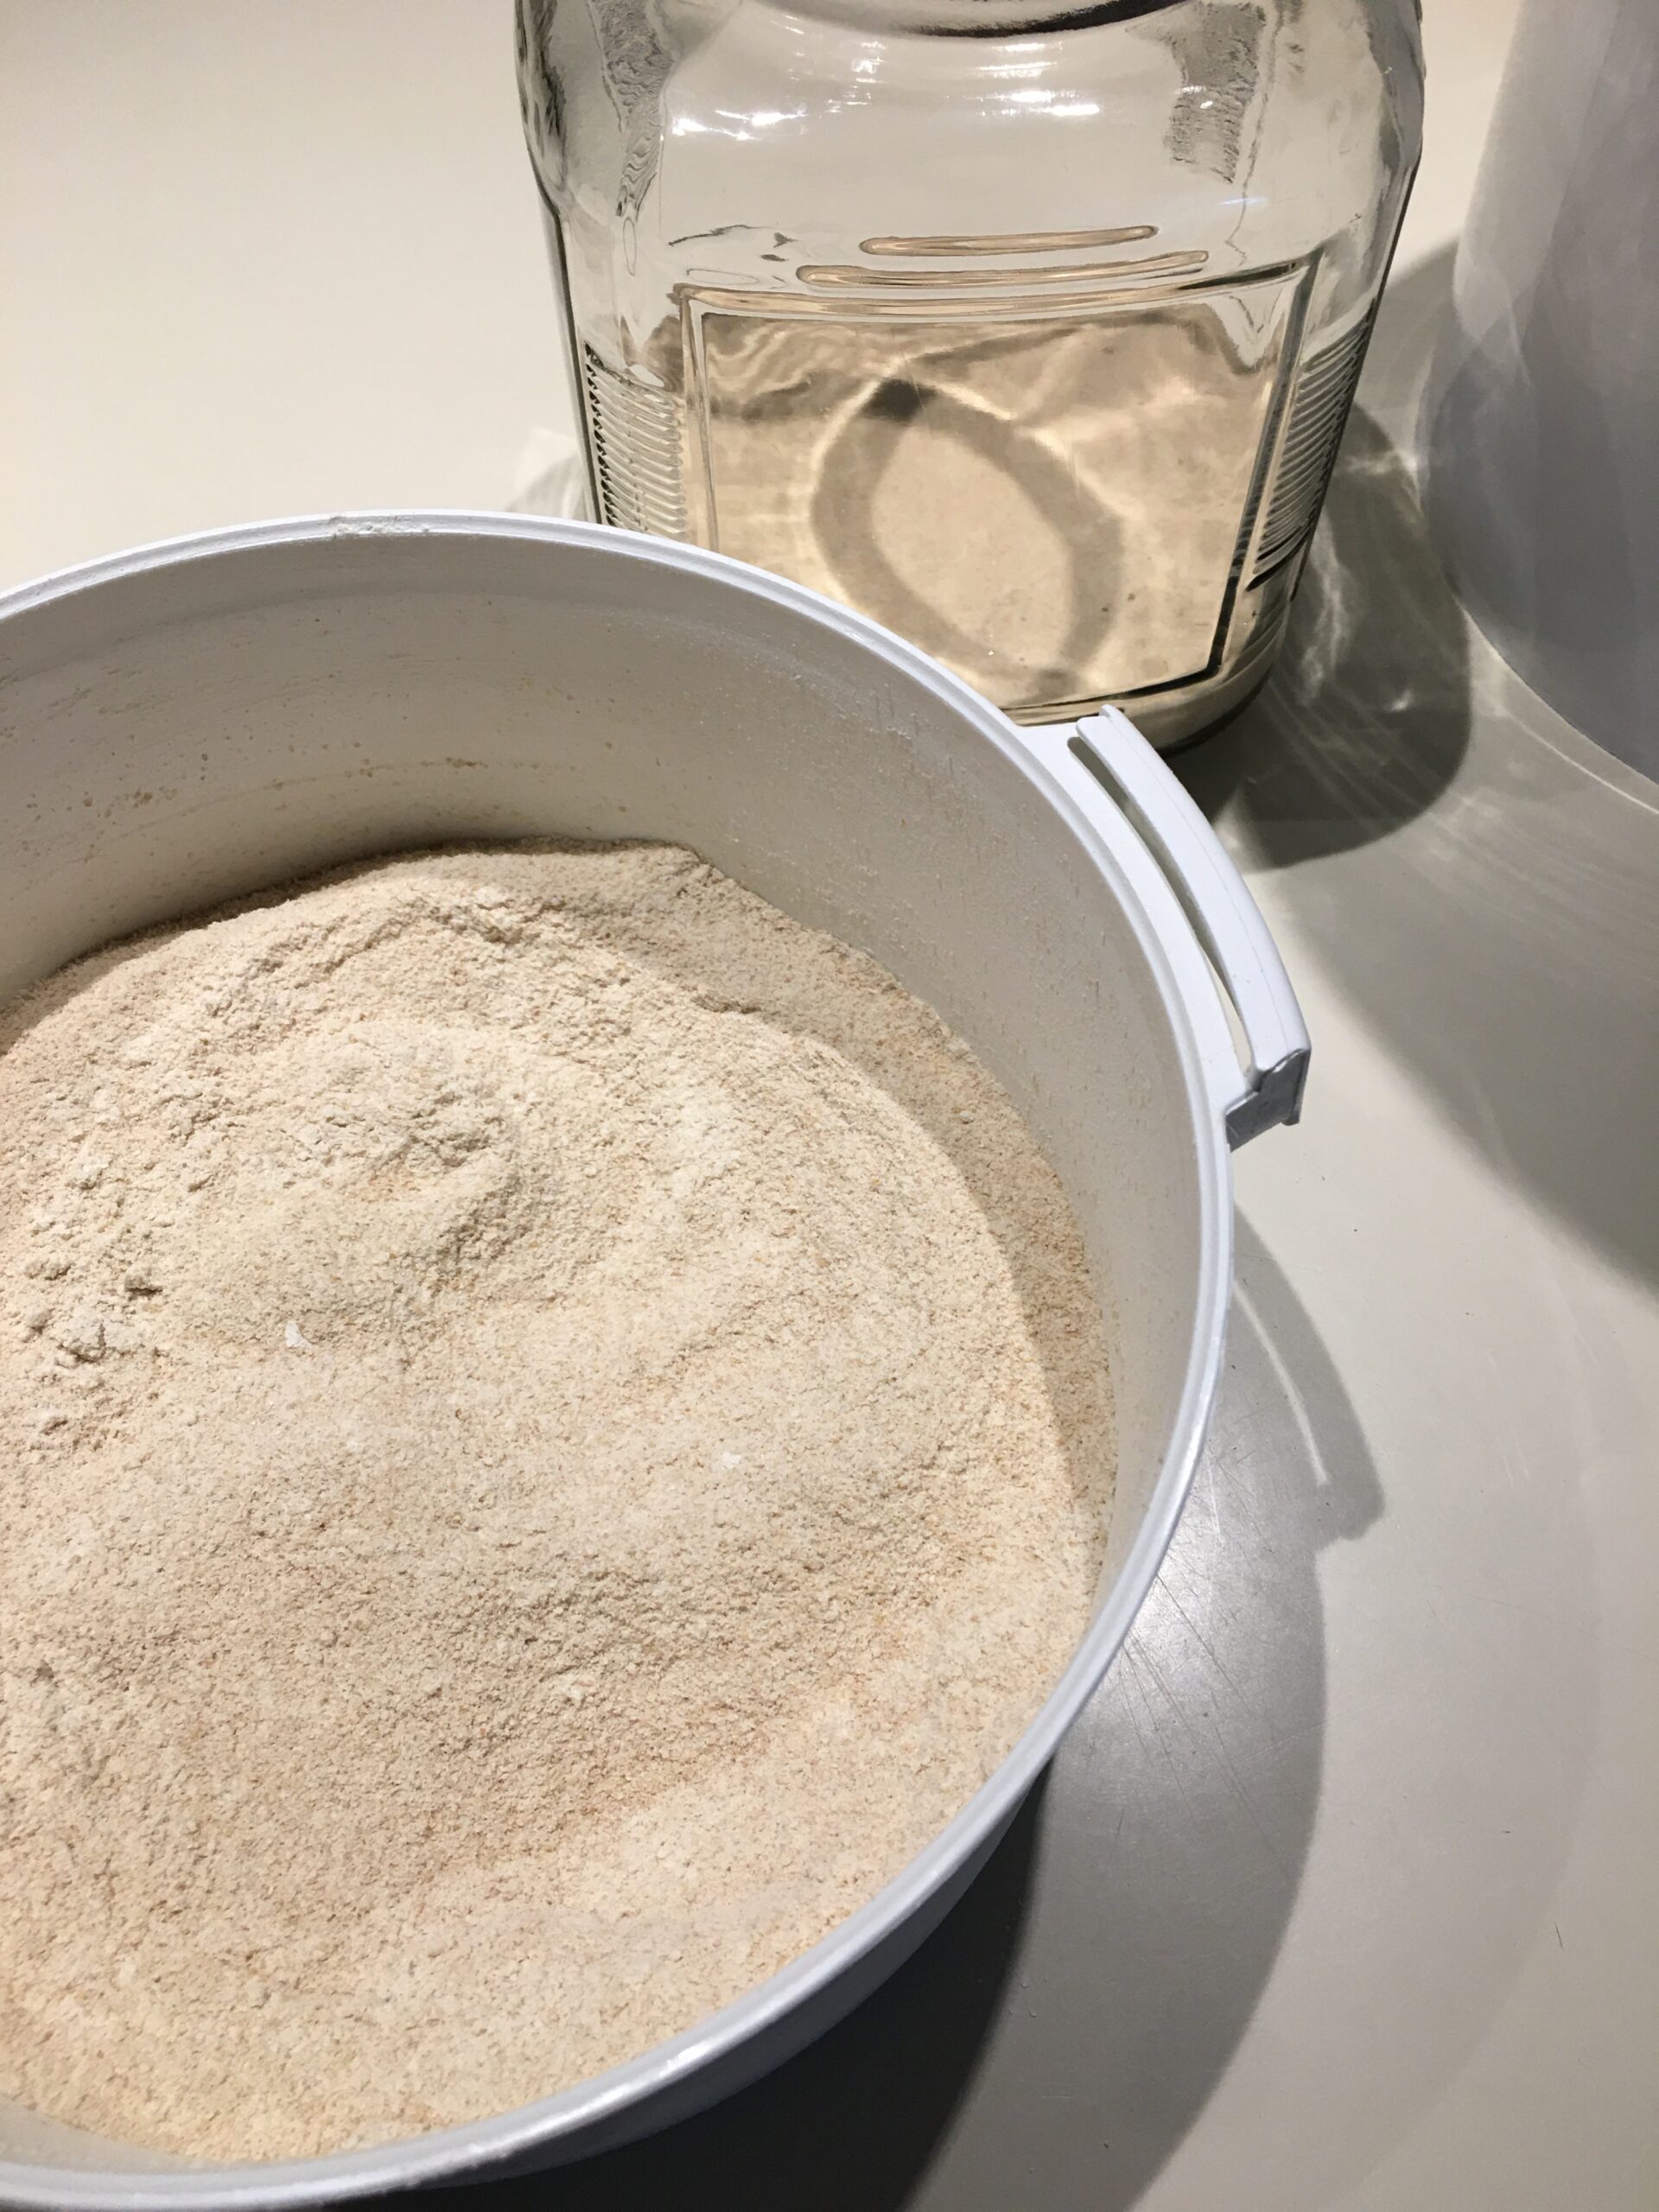
HOW TO KEEP YOUR FRESHLY MILLED FLOUR FRESH
Although, the commercially sold flour has a more stable shelf life, it does not contain a lot of the beneficial parts because they have been stripped and certain parts removed. Not to mention that after grains are milled, they start to lose their nutrient content. For this recipe, I used a combination of all-purpose flour and our freshly milled Einkorn wheat berries.
Milling our own grains at home not only has saved us money in the long run, but it, along with the long fermentation process, helps insure that we are giving our family the freshest grains we can.

For my sourdough starter, I mill some hard white wheat berries and use what I need for the current feeding. Then I place the rest into a ziplock bag and place in the freezer to keep it fresh and kill any possible larvae present. But recently, I was gifted this new Nutrimill Smart Seal product from the folks at L’Chef.
WHY I’M EXCITED TO GIVE THIS SMART SEAL A TRY
The technology of this new Smart Seal vacuum container monitors the air pressure and adjusts to compensate for the differences in temperature and pressure. It has rechargeable batteries.
So, in the event of a power outage, the contents have a better chance of staying fresh even without electricity. It is a simple design and with the touch of a button seals your food and newly milled flour, keeping the content fresher longer. Sounds promising to me! I’ll keep you posted.

Because Einkorn is an ancient grain and hasn’t been genetically modified, its gluten content affects the body differently than those modern day wheat varieties that are behind so many of our nation’s health issues.
When I don’t have enough time or didn’t plan for bread the night before, I mill our Einkorn wheat berries and forego the long fermentation process. It works well for those last minute tortillas, biscuits, and cookies.
GIFT IDEAS
NOTE: These items can be purchased individually, but Amazon also offers baking kits (like the one linked below) that are affordable and has all the items to help a new sourdough baker get started.
**These are some of the “nice to have” baking items I use often in our farmhouse kitchen.
NOTE: The Bannetons I purchased above came with a plastic bowl scraper.
Round bread lame with extra razors


More scoring practice
GRAIN MILL SALE

If you are ready to invest in a quality grain mill like our Classic Nutrimill Grain Mill by Nutrimill, make sure to keep an eye out where these powerful workhorses are sold. Shop Nutrimill.com.
PIN IT FOR LATER:

I hope that you found these simple tips and gift ideas helpful and that you will give this simple sourdough recipe a try.

Disclaimer: The health and wellness posts shared here on GracefullyHome.com are not intended to diagnose, treat, prevent or cure any illness or disease. The information provided on this blog is for general educational purposes, has not been reviewed nor approved by the FDA and is not intended to take the place of advice from your medical professional, licensed dietician or nutritionist.
You are solely responsible for your health care and activity choices. Use of any of the recommendations or helpful tools and tips on the GracefullyHome.com blog does not constitute a client-coach relationship.


Leave a Reply