Our family enjoys our homemade pizza making nights and the old recipe that I used for years was nothing complicated, but I knew that it was only a matter of time that I would make the switch to either sprouted grains or try my hand at making homemade sourdough pizza crust. Unfortunately, all the online recipes that I came across seemed like more work than I had time to do. Then I came across my fellow homesteading blogger friend’s infamous homemade sourdough tutorial on YouTube. Could it really be that simple? She literally shared her techniques and the sourdough starter did the rest. I had to give it a try and I was so pleasantly surprised at how well it turned out.

I had dabbled with making homemade sourdough from scratch for a couple of years before I finally found my sourdough groove. (smile) A sweet friend from HS had sent me some of her German Rye sourdough in the mail. It was fun making pancakes and waffles with it, but I never really got passed the griddle…until last year when I revisited this amazing and rewarding art form. You need only visit the sourdough online community to see what true artisans can make with their wild yeast starters. Their creations almost seem too pretty to chow down on, but “Hey” someone’s got to do it! (wink)
There is no exact science to homemade sourdough pizza crust and your starter may be thick like Lisa’s at Farmhouseboone.com or thin like ours here at GracefullyHome.com. With homemade sourdough starter, there will be some variations and that is perfectly fine. Don’t give up and you will eventually find your sourdough “groove” too. It is only a matter of time until your starter learns how to “play nice” in its new environment. (smile)
Lisa’s recipe is wonderful all on its own, but I discovered a few of my own techniques that I think you will be happy to give a try, the next time you have a sourdough pizza making party with the family. After tweaking our version a little, I may never make my old recipe again. This technique makes a nice thin crust pizza that holds together fabulously without a trace of soggy dough. Here is the SECRET to our perfectly non-soggy sourdough pizza. We have always used organic tomato paste for making our homemade pizzas and loved the tangy flavor. It worked like a champ on this recipe too!
PRINT THE RECIPE: HOMEMADE SOURDOUGH PIZZA

The Secret to Perfect Homemade Sourdough Pizza
Use your sourdough discard to make this simple sourdough pizza recipe that the whole family will enjoy.
Ingredients
- Fed sourdough starter
- Italian seasoning (generous sprinkle)
- Olive oil (enough to coat skillet, but not too much that it makes your pizza soggy)
- **SECRET ingredient-Tomato paste (enough to cover pizza)
- Mozzarella cheese (enough to cover your size skillet/pizza)
- Peppers and onions (diced)
- Chicken sausage links (cut into quarters)
- Garlic powder (dash)
- Grated Parmesan cheese (generous sprinkle)
- Sea salt and pepper to taste
- Cast iron skillets or pizza stone
Instructions
- Pre-heat oven to 425 degrees.
- Place pre-seasoned cast iron skillets or pizza stone in oven and heat. Note: Having an extremely hot skillet will be the key to keeping your pizza from sticking.
- While skillets are heating in oven, chop veggies and set aside.
- Next, cut your pre-cooked sausage into quarters and set aside.
- When the skillets are hot, remove skillet from oven with handle cover and add a little olive oil to coat the bottom of skillet.
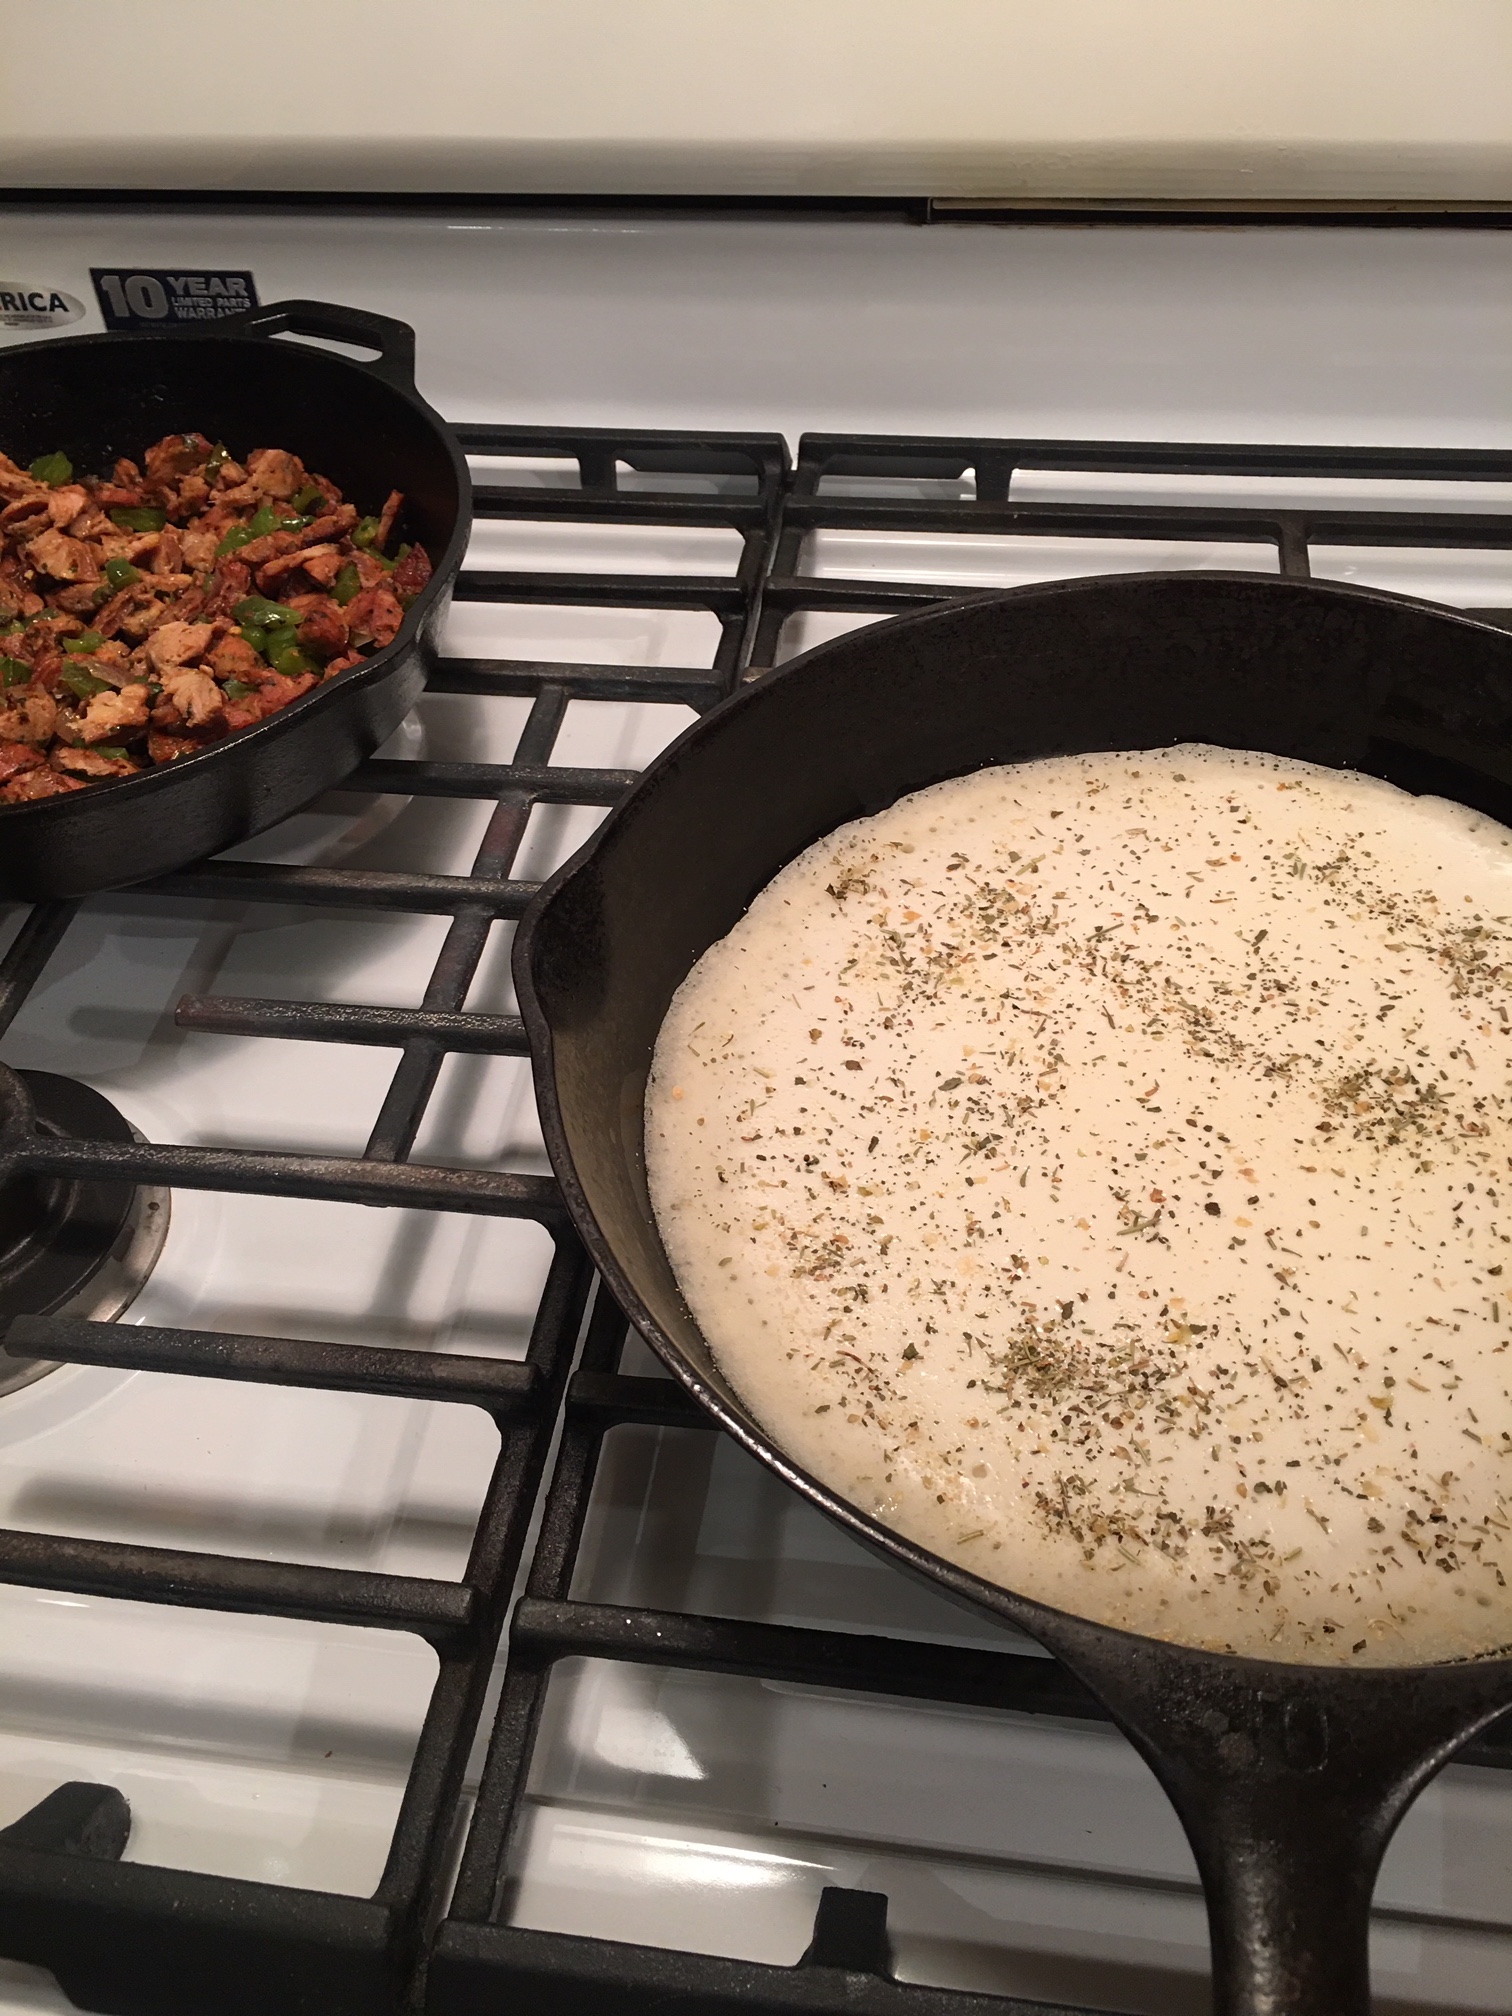
- Pour about 2 ladles full of starter into the skillet. Use the back of the ladle to help push the starter just to the edge of the skillet.
- Sprinkle with Italian seasoning and place back into oven for 10 mins.
- Next sauté veggies over medium high heat for 3-5 mins or until translucent.
- Add sausage in the skillet with veggies and cook until browned.
- After the 10 mins are over, carefully remove skillet with cooked starter and spread enough tomato paste over top.
- Add grated cheese. Spreading evenly. Try not to get on the sides to prevent sticking.
- Add the meat and veggies and a little more cheese.
- Sprinkle parmesan cheese, Italian seasoning, garlic powder, and salt and pepper on top.
- Place skillets back into oven to cook for another 10-12 minutes or until the cheese starts to brown.
- Place on cutting board, let cool for a couple of mins, slice, and serve with a fresh salad.

While the dough was baking the rest of the way in the oven, I chopped up my veggies and sautéed them for a few minutes. This not only helps make the baking process faster, it also helps some of the natural moisture from the veggies to evaporate to help prevent a soggy crust.

When the veggies were done cooking, I added the Italian sausage that we chopped up and then cooked it until brown.

This was my first attempt and it was looking so good, until I tried to use my spatula to peel it off the pizza stone. I got side tracked with one of the littles and forgot to add the oil to the stone before spooning the starter on. Lesson learned!

Thankfully, we keep our cast iron skillets seasoned and so it didn’t take long to heat them up in the oven and then pour more sourdough starter on. This time I made sure not to forget to add the oil before I poured the sourdough starter on. I just added about two ladlefuls of starter into the skillet and carefully spread it out towards the edge, but not up the side walls. It’s fun to watch the starter cook right before your eyes. Then I added the Italian seasoning and placed back into the oven.
We originally purchased our cast iron set from the Cast Iron Outlet in Pittsburgh, TN years before we made the permanent move to our homestead. It took some getting used too, but I love cooking with it now. They are so sturdy, easy to maintain, and will literally last for generations to come. We inherited a couple from my husband’s mother who most likely inherited them from her mother. You can check them out here on Amazon. Ours were not pre-seasoned which I liked because I’m not sure what they use to pre-season their skillets.
**This post may contain affiliate links. Please see full affiliate disclosure here.
PRACTICAL TIP
If you use the cast iron method, be sure to use your handle covers when the skillets are out of the oven and waiting fort the next step. This recipe moves fast and the pizzas are done in no time, so to eliminate the chances of accidentally grabbing onto a hot handle, I made sure I left a handle cover like these below on until after the skillet was placed back into the oven. Warning… Just make sure to not place the handle covers in the oven, to avoid burning the fabric. Hopefully I didn’t really need to say that, but you just never know. (smile) Safety first!

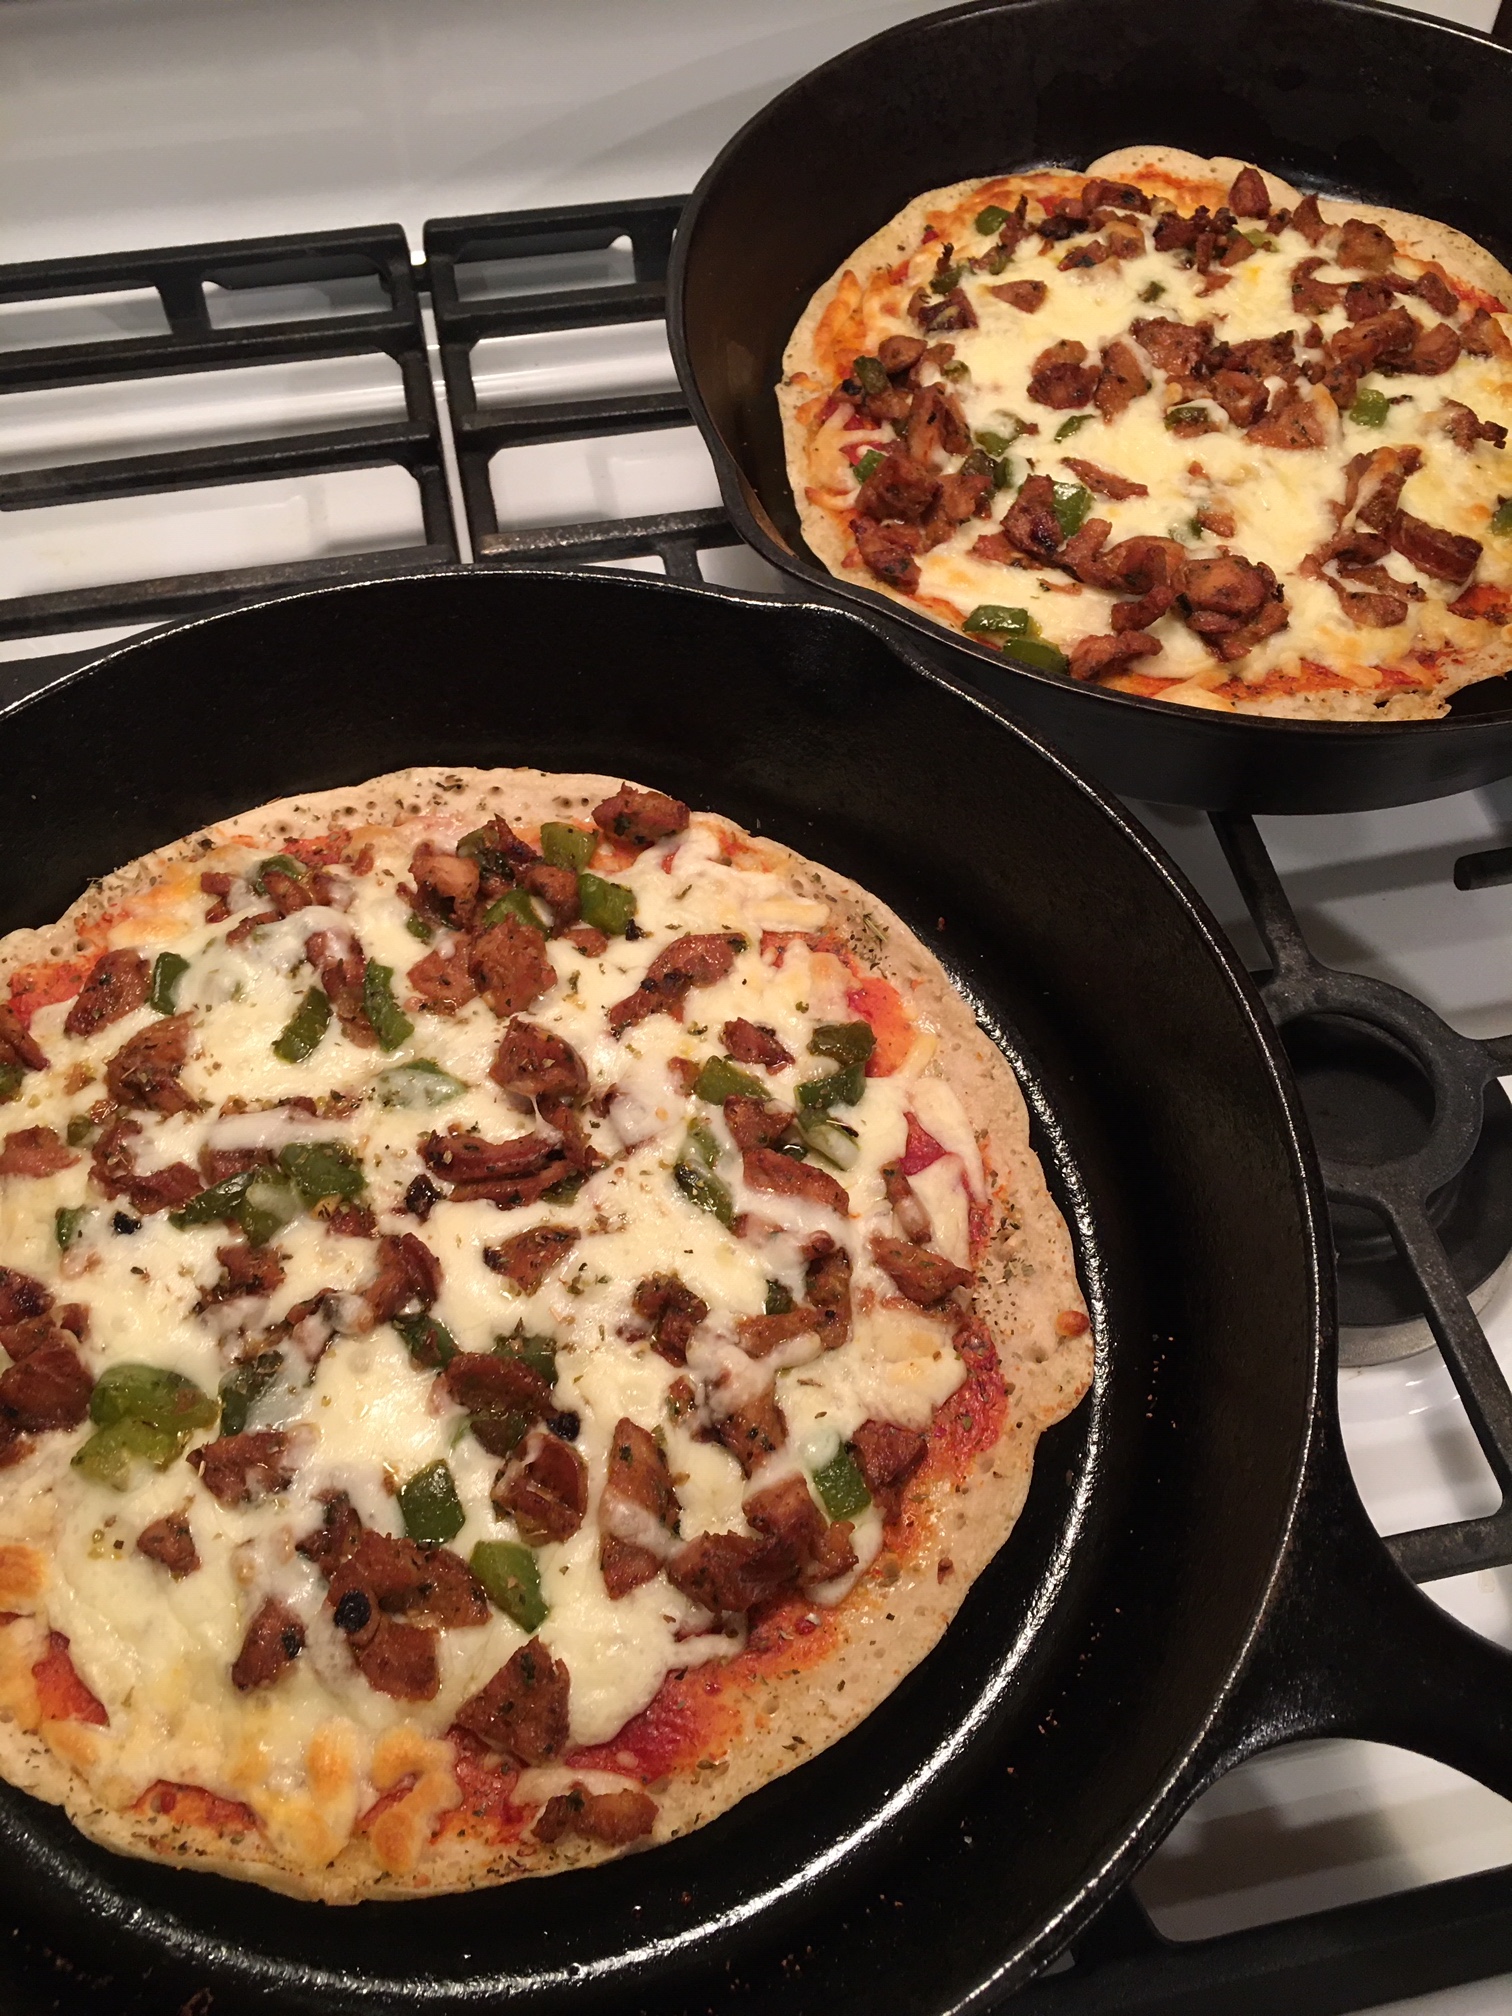
I added the herbs and spices and then a generous sprinkling of natural mozzarella cheese.

Then came the meat and veggies that I pre-sautéed earlier and then back into the oven to cook for another 10-12 minutes.

They came out perfect and they didn’t stick at all! These masterpieces slid right off the skillets.
PRACTICAL TIP
Lisa mentioned on her post that if you use traditional red sauce or pizza sauce for sourdough pizza crust, it will turn out soggy and baking it longer will not help. She shares some other delicious options for homemade sourdough pizzas on her blog at Farmhouseonboone.com. I just love natural and delicious options!

This has definitely made our simple meals recipe favorites. I am already excited about next Friday’s sourdough pizza and a movie night with the family. What about you? Have you tried homemade sourdough? If you haven’t and would like to learn how, visit this post here to learn the basics on how to get started making your own wild sourdough starter.

Note: Purchasing through any of my blog links and/or side bar buttons, helps to keep this blog running. All reviews and opinions of any items shared on GracefullyHome.com are of my own opinion and are not swayed by sponsorship or collaborations. Please keep in mind that I only share products or services that my own family have found helpful and healthful with those who visit my blog. Thank you for your support and for continuing to follow along!


This is a great recipe! Easy and super delicious. Seemed to0 good to be true, but we made it tonight and everyone loved it. Thank you!
So happy you all enjoyed the recipe, Coleen! Thanks so much for stopping by and leaving an encouraging message.