
This post is long overdue, so in honor of #Maker’sMonday, I thought I would share some behind the scenes photos of the DiY process on how we made our new library/TV room console. This is our custom version of Ana White’s barndoor console, but because our space was smaller than her free plans, we did have to adjust the measurements to fit our space. We also adjusted the height because as it was, it would be standing taller than our sound board. Apparently, that is a “NO NO!” with finger wagging type of “No No”, even! (smile)

Here is what the original measurements looked like before we figured out that it would be to gargantuan for the cozy space. Thankfully, it was a fairly easy fix and we were able to correct the numbers and press onward. And here are the original Grandy Barn Door Console plans from AnaWhite.com.
This is Ana White’s finished project. Isn’t it fabulous?! I kept the barn wood door kit for another project, since they were too long for the piece after we had resized the dimensions to suit the small space.
**This post may contain affiliate links. Read my full disclosure here.

I loved being able to work on this project with my father, who was visiting from CA. I regret having not asking him when I was younger and still living at home, to teach me all he had learned from his uncle who was a self-taught carpenter. I think my dad enjoyed working with me and seeing me enjoy the satisfaction of building something from scratch.
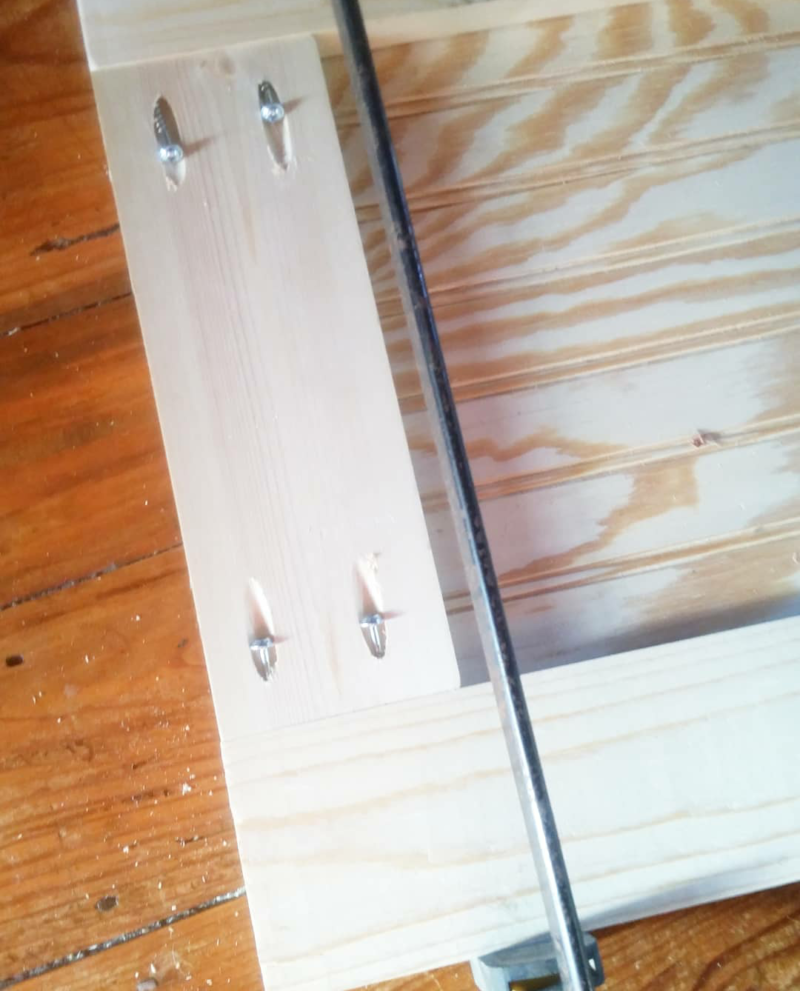
This was my first time using the Kreg Jig and I would highly recommend it. It made joining the wood boards a lot easier and sturdy. My dad had purchased the small kit several years ago to work on some farmhouse projects, but after seeing the value of this handy tool, I went ahead and purchased the next kit up and I can’t wait to put it to use building some night stands for our master bedroom and other DiY projects that are waiting in the wings.

We even enlisted the help of my nephew, who was visiting with his lovely wife. They were such a fun couple to hang out with and very knowledgeable about natural living and homesteading skills.

This is the front face of the console piece. I apologize for the grainy pictures, but the sun really was not cooperating and I had not upgraded to an iPhone just yet. (wink) Some day in the future, I would love to invest in a Canon DSLR camera and perhaps take a photographer course to be able to take fabulous photos of our farmhouse projects and homestead living moments.

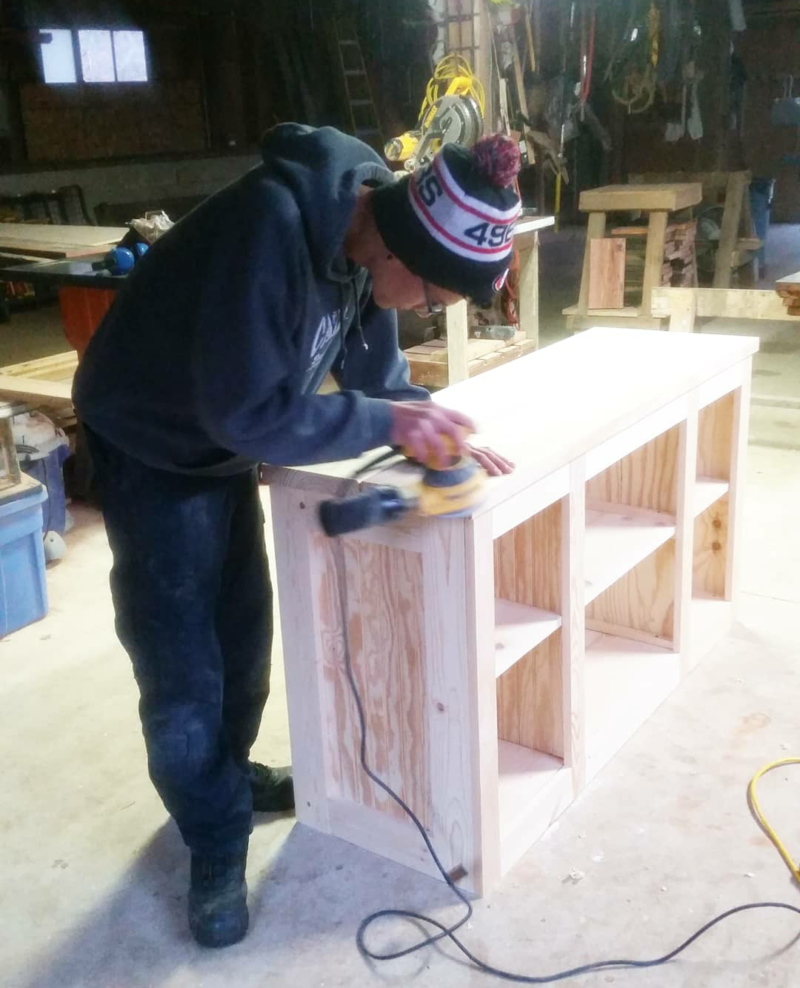
This is the picture after we had resized and sanded the piece. Not bad if I do say so myself! (smile)
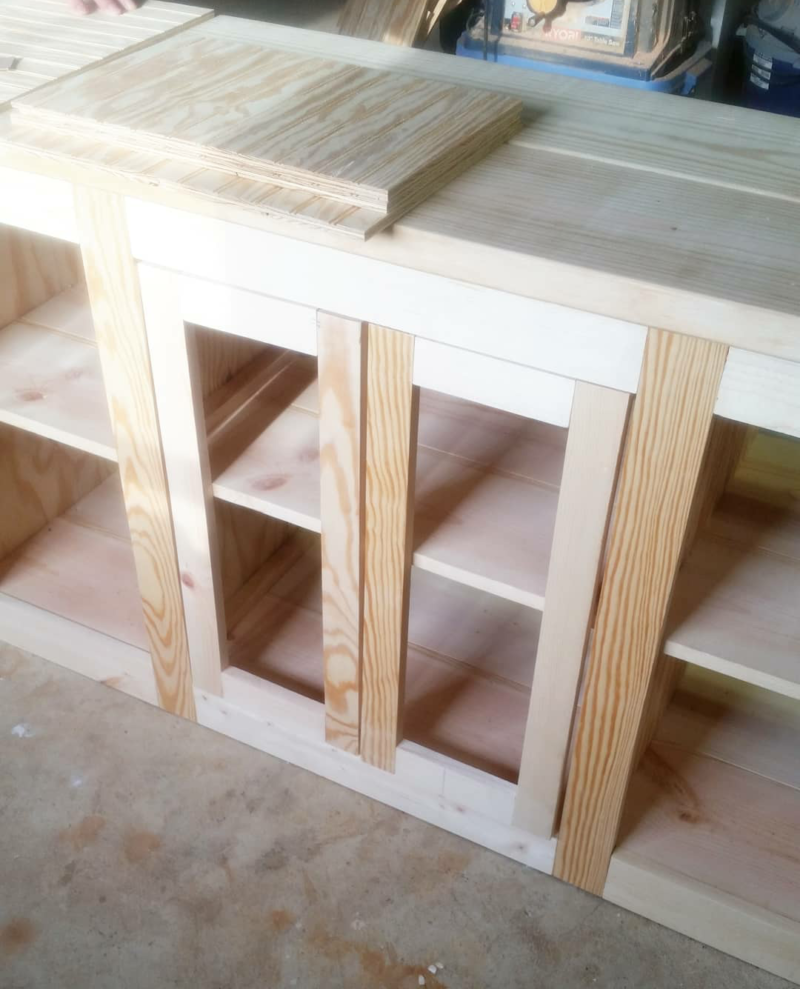
Here are the door panels that we made. At first, I thought about adding burlap and chicken wire to the front, but then my dad went ahead and cut some beadboard down to fit in the panels. My husband joined in and made some molding that really make it look more custom.

During my folks visit, my dad turned 79 years old and although he is getting up there in age and starting to feel it, I think this project really gave him something to look forward to each day. That, and hanging out with the grandchildren who adore him. (smile)

Here’s the moving crew, aka as my nephew and hubby (smile), bringing the almost finished piece up to its new home in the library/TV room.

Here is another picture of the front side before I added more headboard on the inside of the console and installed the beadboard back panel.

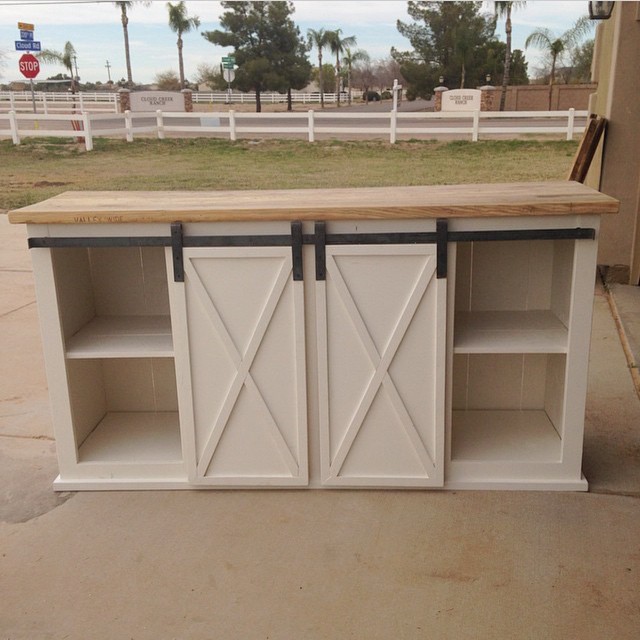
And here she is, waiting for her doors to be painting and installed. It also needs a coat of primer and I need to still find some baskets to fit the cubbies and hide the DVDs. I have a feeling that will be a custom DiY project as well. I’ll share an updated post after I get it completed. Hope you’ve enjoyed seeing the process of making this fun piece. It was fun making memories with my dad, nephew, and husband. This little console idea ended up being a true “family affair.”
Until next time, if you build it, they will come! (wink)

Isaiah 26:3-4


Leave a Reply