When you first embark on your own sourdough baking journey, it can be intimidating!
Questions like, “How long does it take to grow a starter? When can I expect to see some active bubbling? Is it supposed to have a dark pool of liquid on top? What do I do with the discard?” may be racing through your mind.
So many questions and so many artisan examples on the internet to make any new beginner, feel totally out of their league and wondering if it is even worth all the time and effort that goes into this art of sourdough baking.
If this is you, I know how you’re feeling! Because that was me when I first dove into the world of all-things sourdough! But trust me when I say, “It does get easier!” And the simple health benefits that homemade sourdough offers, alone, makes it SO worth it!
WHY SOURDOUGH
Bread has been around for centuries. So, why the bad rap now? Well, this is due in part to how baking practices have evolved over the years. Convenience replaced the healthy ingredients with the artificial and chemically laden versions. Only, in the process of making things “better”, we have lost a lot of the health benefits that used to accompany home cooked meals around the table. Convenience has made us the generation of drive-thru windows and fast “food” meals, which have in turn, made us more toxic and more sick than ever.
WHAT ABOUT STORE BOUGHT SOURDOUGH
Many store bought sourdough products are not the same as long fermented dough made from wild sourdough starter. They use commercially made yeast and therefore, store bought sourdough is made in bulk and made fast to keep up with demands. It lacks all the benefits you would receive from the long fermentation process.
There are some natural brands that do offer long fermented sourdough options and doing a little research can help you find those you can trust.

BACK TO BASICS
There has been a resurgence of natural health enthusiasts, like ourselves who have been relearning the art of bread making from scratch. That includes making their own sourdough starters which has been an integral part of bread making at home for generations. This simple fermentation process helps to break down and neutralize the phytic acid (about 90%) present in most grains, beans, seeds, and nuts.
HOW SOURDOUGH IS DIFFERENT
Traditional sourdough bread is fermented for periods of 8-12 hours and in some recipes, for longer than 24 hours. The long fermentation process allows for the yeast and bacteria to have time to thoroughly digest the natural sugars and carbohydrates present in the flours. This is why some folks who have gluten issues find that they are able to tolerate sourdough without any flareups or negative issues.

KEEP IT SIMPLE
Over the past twenty plus years of living more naturally, we have learned countless lessons from our homesteading journey. From making most of our meals from scratch, to growing some of our own food, preserving the harvest, and caring for our growing number of farm animals, we have discovered that simplifying and going “back to basics” is the BEST recipe for natural living success.
Our sourdough making is no exception! I used to stress over achieving the best artisan looking bread, but you know what? Even those loaves that didn’t look the most “Instagram-worthy,” tasted amazing and was nourishing for my family. These days, I find myself not sweating the small stuff and trying to enjoy more of the journey of learning along side my family.

A recent example of not sweating the small stuff, was when I found myself on Christmas Eve, wanting to make sourdough pancakes for breakfast, but discovering that I didn’t have quite enough discard stored up in the fridge to make a batch large enough for the family to enjoy.
I almost moved on to Plan B, which was our standard farm fresh eggs and wild bacon, and maybe some cast iron organic potatoes or a side of our homemade sourdough bagels. BUT, then I remembered that I had seen a blog post on making Sourdough Dutch Baby Pancakes (aka “German Pancakes”) come through my feed the other day.
I found several recipes to choose from on the internet and they all had common amounts of egg, starter, milk, butter, and sweetness ratios. So, with a little bit of tweaking, I was able to whip up a cast iron full of this fluffy and delicious new family favorite!
**This post contains affiliate links. Please see full affiliate disclosure here.
PIN IT FOR LATER:

SUPPLIES YOU MAY NEED
- mixing bowls
- spatula
- measuring cups and spoons
- 12 inch cast iron skillet (we have a slightly smaller one that we got from the Lodge Cast Iron outlet store)
- whisk (I like to use a Danish whisk)
If you give this recipe a try and love it, I sure would appreciate you giving it 5 stars! Thank you.

Sourdough Dutch Baby Pancakes
Love making homemade sourdough, but don't know what to do with your discard? This simple sourdough Dutch Baby Pancake recipe is simple to make and doesn't require an extra long fermentation process.
Ingredients
- 7 eggs
- 2c sourdough starter (active or inactive)
- 1/3c whole organic milk
- 1/2 tsp sea salt
- 2 tsp pure vanilla extract
- 3T pure maple syrup
- 6T real butter (we like to use grass fed)
Instructions
- Pre-heat oven to 425 degrees. Once heated to appropriate temperature, place a 12 inch cast iron pan in oven with your pats of butter, until the butter is melted, but not burnt.
- Mix remaining ingredients in a medium sized mixing bowl to make the batter.
- Next, pour the batter into the pre-heated cast iron skillet.
- Bake for 20-25 mins or until golden brown on top and the eggs are thoroughly cooked through.
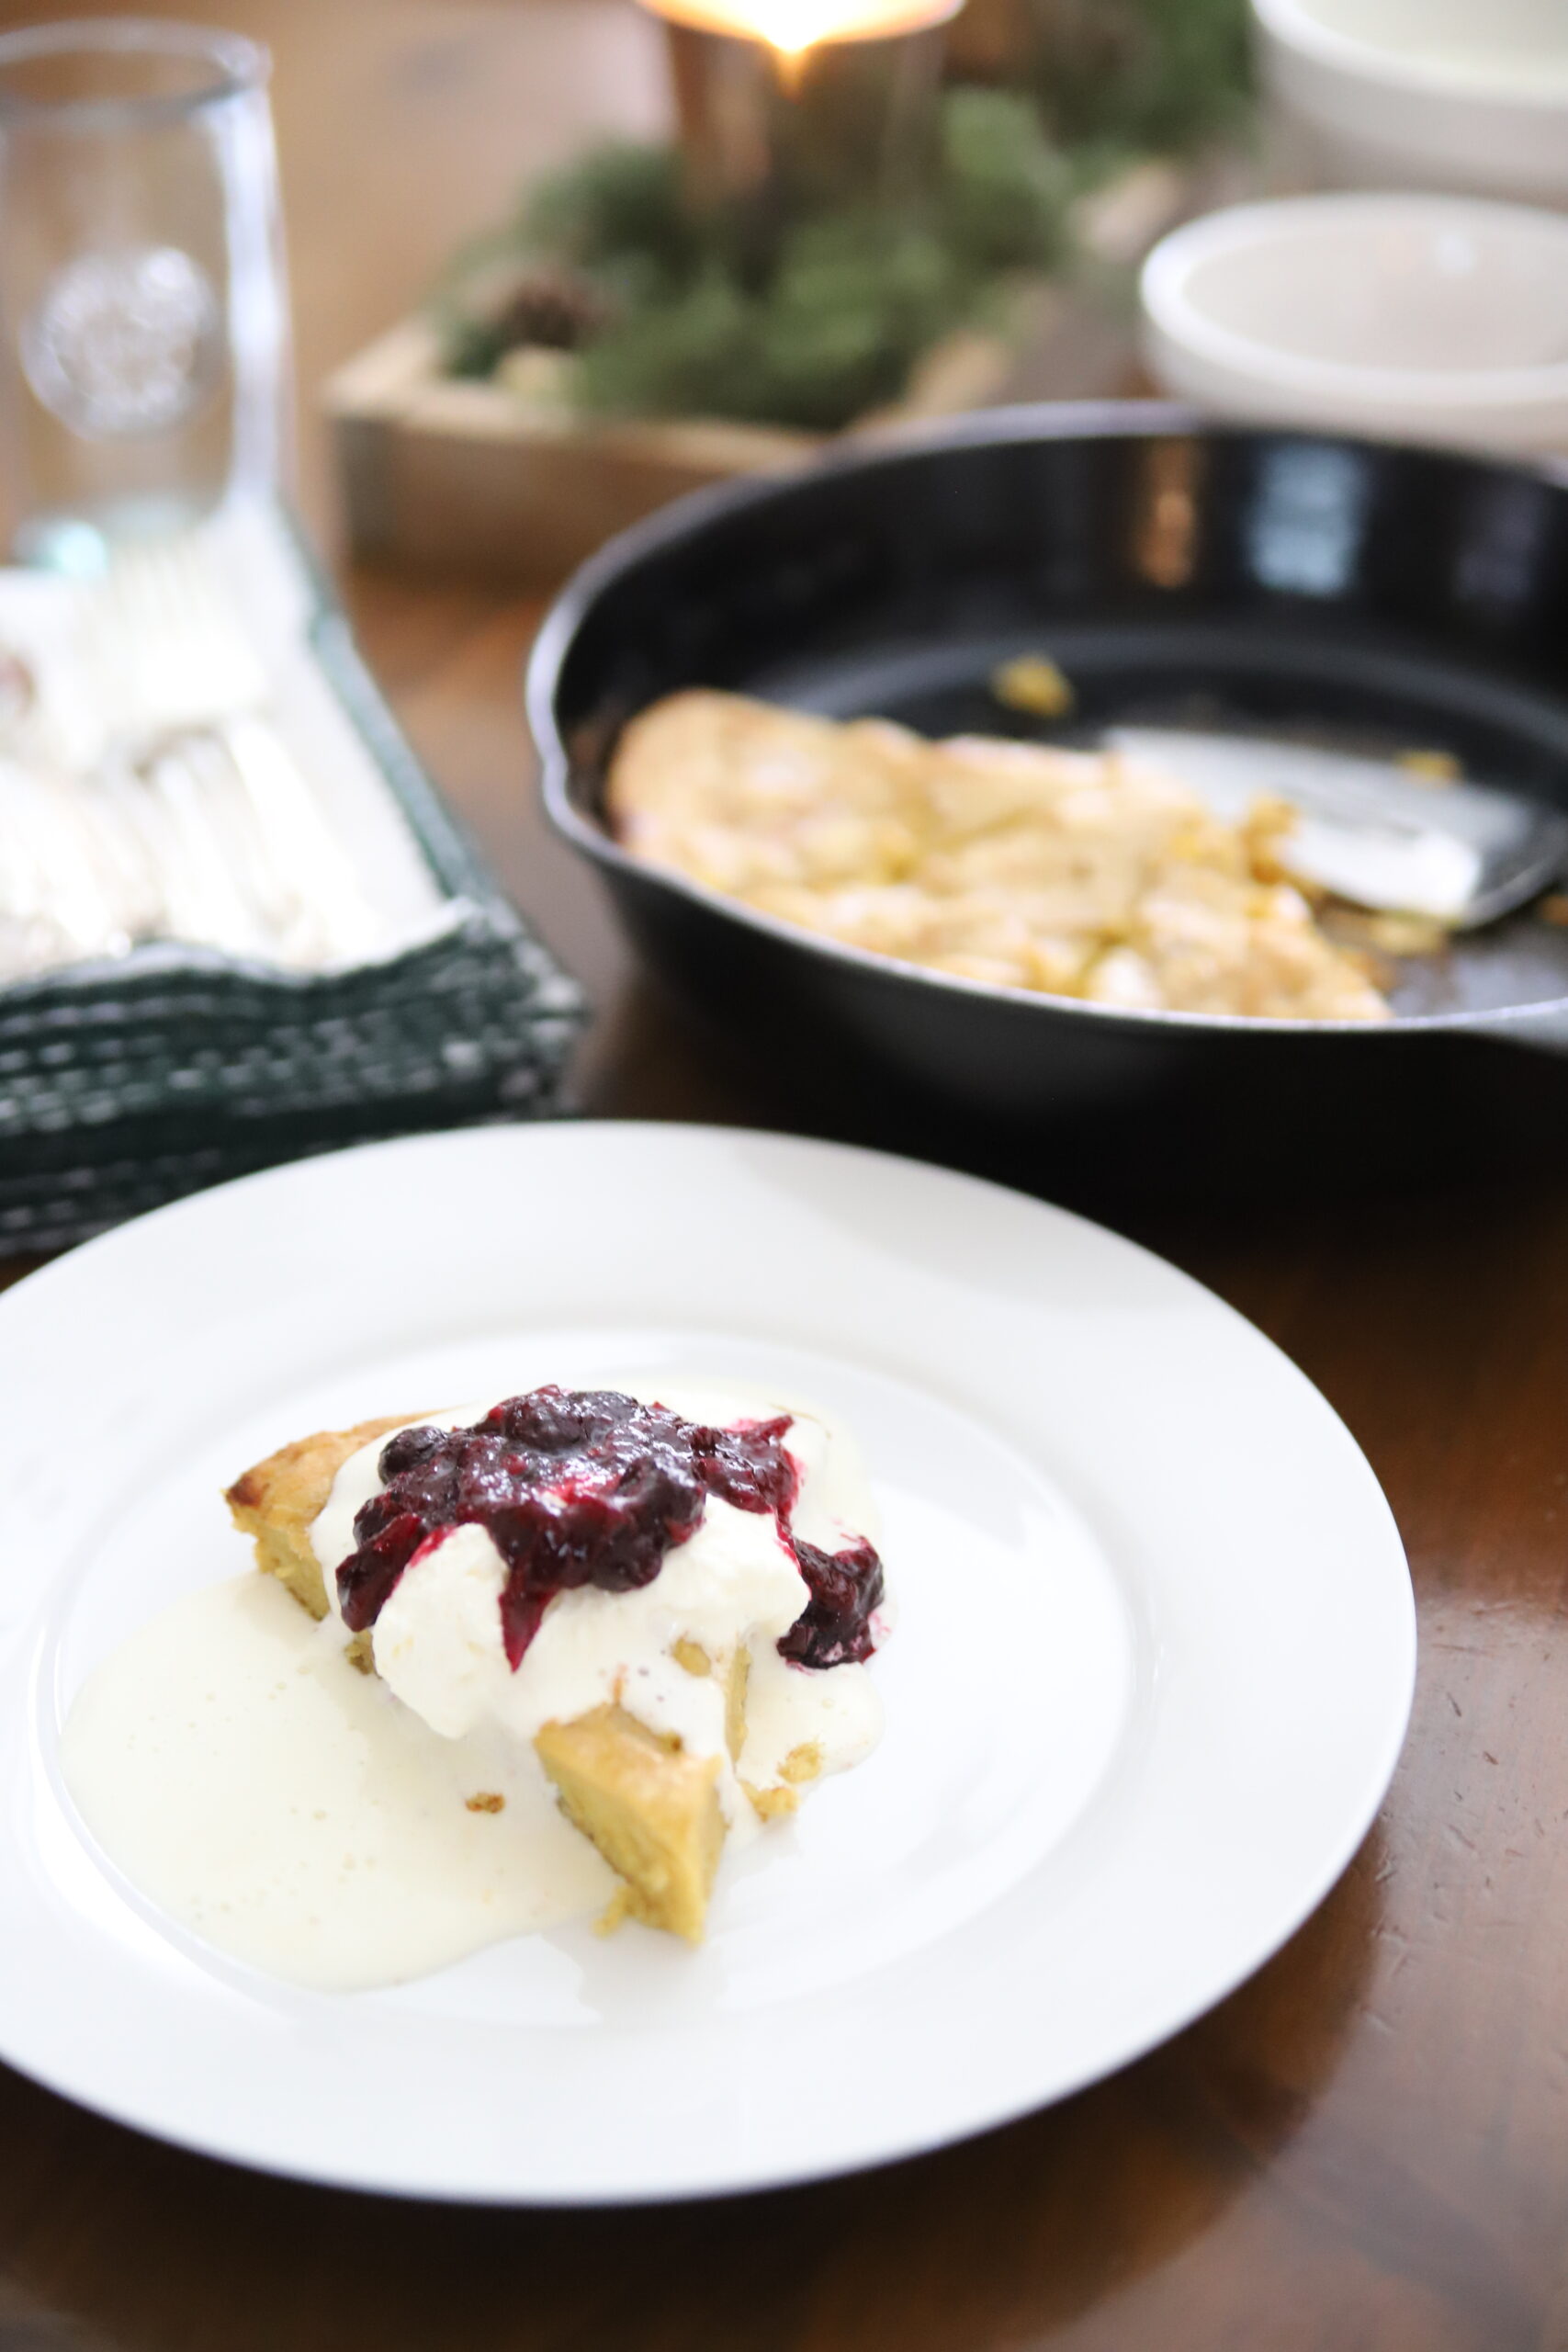
- Top with homemade whipped cream and warm mixture of berries or fruit of your choice and drizzle with pure maple syrup.
Notes
Make sure your cast iron skillet is nice and hot for best results.
Can be used with an active starter or inactive discard.
Can be dusted with powdered sugar for a more festive look.
The pancake will deflate upon removing from the oven.
Best served right out of the oven and while still hot.
OTHER TOPPING OPTIONS
SIMPLE HOMEMADE WHIPPED CREAM
With handheld mixer, whip a carton of organic heavy whipping cream with a couple tablespoons of pure cane sugar, sucanat, maple syrup, or sweetener of your choice.
Whip until soft peaks form.
FRESH BERRIES
Top with seasonal berries and dust with powdered sugar.
WARM FRUIT JELLY
Add frozen berries to a small pot and cook on medium to medium low heat. Add honey if desired and cook until the fruit juices make a jelly like compote.
We will definitely be making these again next year. Enjoy!


Leave a Reply