It’s no surprise that my family loves making fermented and cultured food at home. Fermented foods are great for getting your daily dose of beneficial probiotics that are crucial for good digestive and mental health. If we could, we would have a Jersey cow already so that we could have fresh raw organic milk to make homemade yogurt, soft cheeses, and make larger quantities of our Kefir milk/cheese. For now, though, we will need to be patient a little longer as we continue to update areas of the farm that need some major TLC.
So, in the meantime, we continue to help naturally supplement our healthy meals with some added support from these amazing fermented and cultured foods. Sauerkraut is an easy fermented food that doesn’t cost a lot of money for start up and is so simple that anyone can make it at home. We have been making homemade sauerkraut for years and I have to say that I prefer the purple cabbage the best. There is just something about the bright colors of naturally grown foods that make my mouth water. (smile)
Sauerkraut not only taste amazing on sausages and hot dogs, but it goes great on salads and in soups. It contains vitamins B and C and because of the fermentation process, these are more bioavailable in sauerkraut than the regular cabbage straight out of the garden. It also offers powerful antioxidants that can help support your eyes.
Now that we know how beneficial sauerkraut is, let’s take a look at how simple it is to make this at home and start getting the healthful benefits sooner, rather than later.
**This post contains affiliate links. Please see full affiliate disclosure here.
SUPPLIES YOU WILL NEED
-1-3 Clean Mason Jars (I use the 64 oz half gallon size, but you can make smaller batches in the quart size jars too. These are available at Walmart in boxes of 6.)
NOTE: For larger batches, I use our food processor to make the process go a lot faster and give us a more finer cut. This also helps cut down on the water squeezing process. The food processor helps promote some of the water to release without even squeezing by hand.
-Clean counter
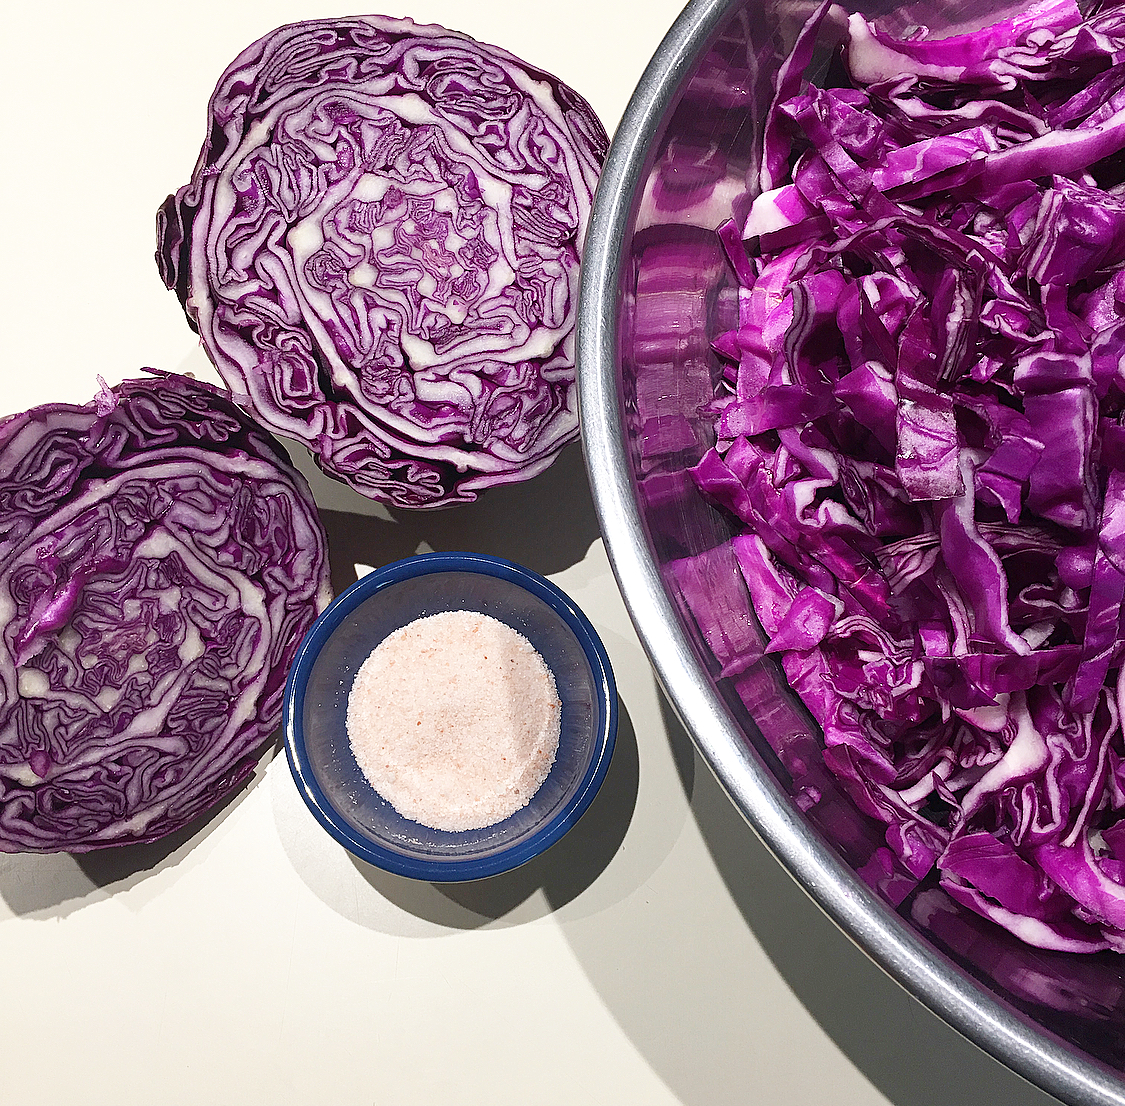
-3-4 heads of fresh organic cabbage (ranging from 3-5 lbs total)
-Clean knife (I like the Santoku kind for chopping and coring)
-Clean wooden cutting board (When you chop, sometimes chards can come off, so I shy away from plastic cutting boards because wood would be easier to digest if any found its way in)
-Clean dishcloth (For wiping spills and rim)
-2-3 Tablespoons of Pink Himalayan Sea Salt or Celtic Sea Salt (Note: For 5 lbs of cabbage, use 3 T of sea salt. For 3 lbs of cabbage, use 2 T)
-Clean large bowl (Large enough to be able to work your hands around.)
-Clean canning funnel (I use this one here for canning and fermenting.)
-Fermentation weight (The ones we use are unavailable, but this one is very similar here. I chose one that is lead/cadmium free.)
-Small Mason Jar (Use as a weight to keep the sauerkraut submerged under the liquid)- optional
-Air lock lid (I received mine from MasonJars.com)- optional
UPDATE: These days, we have found these fermenting lids here to be extremely simple and easy to use.
Simple Homemade Sauerkraut
Fermented foods are great for getting your daily dose of beneficial probiotics that are crucial for good digestive and mental health.
Ingredients
- 3-4 heads of fresh organic cabbage (ranging from 3-5 lbs total)
- 2-3 Tablespoons of Pink Himalayan Sea Salt or Celtic Sea Salt
Instructions
- Weigh cabbage heads individually to determine the amount of sea salt to use.
- Rinse cabbage heads.
- On a clean wooden cutting board, cut the cabbage in half and cut in a "V" shape around the bottom to remove the hard stem at the base.
- Next, slice thinly until the whole cabbage is in shredded form. (You can also use a food processor with grater or use a box grater to get a more even end product.)
- Place the shredded cabbage in a large bowl and add the sea salt.
- Begin mixing, squeezing, and kneading the cabbage for about 10 mins. The more you squeeze and massage the cabbage, the more water will come out.
- Once you have a good amount of water accumulated and the cabbage is nice and tender, transfer to a clean Mason Jar. (Using a canning funnel will help cut down on mess.)
- Add fermenting weight or a piece of the outer layer of the cabbage (pre-cutting) and press down until the cabbage mixture is submerged under the brine.
- Place fermenting lid and canning ring on and screw to the top of the jar.
- Place your filled jars in a pyrex casserole dish or on a baking sheet to catch any spills that occur during the fermenting process.
- Let ferment in a dark cool area and test around day five. Can ferment longer up to 3 weeks, if desired. (We like the taste of about 2 weeks.)
- Once the fermentation process is complete, remove fermenting lid and cap with regular canning lid and place in refrigerator.
- When stored in fridge, it should last up to 6 months.
Notes
For 5 lbs of cabbage, use 3 T of sea salt. For 3 lbs of cabbage, use 2 T

The first thing I did was clean my prep area. We use white vinegar as an all purpose cleaner. If we are feeling fancy, we may add a some drops of essential lemon or peppermint oil into the spray bottle. I made sure that my bowls and utensils were also clean. No brainer, right?!
Next, I rinsed my cabbage and cut it in half. I cut off the hard part at an angle where it was attached to the stem. No fancy terms here! (smile) Then I cut the cabbage into thin slices to create the shredded pieces. You can also use your food processor with the grating blade to shred faster. If you don’t have a food processor, you can also use a regular box shredder and shred the pieces like that. I think cutting it does just fine, though. The simpler, the better and less clean up.
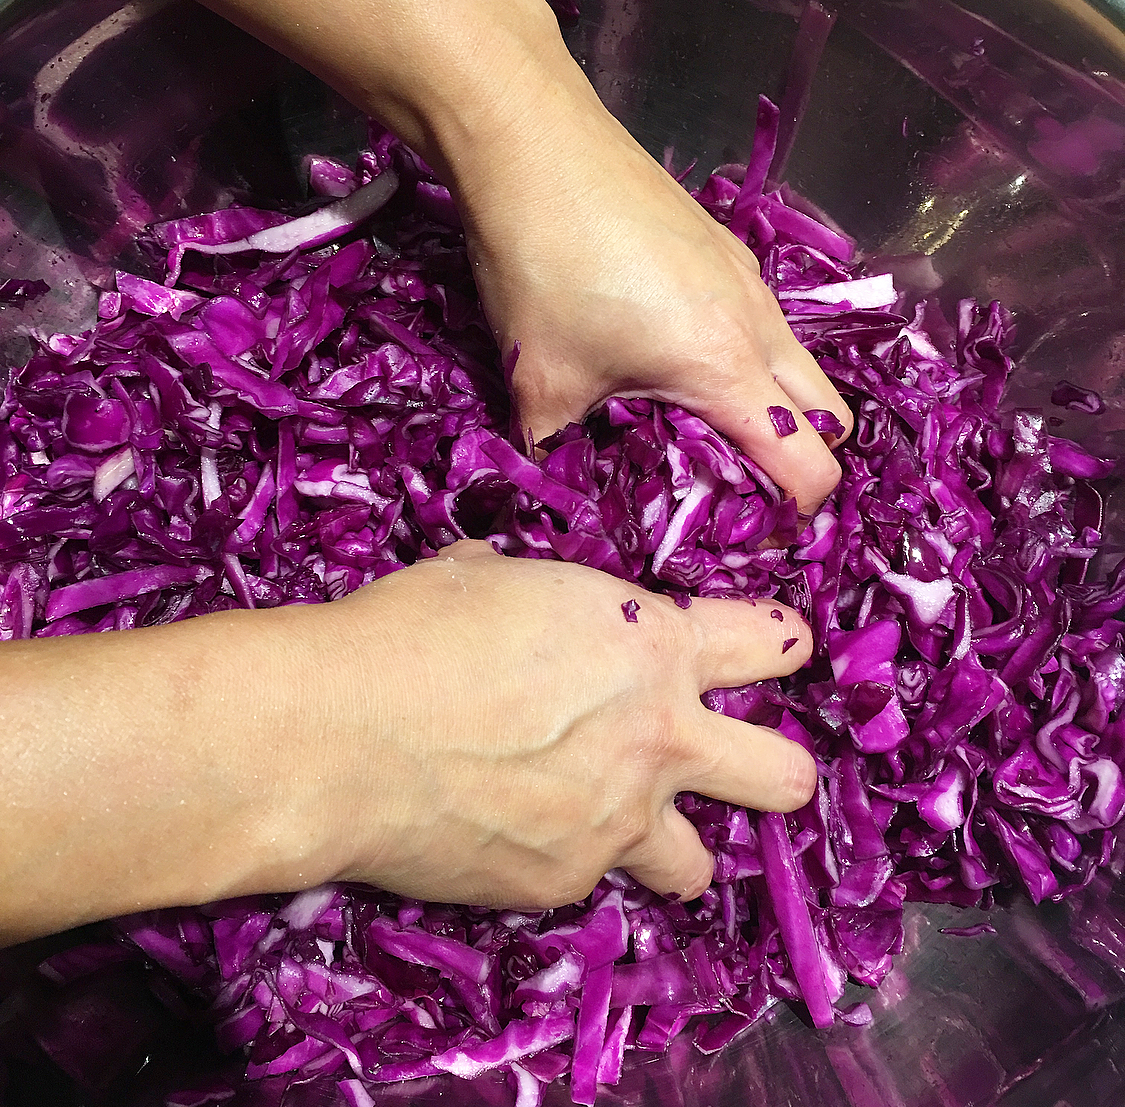
Next, I placed the shredded cabbage in the bowl and added the salt. I mixed, squeezed, and kneaded the cabbage for about 10 mins. The more you squeeze and massage the cabbage, the more water will come out. It is amazing how much water is in one head of cabbage!
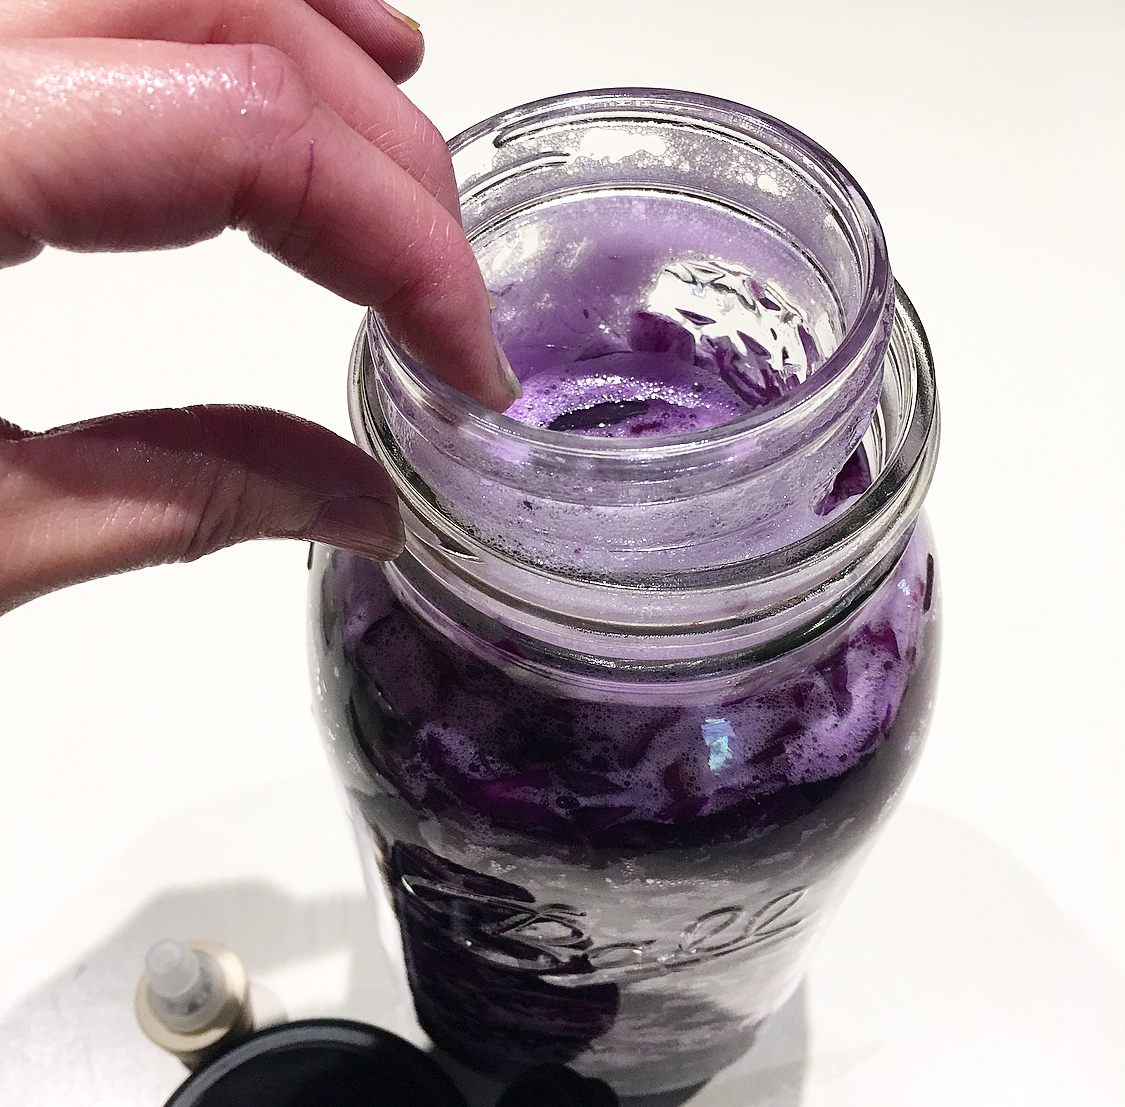
Once I had a good amount of water accumulated and the cabbage was feeling tender to the touch, I transferred it to the Mason Jars. The canning funnel makes it easier to get the cabbage into the jar without as much overspill. Then I added the small jar as the weight. Having a weight can help prevent unwanted bacteria or mold growing by helping to keep the cabbage submerged in the brine.
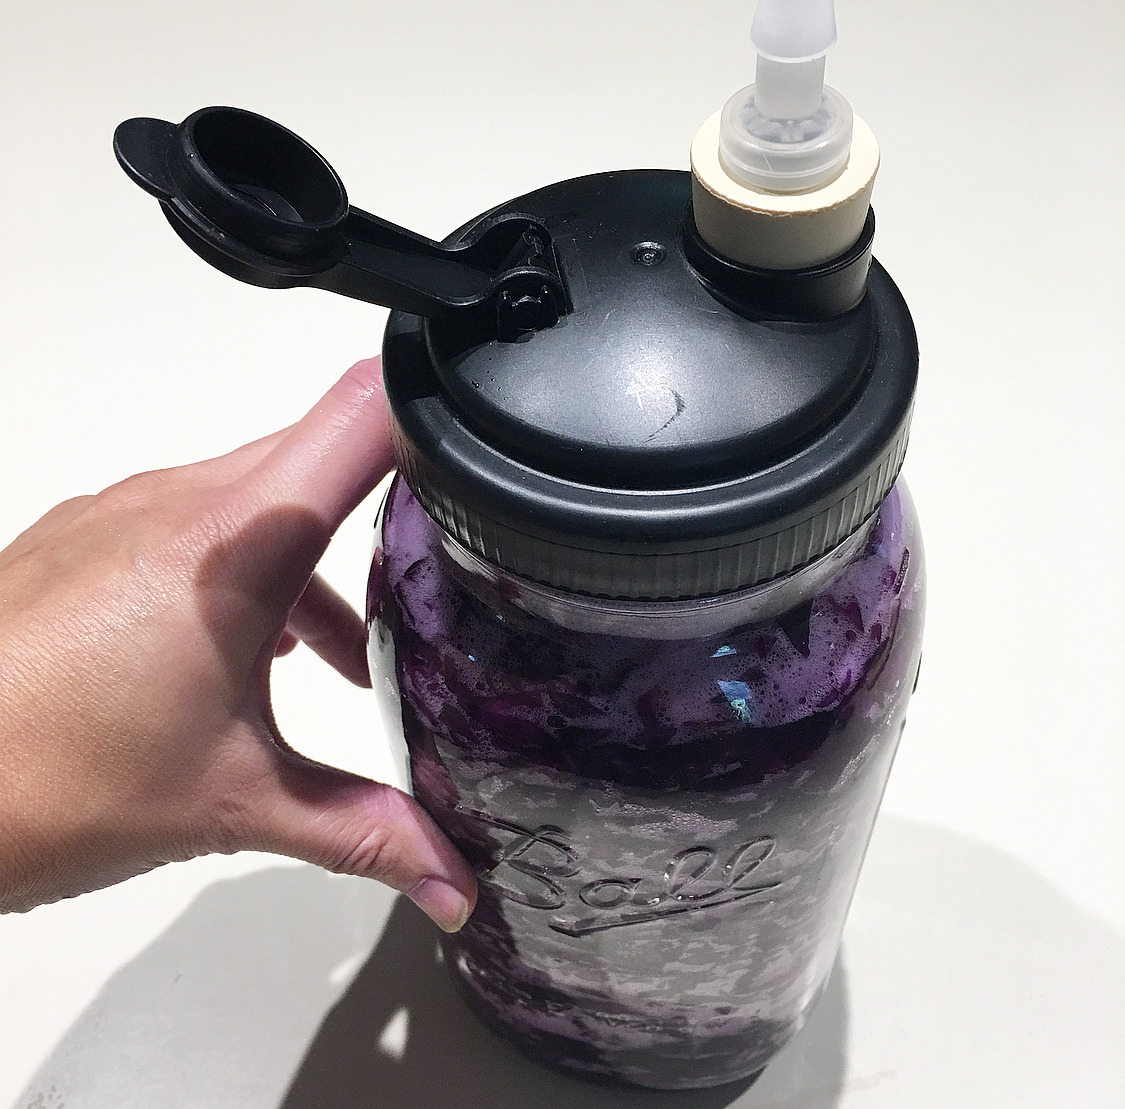
The last part was to add this nifty lid and reCap fermenter (valve) from MasonJars.com. I have noticed using this tool gives me a good batch without any risk of growing mold. If you are making your own sauerkraut batch at home and don’t have the reCap fermenter, you can easily use a clean dish towel or cheese cloth with a rubber band around the neck of the jar. After putting the lid on, I simply placed it in a dark, cool place and now we wait at least 2-3 weeks to have our first taste test.

PRACTICAL TIP
Make sure to place a cake pan or pyrex baking glass dish under the jars to catch any spillage during the fermentation process. Depending on your home’s temperature, the times for fermenting may vary slightly. It ranges from 5 days-3 weeks. At the end of 5 days, sample a little and see how you like it. If you want it to be more zesty, place it back in the cabinet until desired tanginess OR if you find it to your liking, you can STOP the fermentation process by placing the jar in the refrigerator. It should keep for at least 6 months in the fridge.
NOTE: Purchasing through any of my blog links and/or side bar buttons, helps to keep this blog running. All reviews and opinions of any items shared on GracefullyHome.com are of my own opinion and are not swayed by sponsorship or collaborations. Please keep in mind that I only share products or services that my own family have found helpful and healthful with those who visit my blog. Thank you for your support and for continuing to follow along!

This post was updated: January 2022


Leave a Reply