I look forward to learning new gardening techniques each year. This year is no exception and it’s only the start of planting season, here in middle TN. (smile) Some years, have produced more fruit (literally) than others. My love of gardening began early in our homesteading journey. We joke and call ourselves “accidental gardeners” because one year, we kept a compost pile in our army post back yard and it produced potatoes, sunflowers, and tomato seedlings without any help from us. Hahaha!
OUR GARDENING JOURNEY
There is so much beauty and excitement to watch a tiny seed go through its’ life cycle. It has been a wonderful visual aid for our little homeschoolers over the years. Watching God’s handiwork in action makes us all the more grateful for the endless bounty that He provides each day. Growing a garden doesn’t have to be fancy or magazine-worthy like Joanna Gaines or those who get featured in Country Living. Over the years, we have had gardens in terra cotta pots and cedar boxes made from scrap wood. We have grown our veggies in raised beds, galvanized buckets, and this year, we will be trying our hand at growing a harvest in feeding troughs.
Some fruits and vegetables have done better than others. I have yet to have a huge tomato harvest in the hollow, so this year I am hoping that the tides will change for us. In the past, our tomatoes seem to do well and then horn worms come out of nowhere and decimate our plants. I have a feeling this is our year for a stellar crop. Our secret weapon is a very popular trellis technique, called the “Florida Weave.” The Florida Weave is popular for a reason and works well with determinate or “bush” tomatoes that are compact and grow typically to 3-4 feet in height. It is an effective way to trellis your determinate tomatoes without a lot of effort and it’s likely that you already have all the supplies or most of them to get started today.
BENEFITS FOR USING THE FLORIDA WEAVE
- Allows good air flow (circulation) between plants which helps prevent disease.
- Twine or rope helps to keep the leaves more upright and off the ground. This reduces susceptibility to disease and becoming some critters lunch.
- Simple and easy to install and easy to find supplies. You may even have all that you need already in your garage or storage shed.
- Allows for even ripening.
- Easy to clean up at the end of the season and if you choose to use natural rope like sisal, jute, or twine, they are biodegradable and can be left right in place on the soil.
- Won’t break the bank (budget-friendly).
SUPPLIES YOU WILL NEED
-Twine, jute, or sisal rope
-Metal stakes and/or wooden stakes
-Hammer
-Scissors
-Organic Tomato plants
-Sledge hammer (if using metal stakes)
-Ladder or step stool (if using a sledge hammer)
-Trowel
-Mulch or straw
GETTING STARTED
STEP ONE
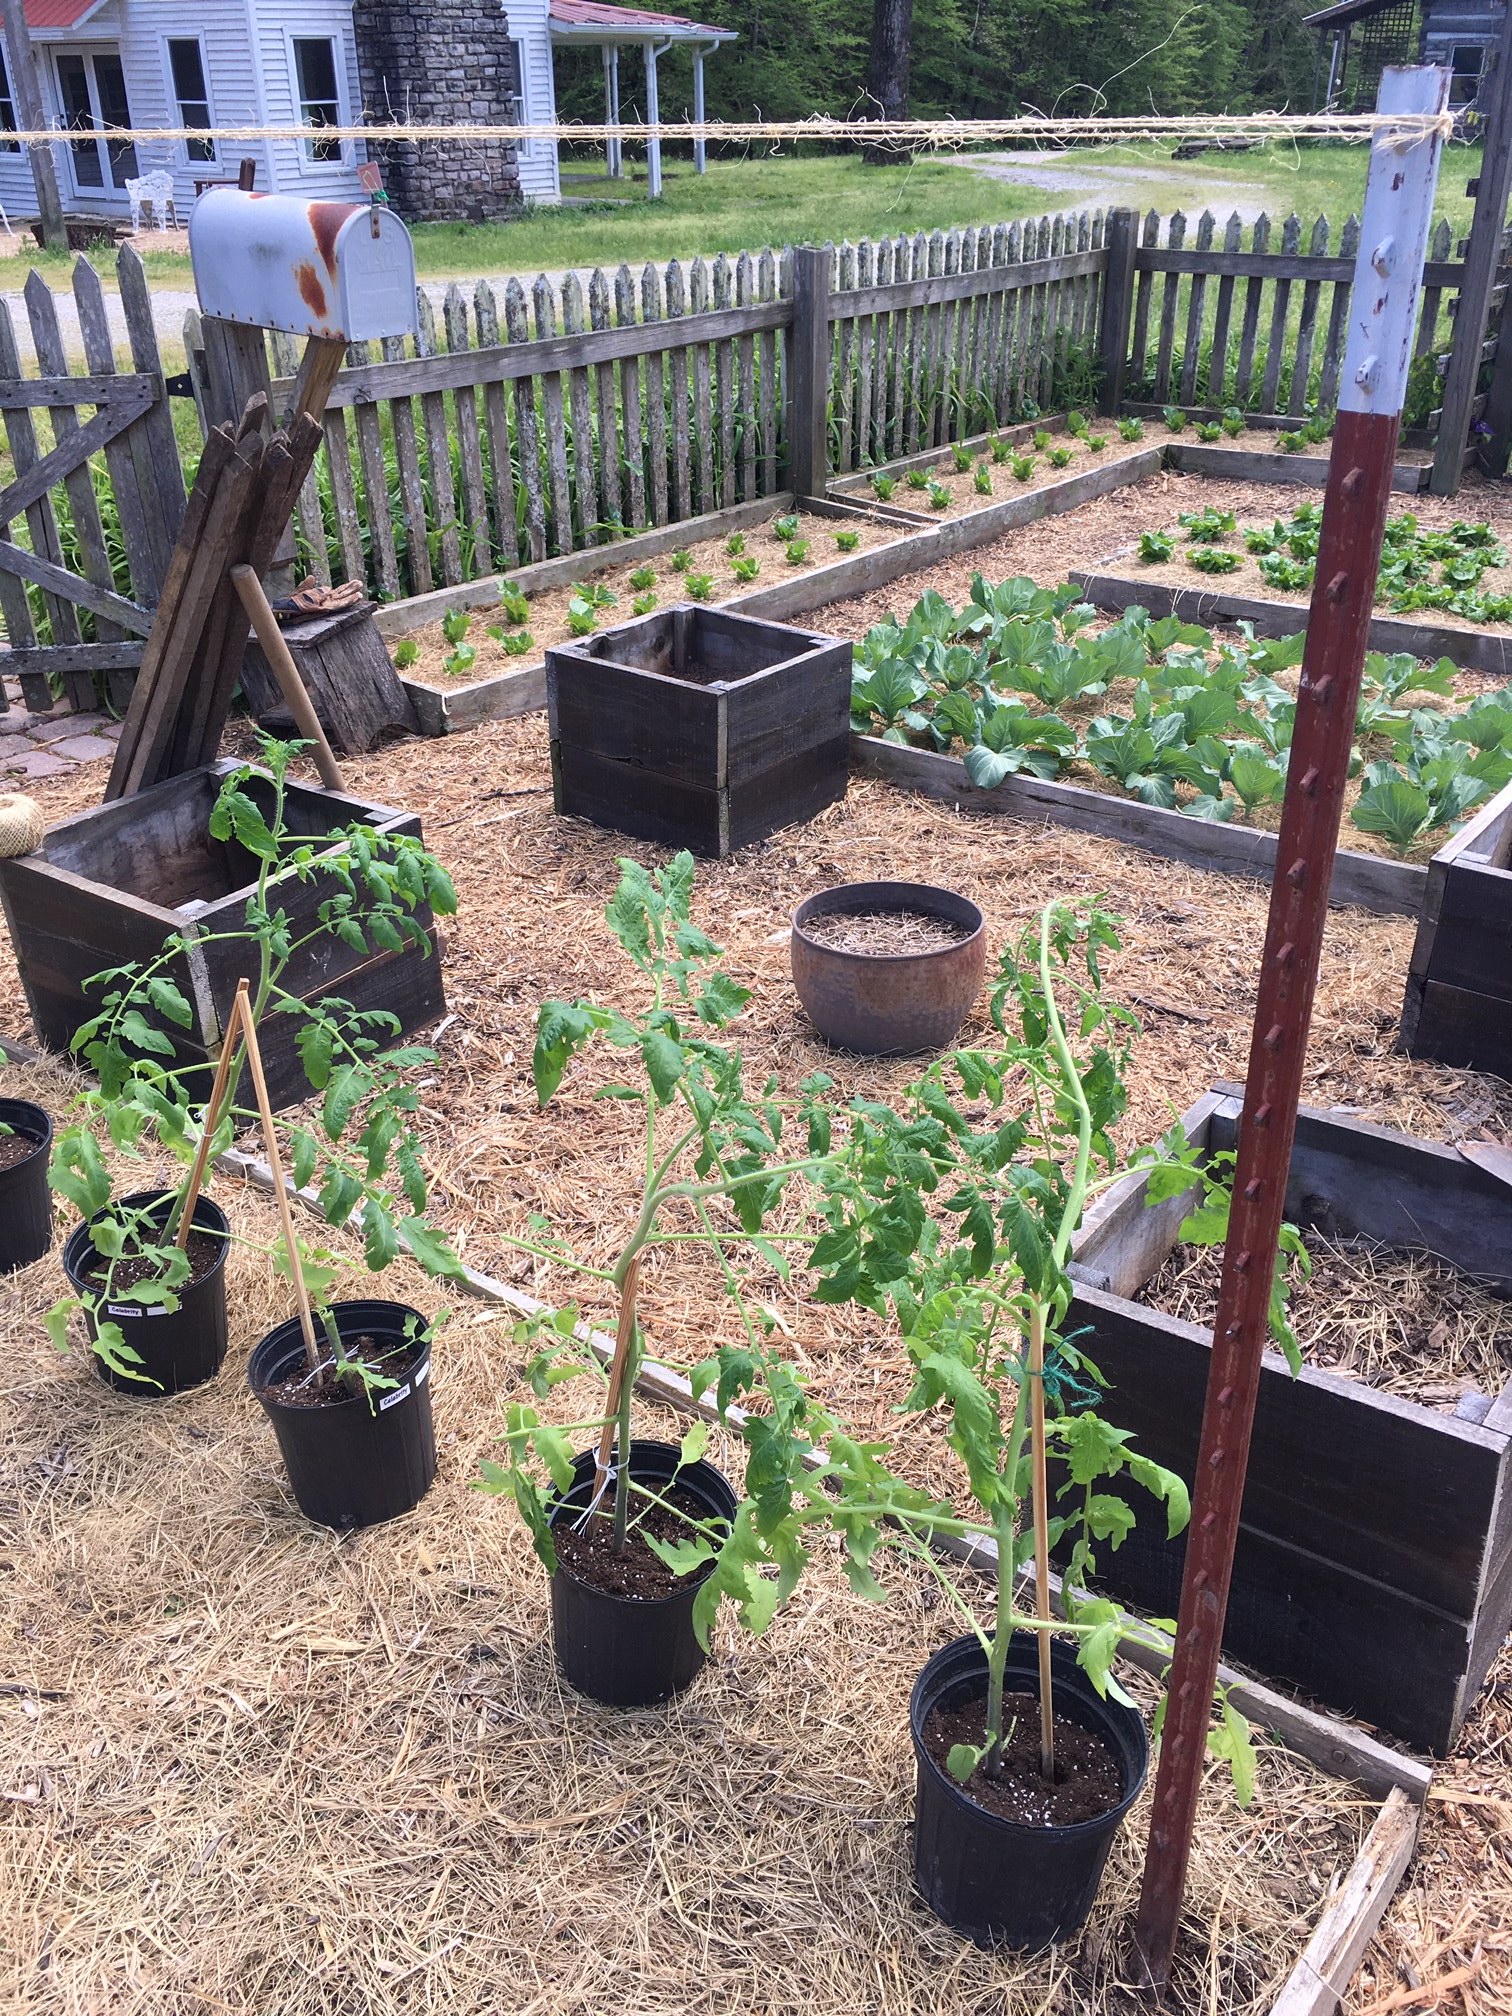
Place young plantings about two feet apart in a single row.

Once you have the placement that you like, plant according to growing instructions.
STEP TWO
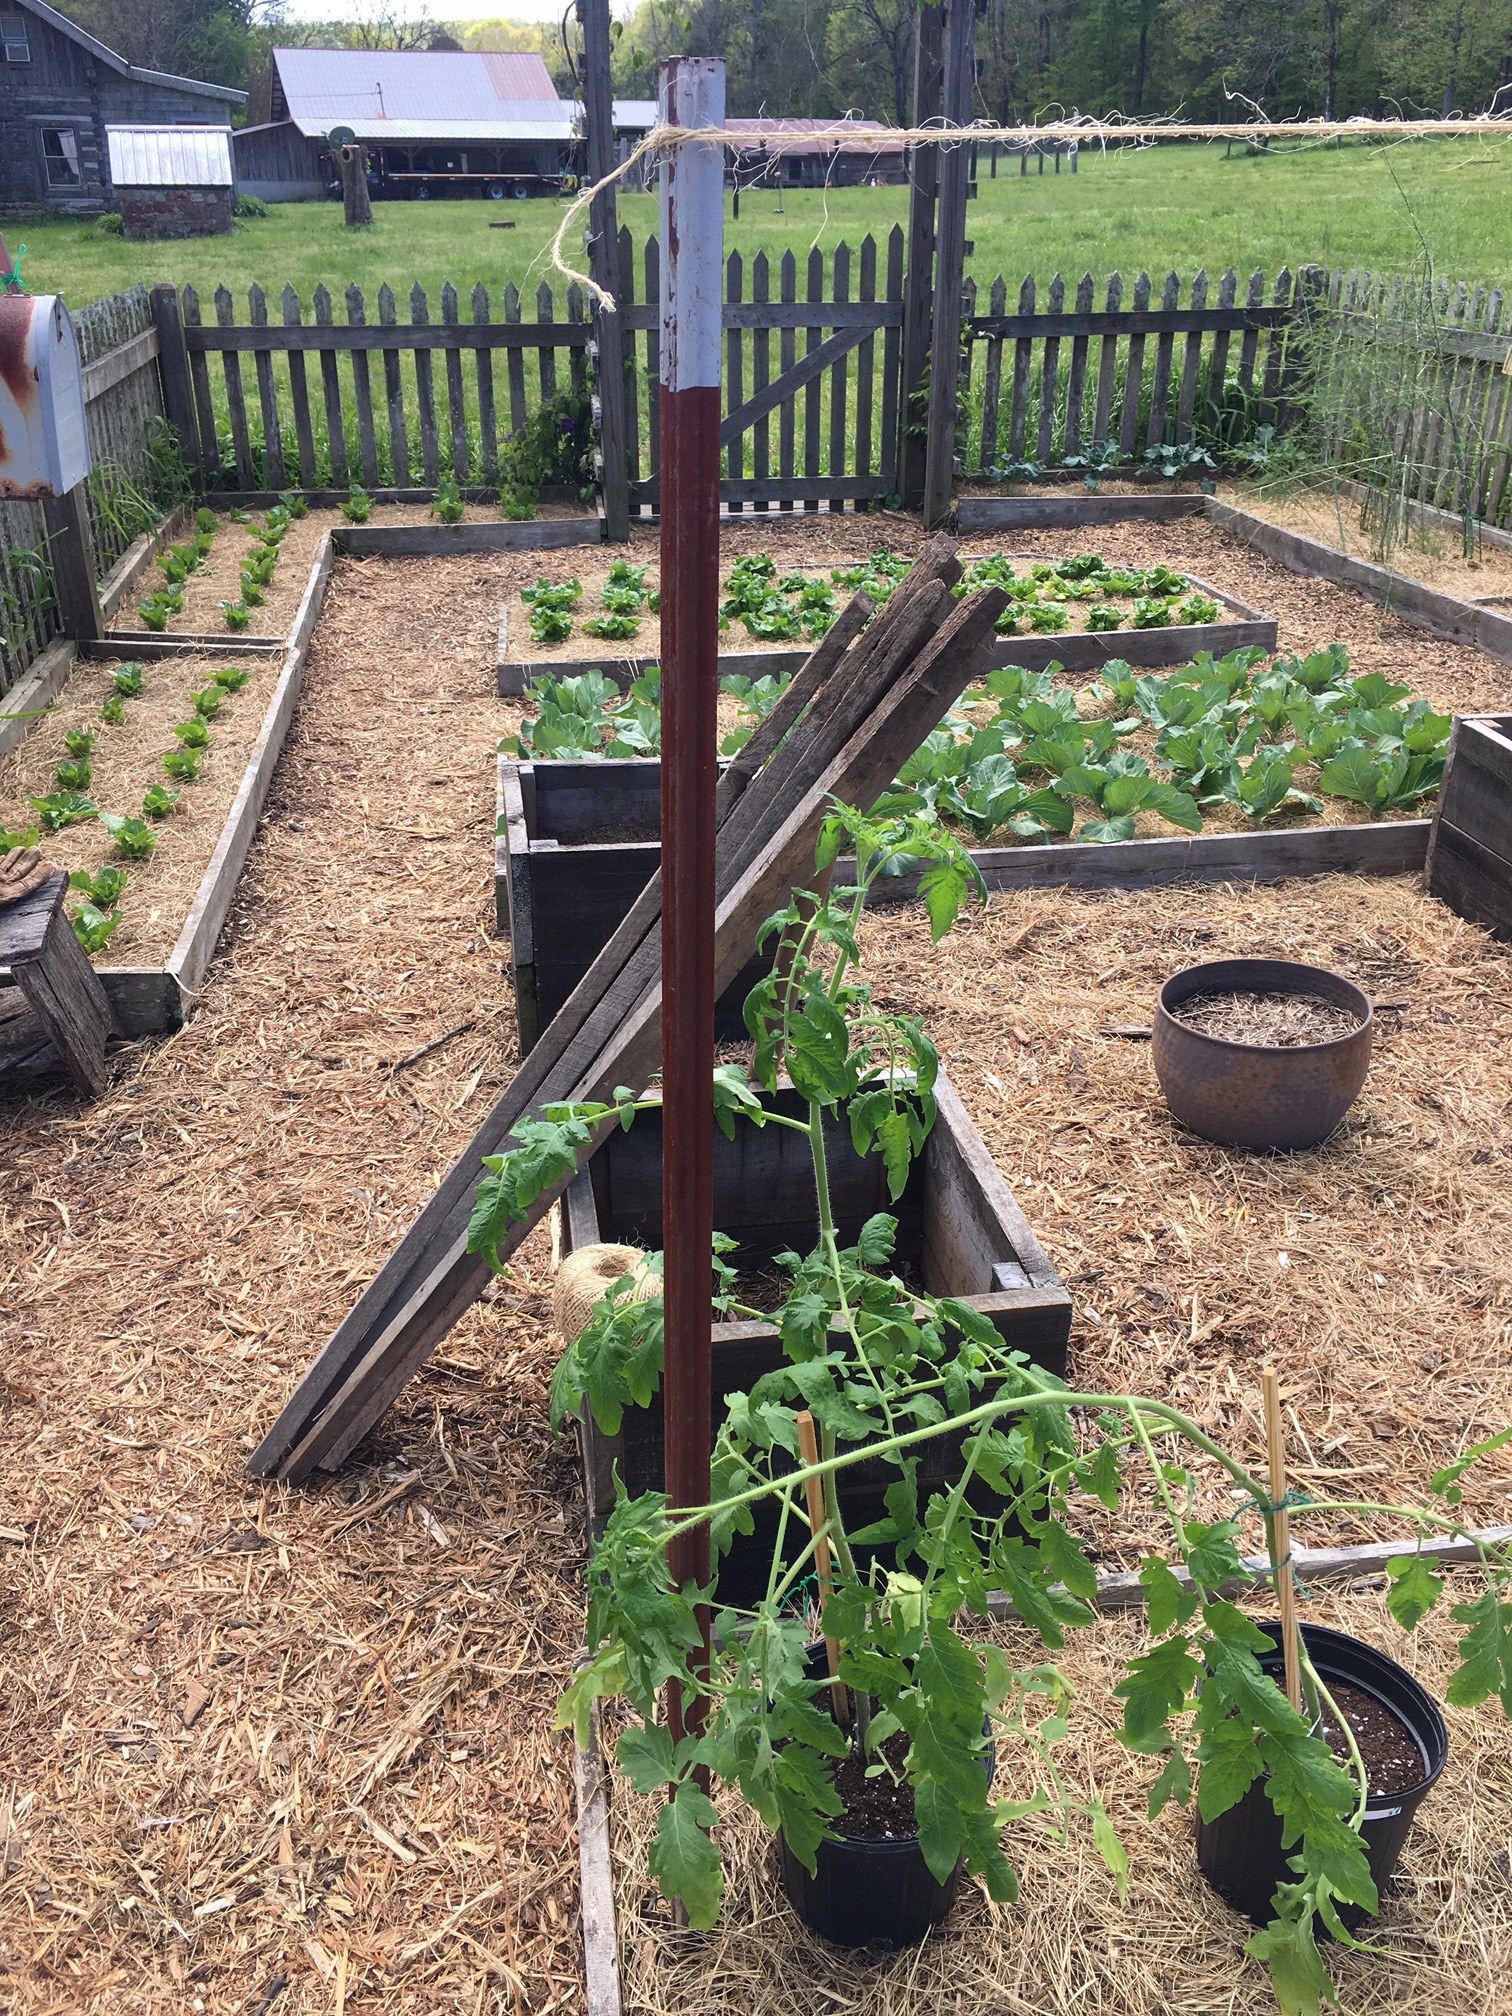
Hammer a 7-8 foot metal stake or wood stake into the ground about 8-12 inches into the ground.

STEP THREE
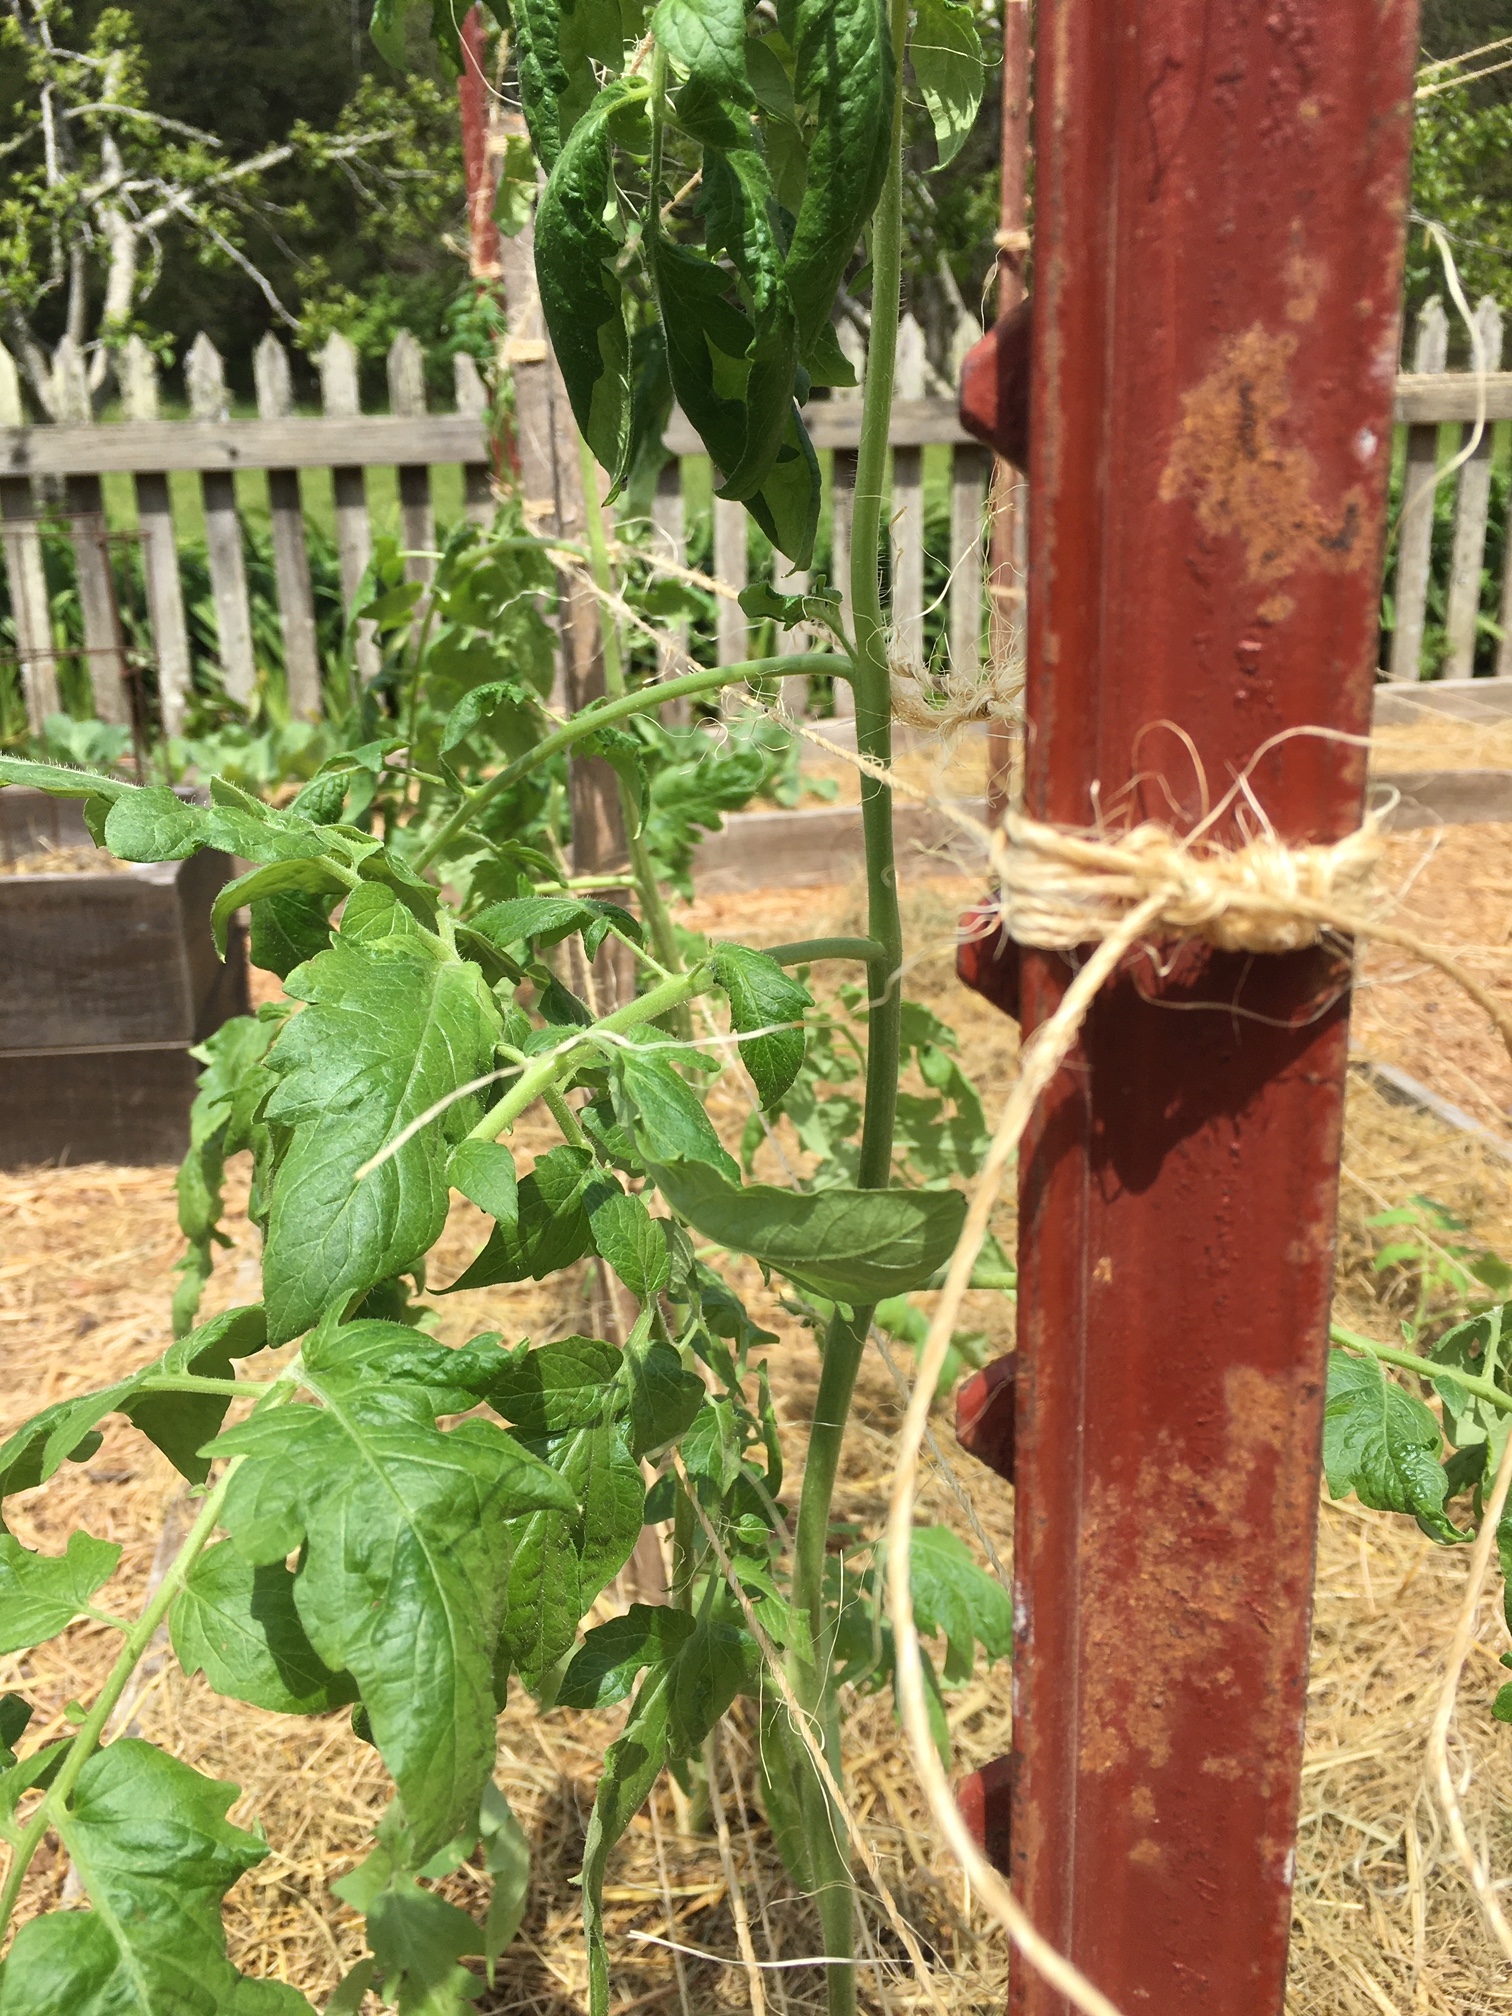
Attach your twine by wrapping it around the first stake several times and then using your favorite knot to secure. I used a combination of a basic overhand knot and a bowline knot, along with a square knot to secure the ends. It appears to be working just fine.

STEP FOUR
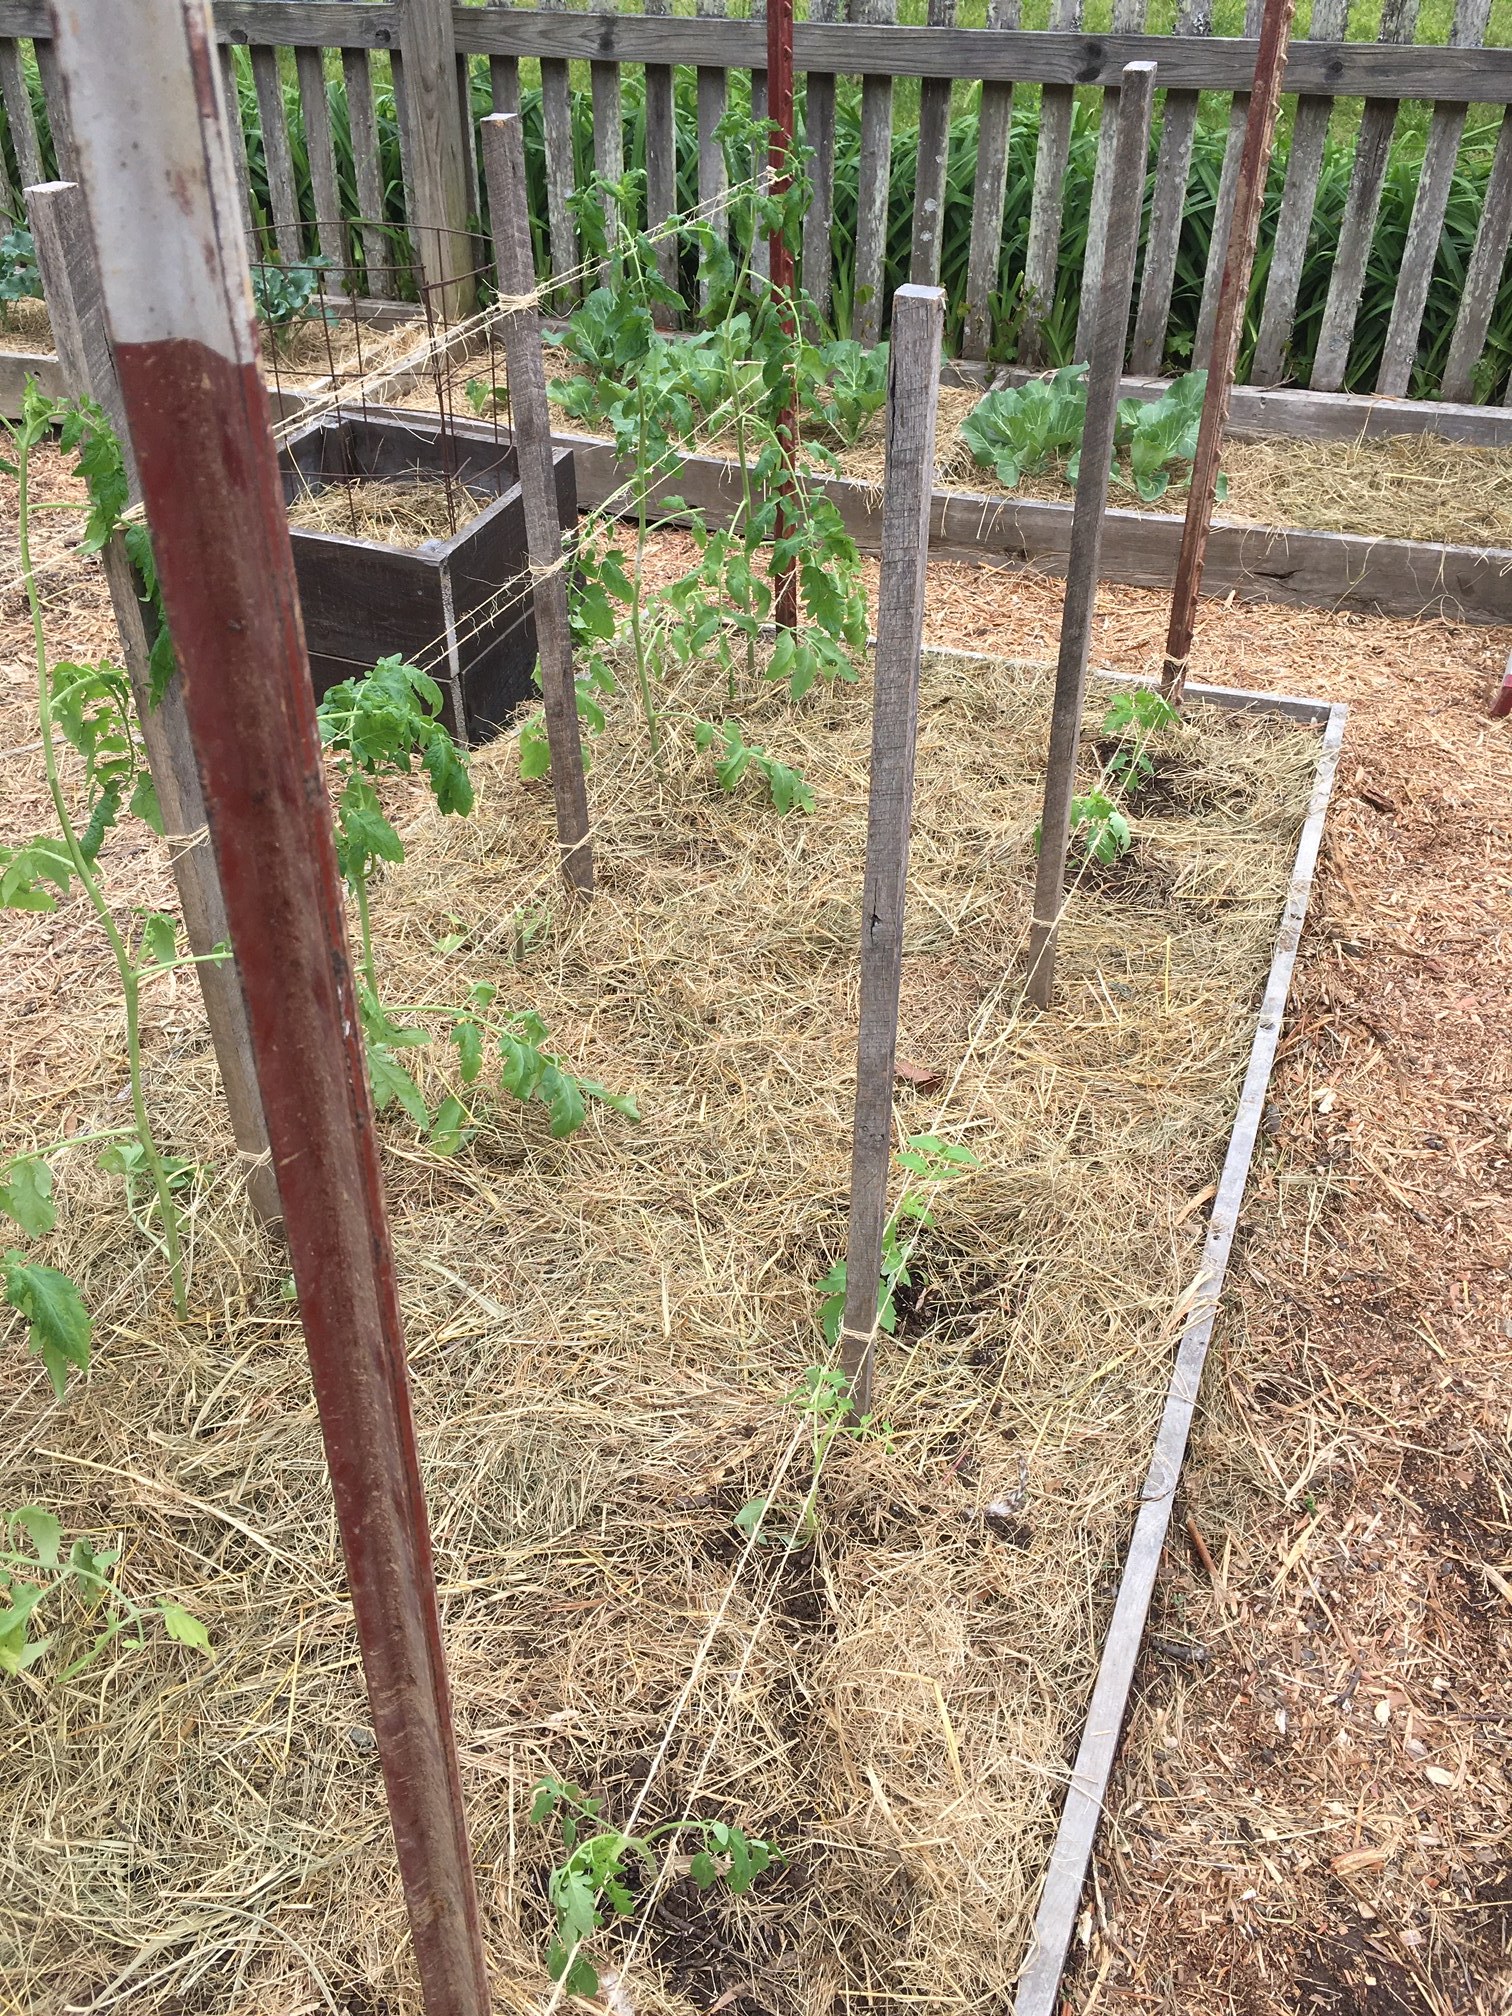
Once at the end of the row, pull twine tight and then triple loop for more strength. Continue the same weaving pattern until you reach the other end. Tie off and secure, then cut excess off.

STEP FIVE
When your plant reaches at least 1 foot high, begin wrapping your stakes with twine, sisal, or jute string. Continue to loop and weave the twine in and out between each plant until you get to the last stake. Make sure to make a figure 8 pattern as you we’ve in between each plant. Example: One plant, the rope will go behind and the next will go in front. I missed that memo, initially, but I am not sweating the small stuff. Remember “trial and error” here. (wink)
STEP SIX
Add additional stakes in between every two plants for longer rows. We used metal stakes because that is what we had, but wood or bamboo sticks would work well too.
NOTE: As your plant continues to grow, you will need to add another level of twine about 6-8 inches higher than the last.
Lastly, at the end of the season, simply remove the stakes and you can cut the sisal or twine off and they will decompose naturally in the ground. Even with my figure 8 misstep, I can already see that this is a better system than the previous attempts. So long tomato cage! Hope you’ll give it a try.


Leave a Reply